
SonarQube Server 2026.5 LTA is the long-term active release of the self-hosted SonarQube code quality and security platform, and carries new, agentic capabilities: Sonar Vortex, SonarQube Remediation Agent, and SonarQube Hunter Agent. This guide covers the steps required to activate and configure each agentic capability.
Prerequisites
- SonarQube Server 2026.5 Enterprise or Data Center Edition.
- SonarQube Server must be using the new license management and not Server ID based licensing.
- The agentic capabilities must be deployed as containers alongside SonarQube Server.
- Confirmation of entitlement for each agentic capability enabled.
Step 1 — Register an LLM provider
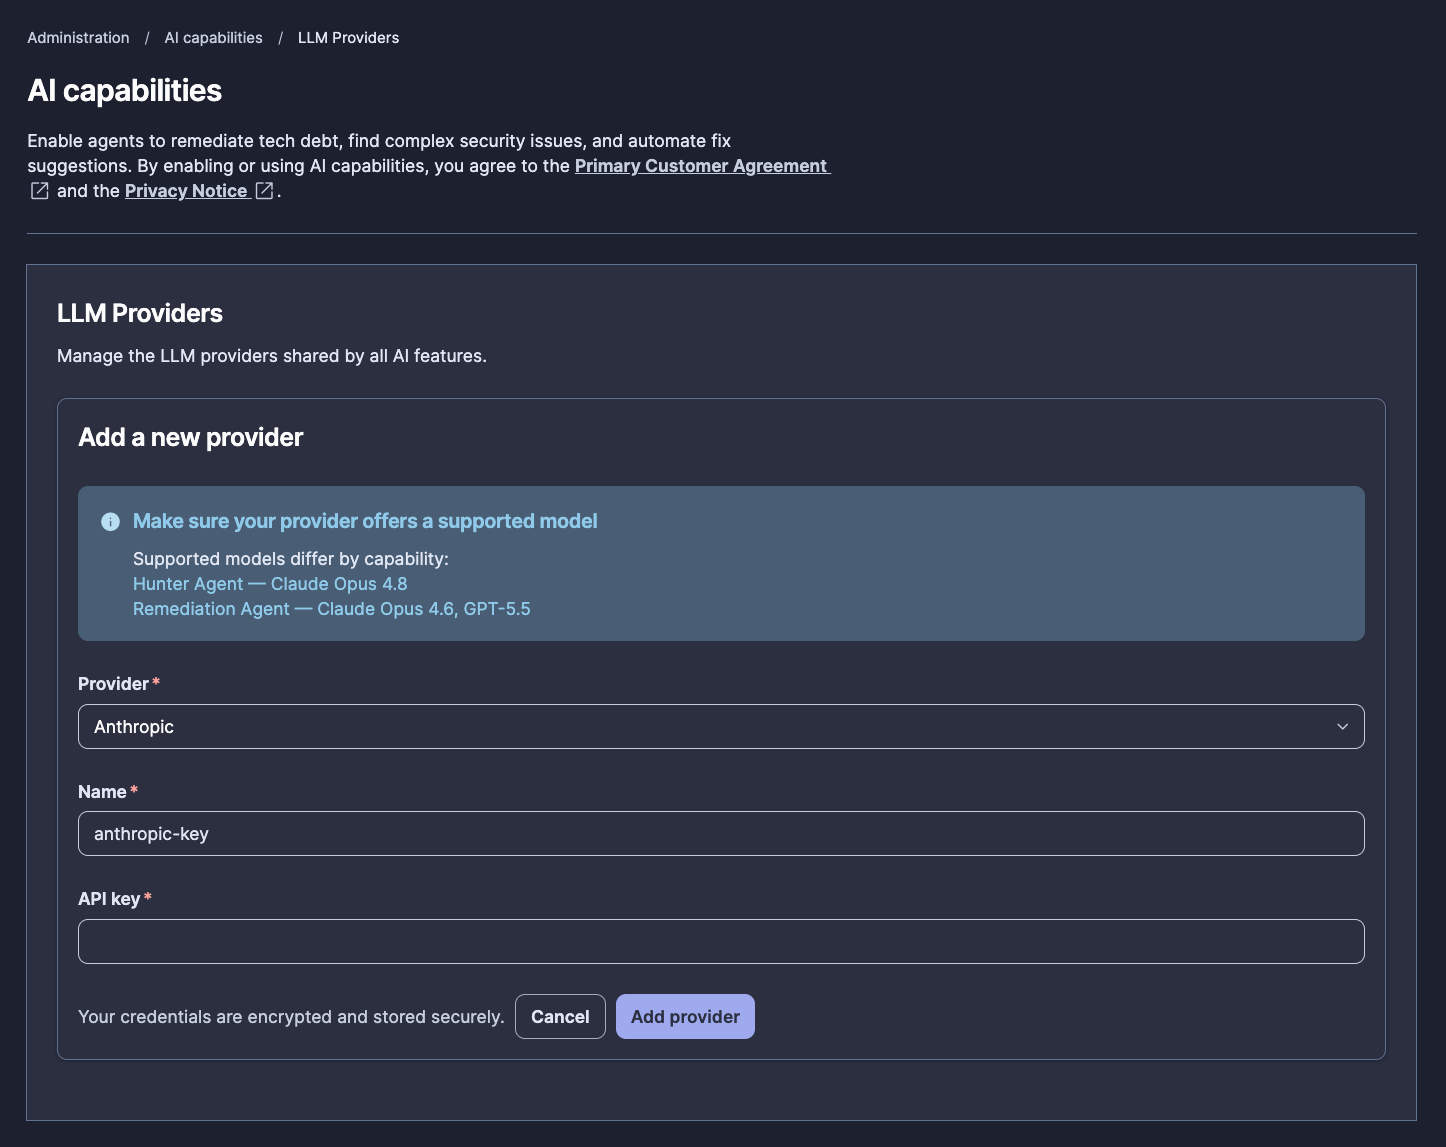
From the SonarQube Server UI, register a provider under Administration → Configuration → AI capabilities → LLM Providers using a credential and provider-recognized model identifiers that meet the documented requirements for each feature you enable.
Under Add a new provider, select the Provider of your choice (OpenAI, Anthropic, etc.), assign the provider reference a Name, and supply an API key before clicking Add provider.
Step 2 — Activate and configure Sonar Vortex
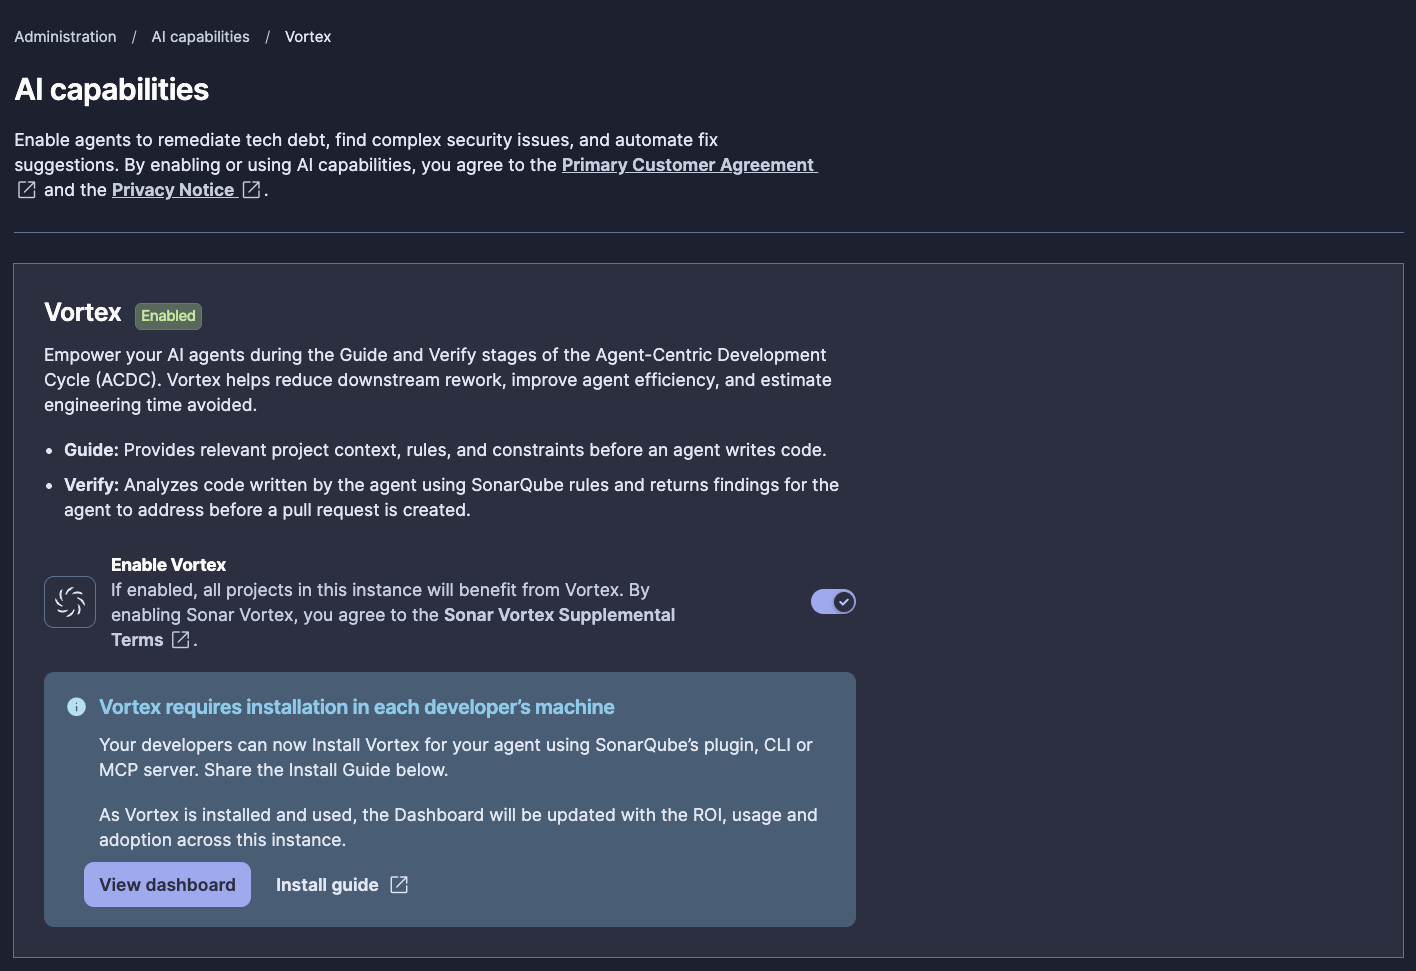
Now navigate to AI capabilities → Vortex and, if entitled, toggle-on Enable Vortex. Vortex requires installation on each developer’s machine; consult this guide for detailed installation guidance.
Note that there is a Vortex Dashboard which can be accessed by clicking View Dashboard. Once Vortex is installed and utilized, the dashboard will be updated with the impact, ROI, usage, adoption, and coverage across this instance.
Step 3 — Activate and configure SonarQube Remediation Agent
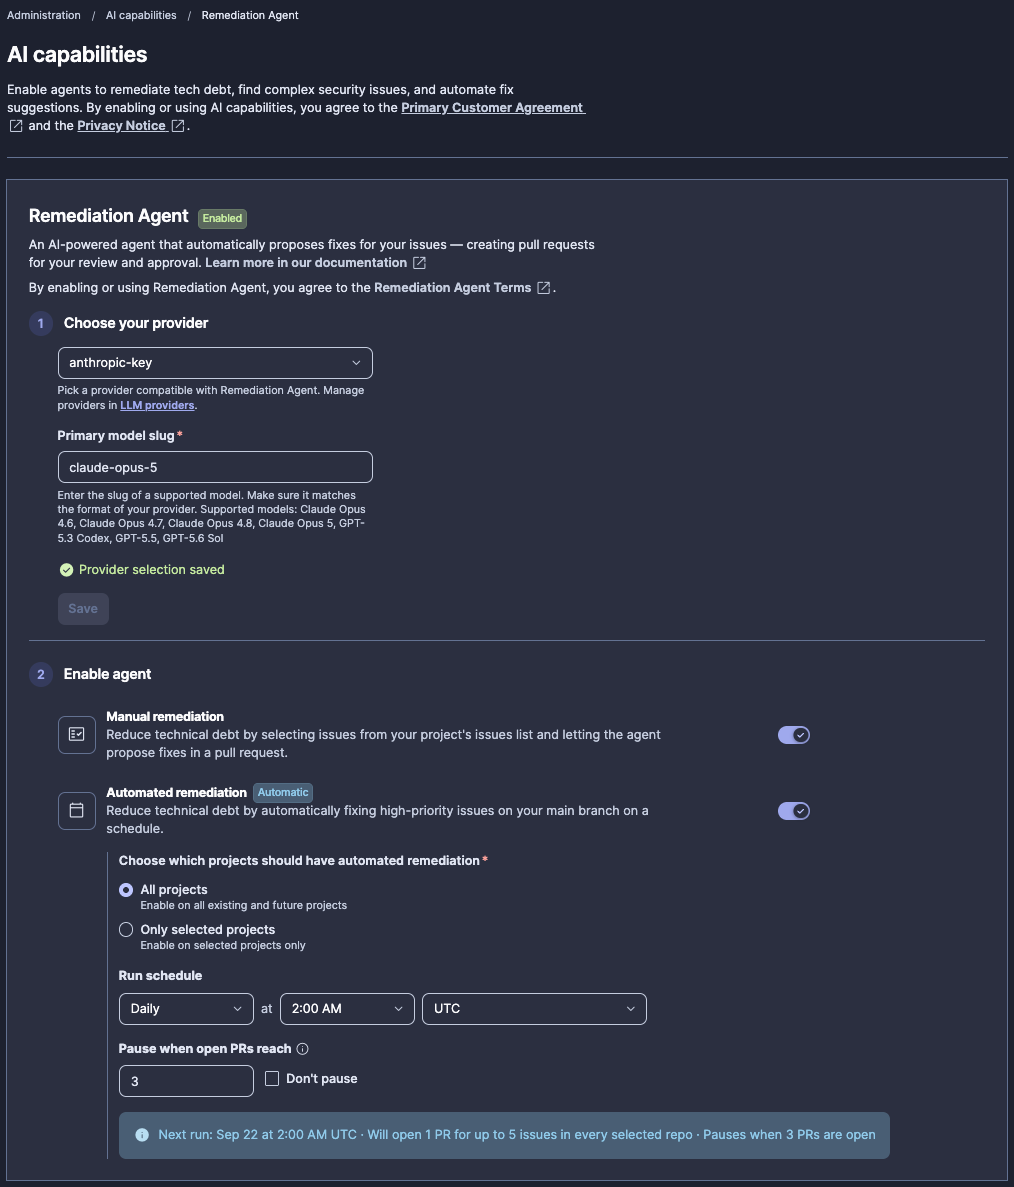
Next navigate to AI capabilities → Remediation Agent and, if entitled, Choose your provider by supplying the LLM provider (name) that you configured earlier and the Primary model slug that you will be utilizing.
To trigger the Remediation Agent manually, toggle-on Manual remediation under Enable agent. Note that the Remediation Agent can be run on a scheduled basis; select the project scope (All projects or Only selected project) and configure the Run schedule (Daily or Weekly, Day, Time, and Timezone).
You can also select whether to Pause when open PRs reach a particular number (user defined); in this case, the agent pauses creating new PRs when this number is reached, but existing PRs from other sources are not counted. Conversely, select Don’t pause to opt out of this feature.
Step 4 — Activate and configure SonarQube Hunter Agent
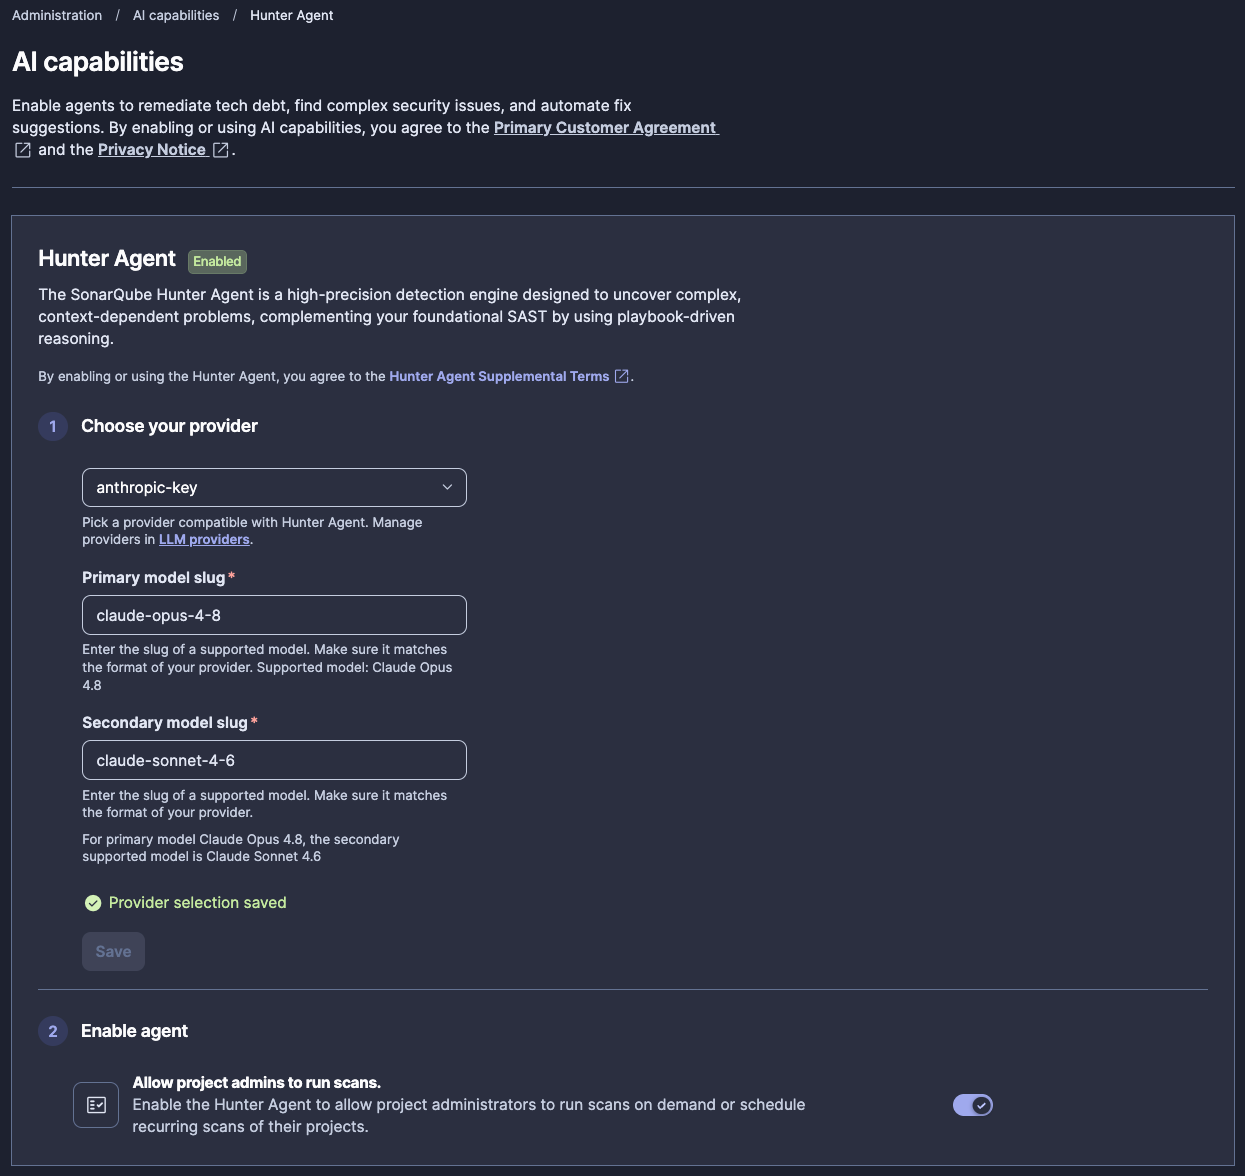
Lastly, navigate to AI capabilities → Hunter Agent and, if entitled, again Choose your provider by supplying the LLM provider (name) that you configured earlier and both the Primary model slug and Secondary model slug that you will be utilizing.
Also toggle-on Allow project admins to run scans under Enable Agent. Note that Hunter Agent can be run on demand, or on a scheduled basis, and the schedule can be configured in a similar manner to the Remediation Agent. To set the frequency: Daily asks for a time and timezone, Weekly adds a day of the week, and Monthly runs on the last day of the month. Choose the branch to scan, then click Save schedule to enforce your selection.
Step 5 — Verify the setup
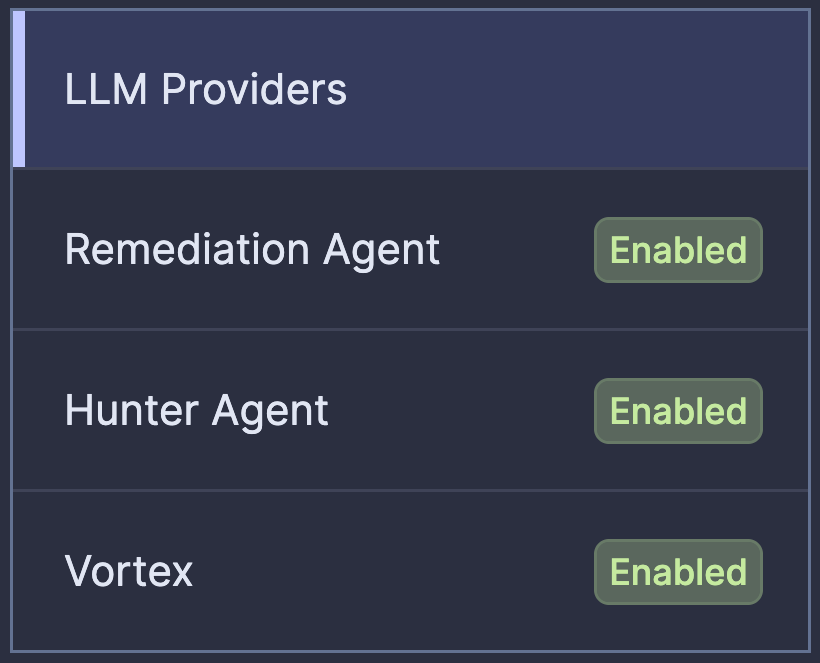
Once activated, all agentic capabilities are Enabled and ready to be utilized.
Next steps:
Consult the following guides covering each agentic capability:
- Sonar Vortex:
- SonarQube Remediation Agent:
- SonarQube Hunter Agent: