
Start your free trial
Verify all code. Find and fix issues faster with SonarQube.
Get startedTL;DR overview
- Integrating SonarQube with Kiro IDE adds real-time static analysis directly into Amazon's agentic AI development environment.
- Installation uses the VS Code-compatible extension marketplace and a token-based connection to SonarQube Cloud.
- Connected Mode syncs organization-wide quality profiles and rules into Kiro, ensuring AI-generated code meets team standards immediately.
- The integration enables a vibe-then-verify workflow, catching security and quality issues before they reach a pull request.
The speed of agentic AI development environments like Kiro is undeniable as it turns natural language prompts into executable code faster than ever. However, this velocity introduces a critical challenge for the code quality, security, and maintainability of AI-generated code.
This is where SonarQube for IDE becomes essential. It is your real-time quality check, integrated directly into the Kiro environment. It provides immediate, actionable intelligence, catching issues the moment code is generated. By shifting quality checks to the earliest stage of your agentic workflow, you ensure that the rapid code produced by Kiro remains secure, reliable, and compliant with your standards.
This guide will walk you through installing the SonarQube for IDE plugin in Kiro and connecting it to SonarQube Cloud. You will learn how to combine Kiro’s agentic speed with SonarQube’s static analysis to deliver high-quality software with confidence.
Setting up the SonarQube IDE plugin for Kiro
Following these steps will enable a fully integrated, real-time code quality and security analysis workflow using the SonarQube IDE plugin in Kiro.
Prerequisites
Before you start, ensure the following requirements are met:
- Kiro IDE is installed and operational on your machine.
- You have access to SonarQube Cloud. Sign up for a free trial account if needed.
- The project intended for analysis already exists on SonarQube Cloud.
Step 1: Installing the SonarQube for IDE extension
Since Kiro supports the VS Code extension ecosystem, installing the plugin is seamless.
- Open the Kiro IDE.
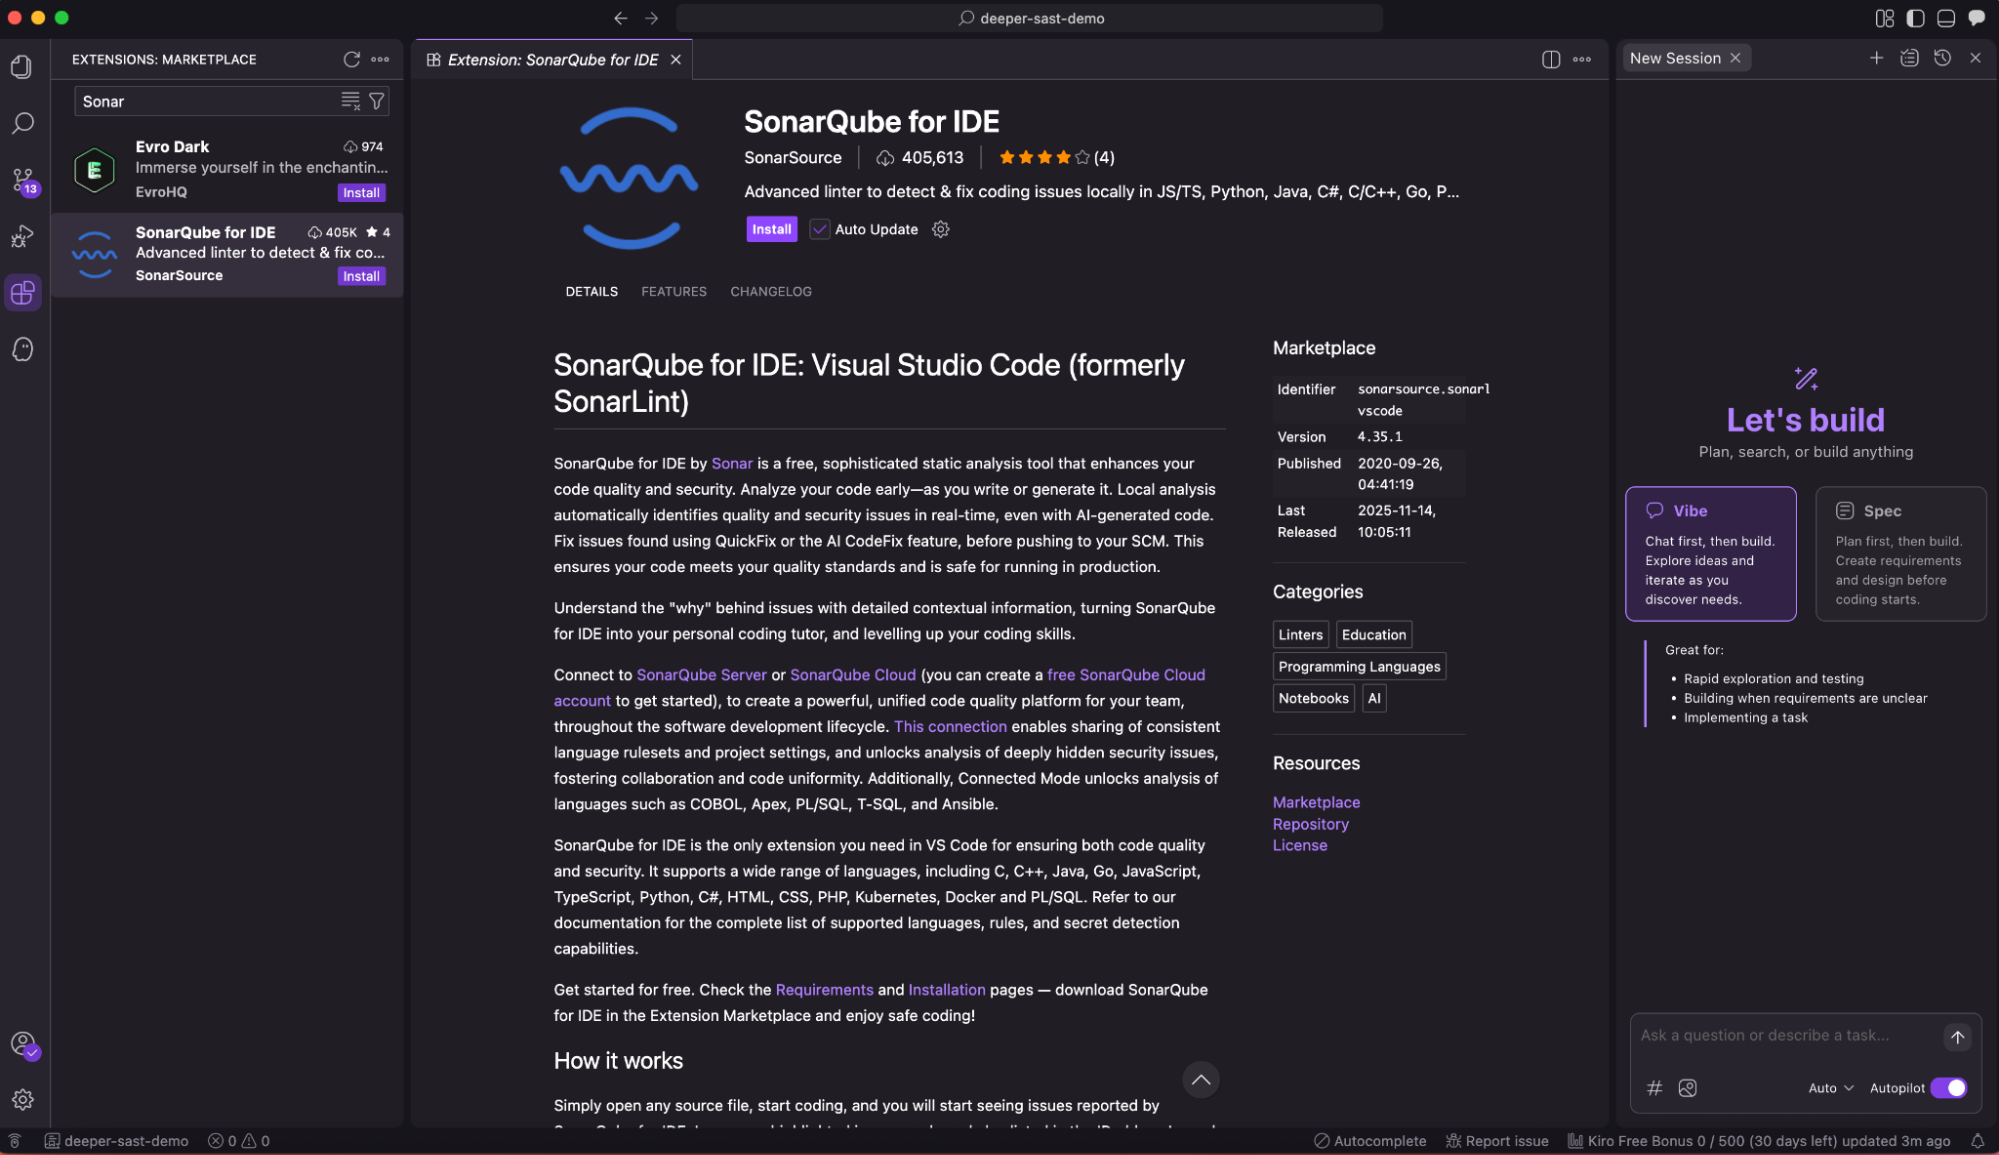
- Navigate to the Extensions view. You can do this by clicking the Extensions icon in the Activity Bar on the side or by pressing Ctrl+Shift+X (or Cmd+Shift+X on macOS).
- In the search bar, type “SonarQube”.
- The extension published by Sonar should appear in the search results. Click the Install button.

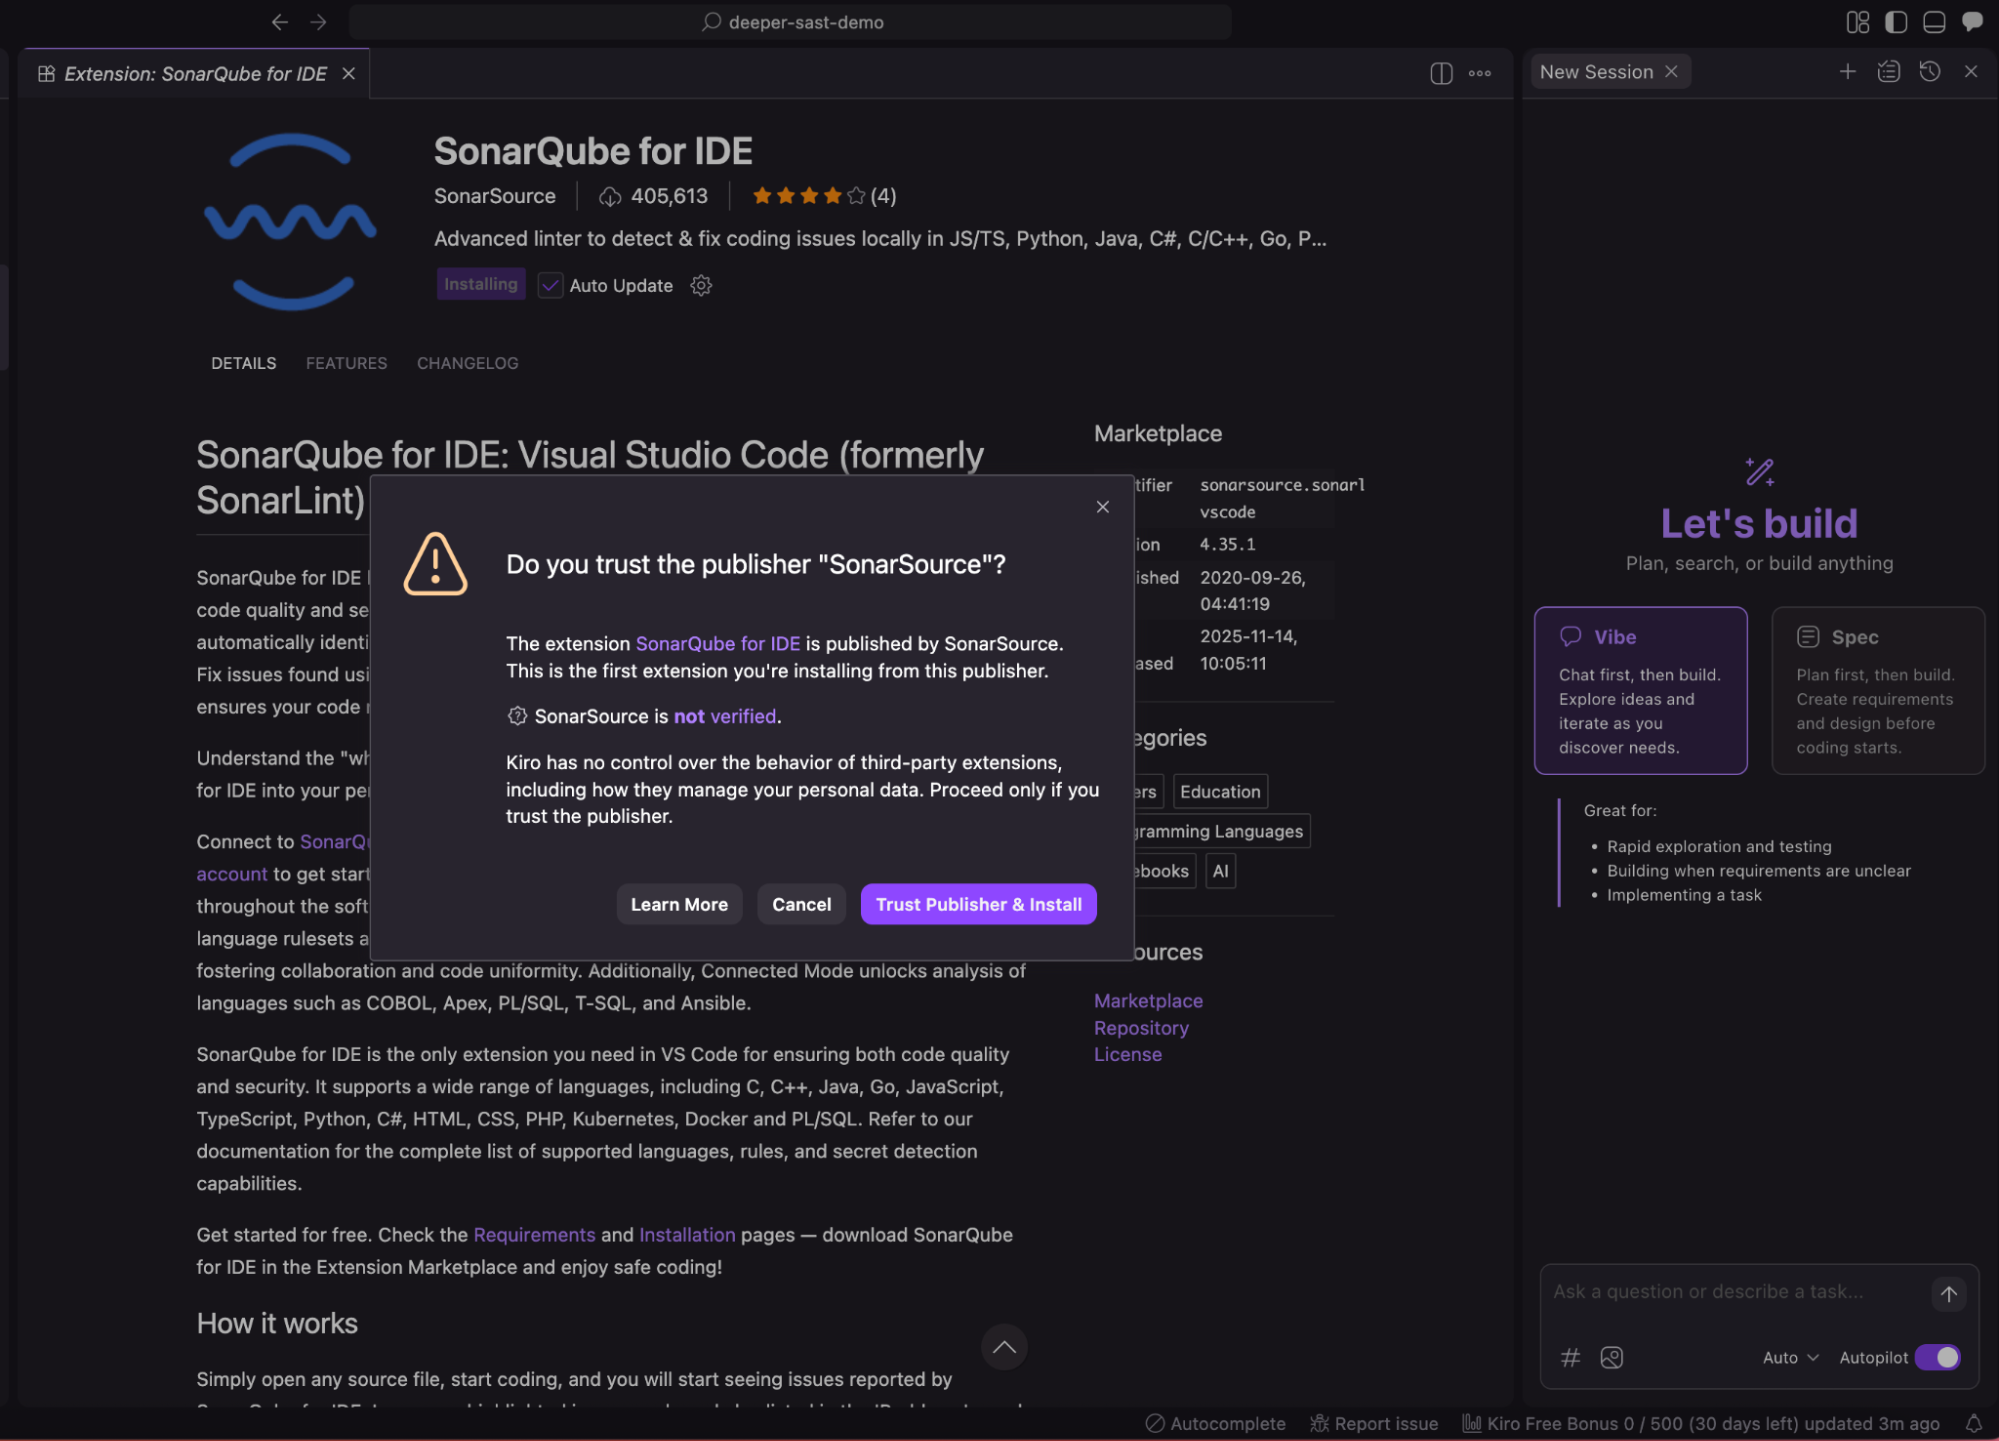
- Click on Trust Publisher & Install.

- Once installed, you may need to reload the window to activate the extension fully.
Step 2: Connecting Kiro to SonarQube Cloud
With the plugin installed, you must establish a secure connection to your SonarQube Cloud organization to leverage your quality profiles and settings.
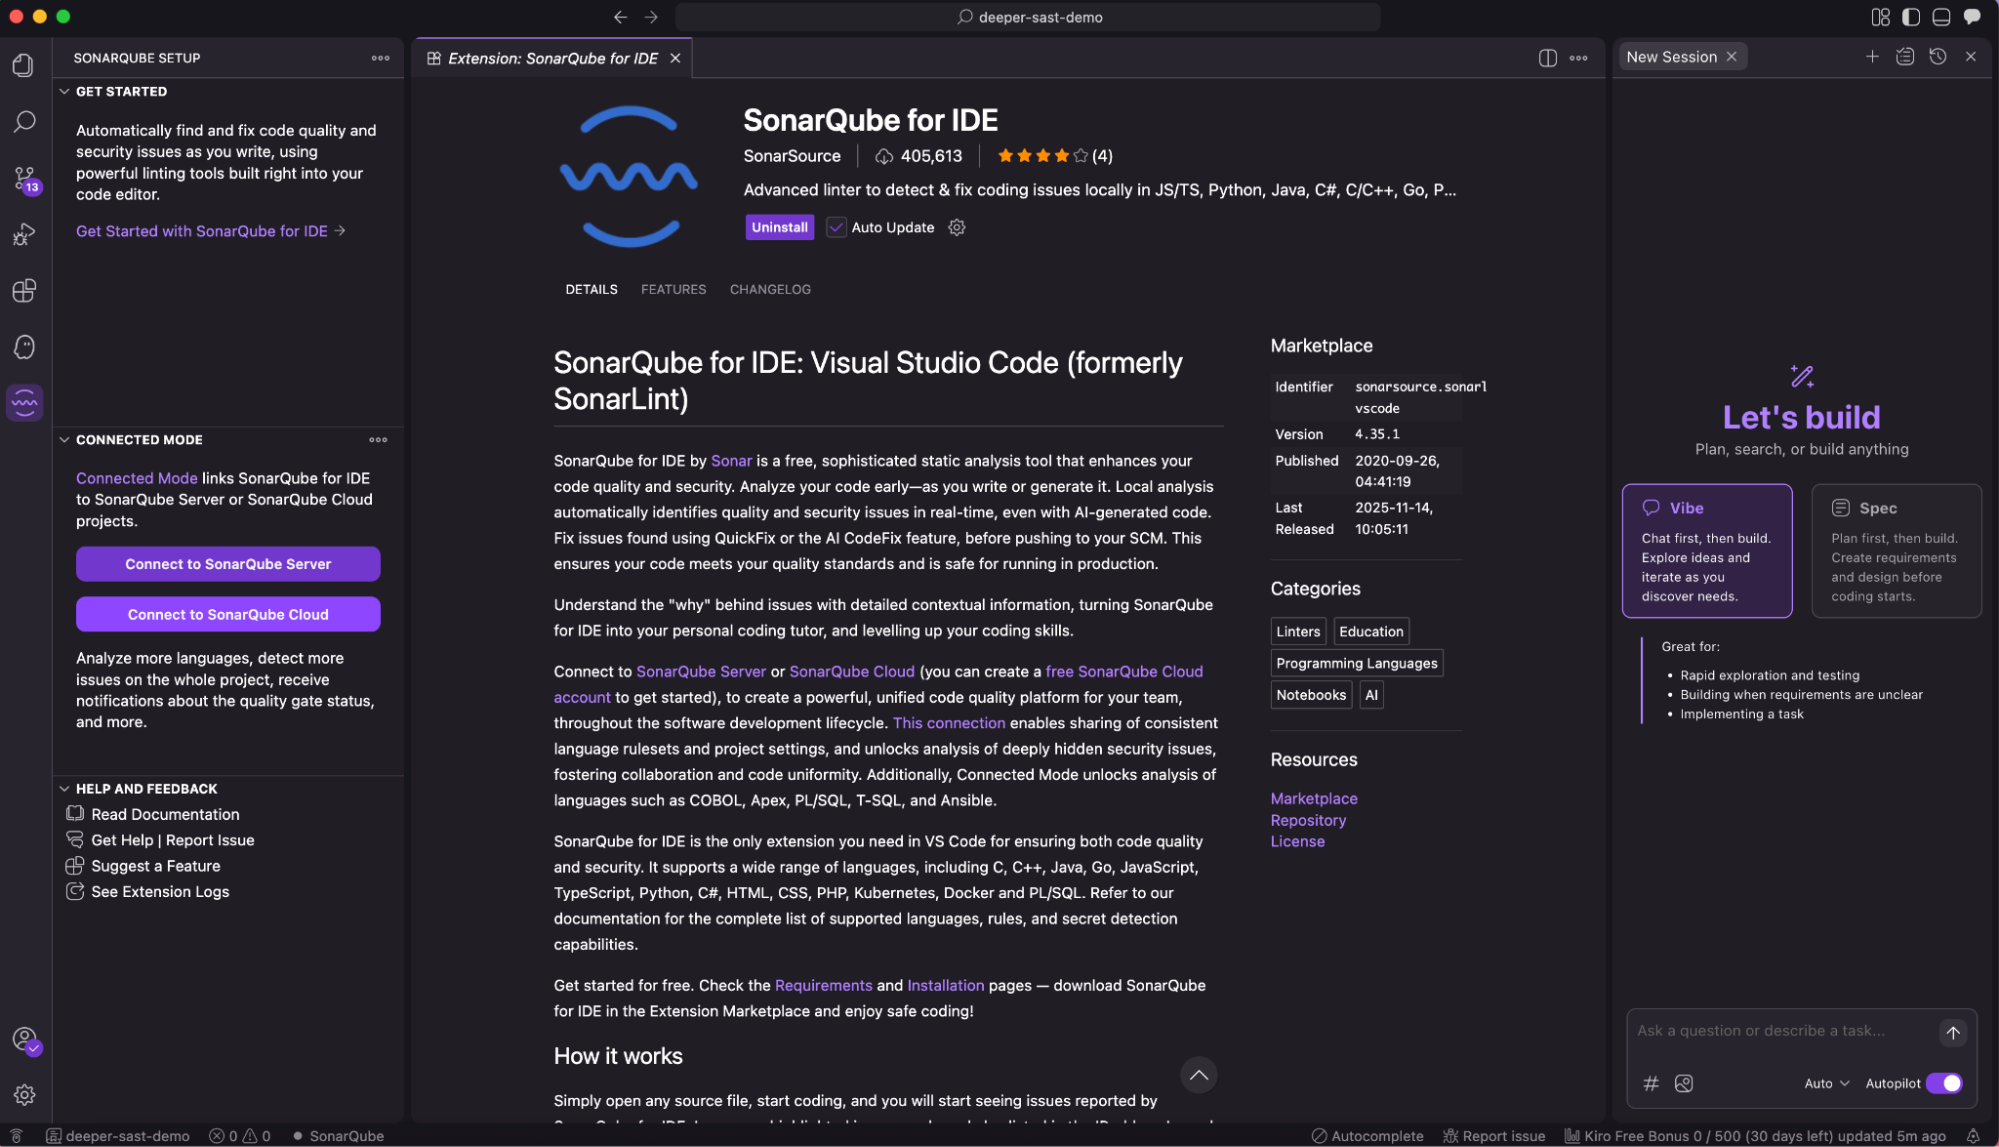
- Locate the SonarQube icon in Kiro’s activity bar and click it to open the side panel.
- Click on Connect to SonarQube Cloud.

- You will be prompted to generate a token. Click Generate Token.
- This will open your browser and direct you to the SonarQube Cloud login page. Log in with your credentials.
- Create a new token (give it a memorable name like “Kiro IDE”) and copy it.
- Return to Kiro and paste the token into the input field.
- Click Save Connection.


- After the connection is saved, if you have a folder open that matches a project in SonarQube, you will be asked to bind the project. Click Configure Binding and select the corresponding project from your SonarQube organization.


Step 3: Examining code quality in real time
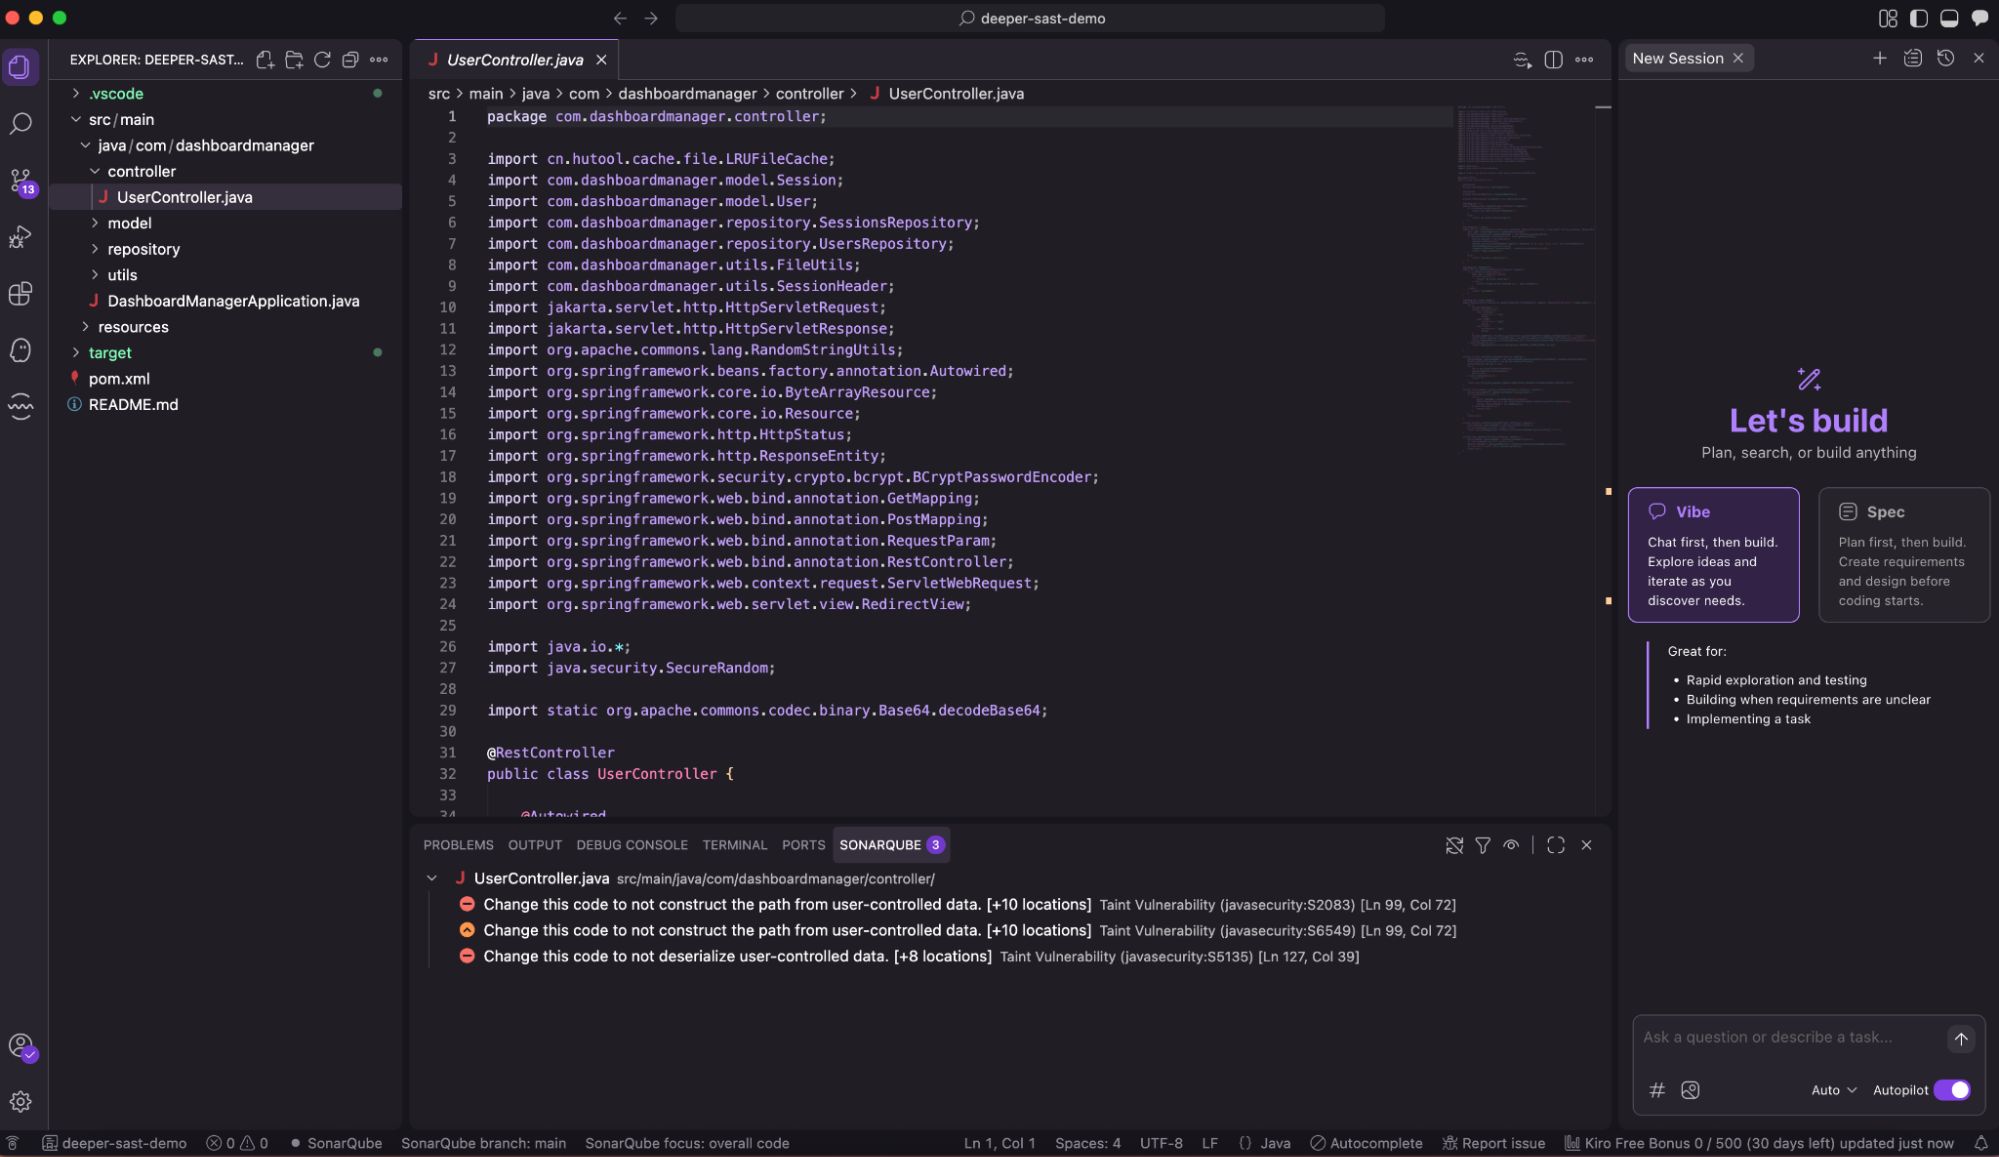
With the setup complete and the project bound (connected mode), SonarQube for IDE will automatically analyze any source code file you open or edit in Kiro.
- In-editor highlighting: Issues are flagged directly in your code with colored “squiggles” (e.g., yellow for warnings, red for bugs). This immediate visual feedback ensures you spot problems as they occur.
- Rich issue details: Hover over any highlighted issue to see a tooltip with a concise description, or open the Problems panel and SONARQUBE tab to see a full list of detections in the file.
- Contextual guidance: The extension explains why an issue is problematic and provides examples of compliant and non-compliant code, helping you learn as you fix.

Unlocking a higher standard of quality with connected mode
While the standalone extension provides great value, connecting Kiro to SonarQube Cloud (“Connected Mode”) unlocks the full potential of the tool.
1. Consistent team standards
Connected Mode synchronizes your local analysis with the quality profiles defined on the cloud. This ensures that Kiro checks your code against the exact same rules that will be enforced in your CI/CD pipeline, preventing “it works on my machine” scenarios.
2. AI CodeFix
One of the most powerful features available in Connected Mode is AI CodeFix. When SonarQube detects an issue, you can often right-click it and select “Fix with AI CodeFix.”
- SonarQube will generate a specific remediation for the issue.
- You can review the suggested change in a diff view.
- With one click, you can apply the fix directly in Kiro.
This is particularly potent in Kiro: while Kiro’s agents generate the features, SonarQube’s AI CodeFix polishes the implementation, ensuring the code quality and code security.
Kiro and SonarQube IDE are better together
Integrating SonarQube for IDE into Kiro represents a perfect synergy of speed and stability. Kiro’s spec-driven development and agentic capabilities allow you to iterate on features rapidly, while SonarQube ensures that this velocity doesn’t result in technical debt.
By following this guide, you transform your development environment into a proactive quality hub. You gain the confidence that your AI-assisted code contributions are secure, reliable, and aligned with your team’s standards before they ever reach the repository.
Ready to transform your development process in Kiro? Install the SonarQube for IDE plugin, set up Connected Mode, and start writing better, safer code today.