
Start your free trial
Verify all code. Find and fix issues faster with SonarQube.
CommencerAuthor: Taylor Luttrell-Williams
TL;DR overview
- Integrate SonarQube MCP Server with Gemini Code Assist agent mode to automatically verify AI-generated code quality, maintainability, and security.
- Connect to the native MCP server embedded in SonarQube Cloud to surface analysis findings directly to the agent in VS Code.
- Implement a GEMINI.md file to instruct the agent to run quality gate checks and fix issues before marking any task complete.
- This workflow has the AI agent run the SonarScanner CLI, fix coverage gaps and code quality issues, and verify a clean quality gate, all without leaving the IDE.
With Gemini Code Assist, agent mode can write code, run commands, and iterate on tasks with minimal intervention. What it can't do on its own is verify that the code it produces is high quality, maintainable, and secure. The SonarQube MCP Server fills that gap, connecting Gemini's agent to SonarQube Cloud so it can scan its own code, read the results, and fix code quality and security issues before you ever review the output. This guide walks through the setup and details a real workflow: Gemini generates code, SonarQube analyzes it, and the agent steps in to resolve any issues that were discovered.
When to use this
You use Gemini Code Assist agent mode in VS Code and want to enforce code quality and security standards on AI-generated code at the point of creation, not after it reaches your pipeline.
What you'll achieve
By the end of this guide, you'll have:
- Gemini agent mode connected to SonarQube Cloud through the native MCP endpoint
- A
GEMINI.mdcontext file that instructs the agent to verify code against your quality gate before completing any task - A tested workflow wherein the agent generates code, hits a quality gate, fixes any issues, and passes on re-scan
Architecture
This guide uses a Python project as an example. SonarQube Cloud supports analysis across 40+ programming languages, so this workflow applies regardless of your project's tech stack.

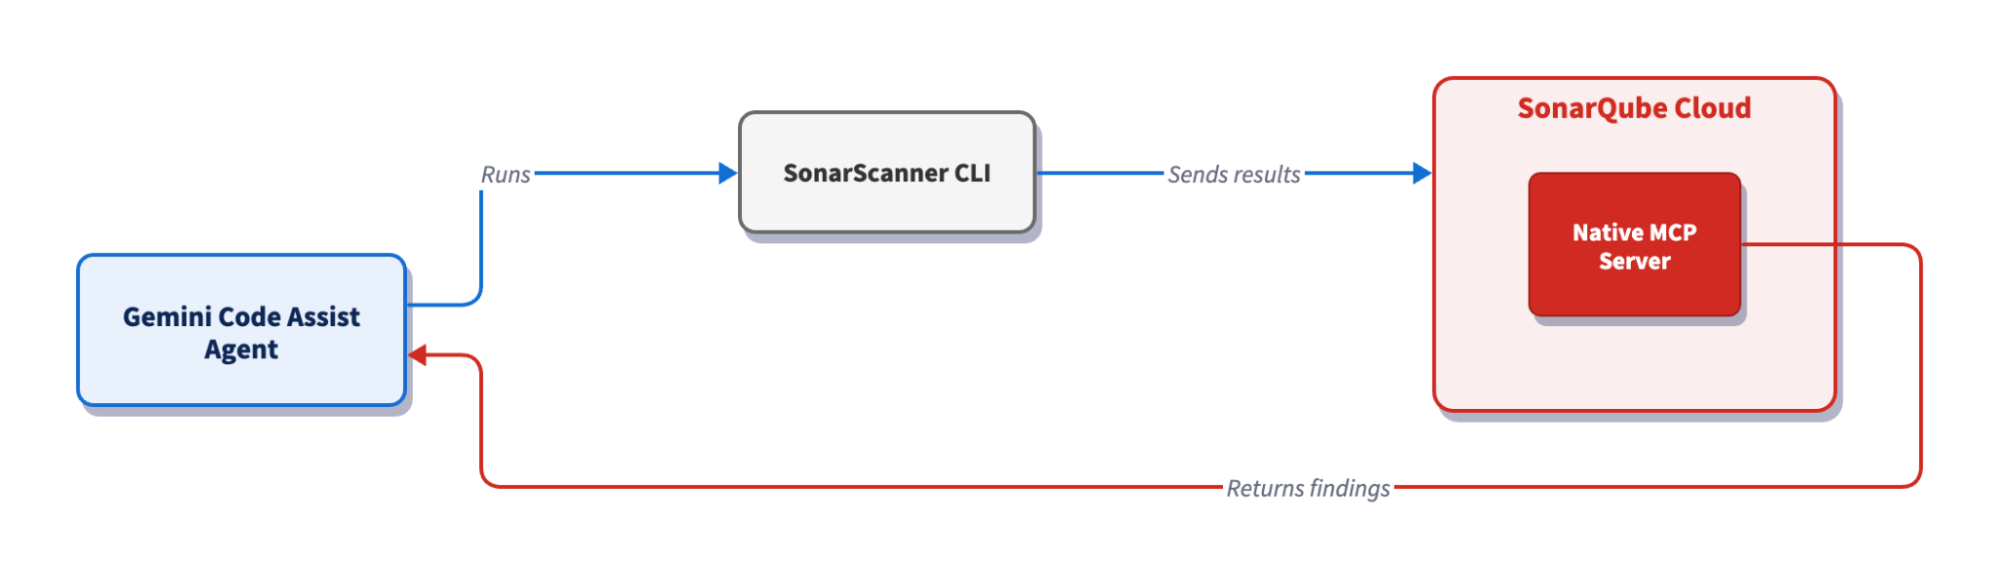
The Gemini Code Assist agent runs the SonarScanner CLI, which analyzes the code locally and sends the results to SonarQube Cloud for processing. Once the analysis completes, the native MCP server embedded in SonarQube Cloud returns the findings—quality gate status, issues, and rule details—directly to the agent. The agent reads the results and fixes what it finds, closing the loop without leaving VS Code.
Prerequisites
- SonarScanner CLI: installed and working. Verify with
sonar-scanner -v. - SonarQube MCP Server: configured for Gemini Code Assist. This guide uses the native MCP Server embedded in SonarQube Cloud, which doesn’t require Docker or local installation.
- Gemini Code Assist extension: installed in VS Code and authenticated with a Google account, with agent mode enabled. See: Gemini Code Assist docs.
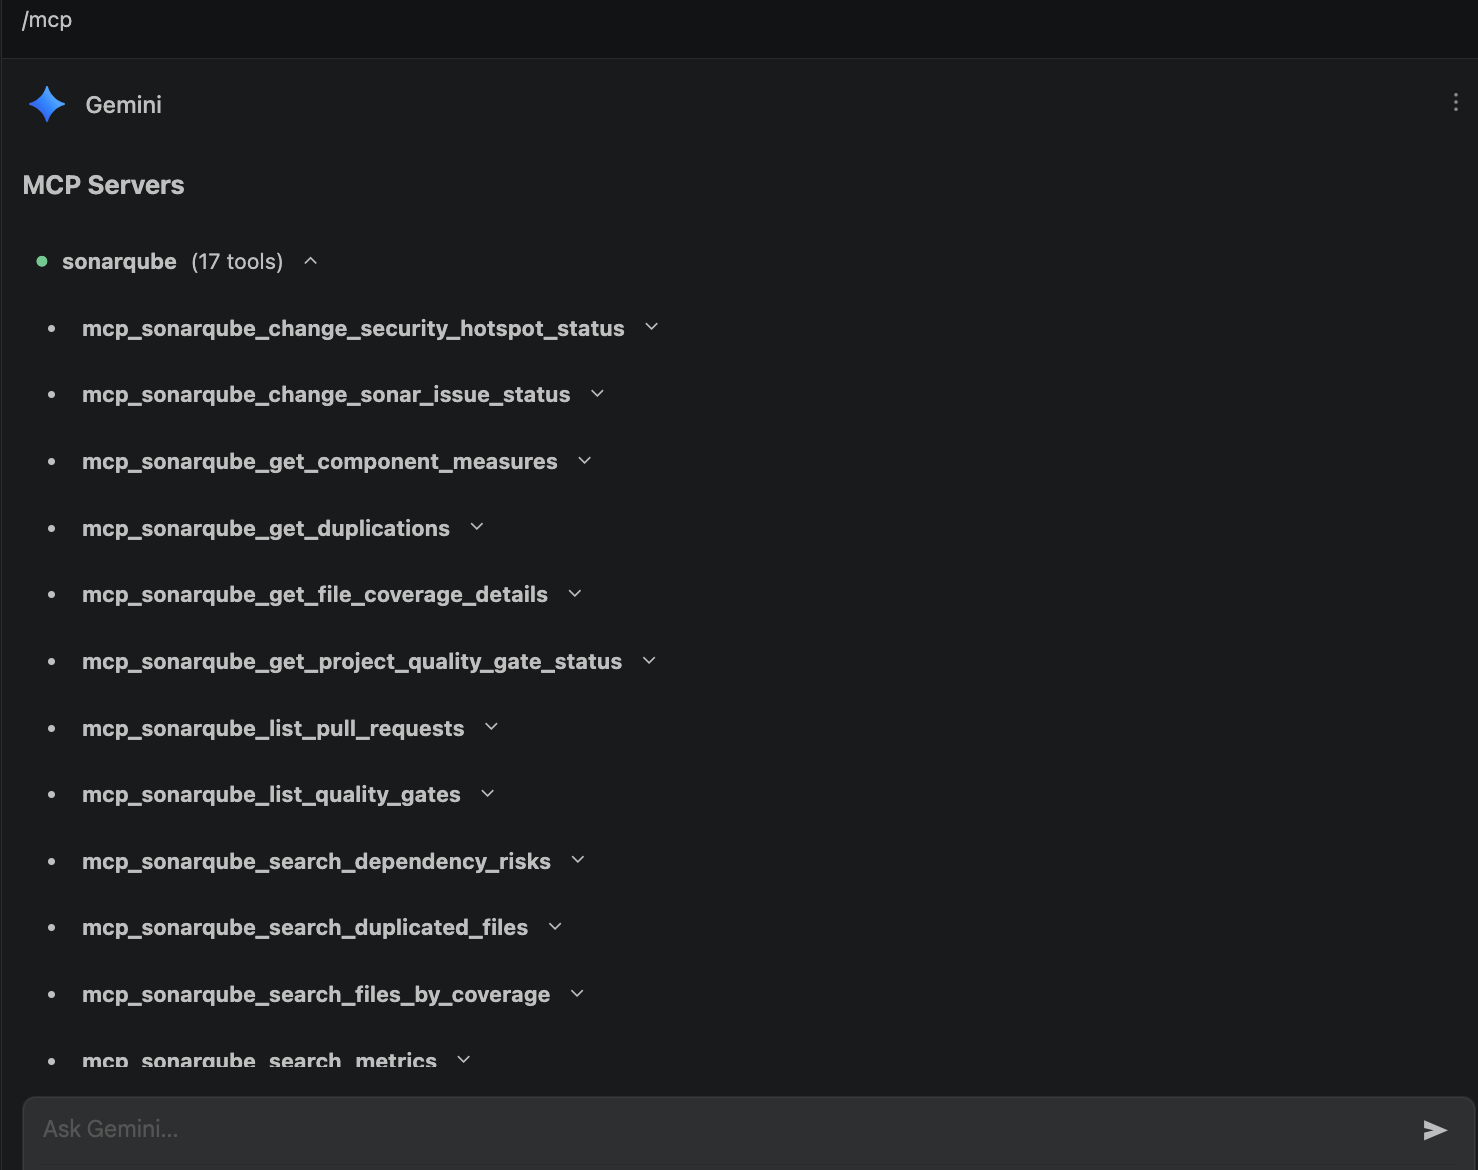
- MCP connection: verified by toggling agent mode in the Gemini panel and entering
/mcp. You should seesonarqubelisted alongside its available tools:

Step 1 — Project configuration
Create a sonar-project.properties file in your project root and replace YOUR_PROJECT_KEY and YOUR_ORG_KEY with the values from your SonarQube Cloud project:
sonar.projectKey=YOUR_PROJECT_KEY
sonar.organization=YOUR_ORG_KEY
sonar.sources=.
sonar.sourceEncoding=UTF-8
sonar.exclusions=**/node_modules/**,**/dist/**,**/.git/**,**/venv/**,**/__pycache__/**
sonar.qualitygate.wait=trueThe scanner authenticates with SonarQube Cloud using a SONAR_TOKEN environment variable. Export it at the start of your session. Adding a leading space before the command keeps it out of shell history in most shells, but check your shell's configuration to confirm:
export SONAR_TOKEN="YOUR_PERSONAL_ACCESS_TOKEN"If you've set SONAR_TOKEN in your shell profile or a .env file, skip this step. The sonar-scanner binary reads the variable automatically when it runs.
Step 2 — Behavior enforcement with GEMINI.md
Create a GEMINI.md file at the project root. Gemini reads this file automatically at the start of every agent session, and it acts as the rulebook for how the agent generates and modifies code in this project:
# Project quality rules

This project uses SonarQube Cloud for code quality and security verification.

## Rules for code generation and modification

1. **Always verify code with SonarQube before marking a task as complete.** After generating or modifying code, run `sonar-scanner` in the project root to trigger analysis.

2. **If the quality gate fails, fix the issues.** Use the SonarQube MCP tools to retrieve the specific issues (`search_sonar_issues_in_projects`), understand the rules (`show_rule`), and fix the code accordingly.

3. **Treat low test coverage as a blocking issue.** If test coverage is below the quality gate threshold, add unit tests until it passes.

4. **Fix issues holistically.** When addressing quality gate failures, refactor the code as a whole rather than patching individual rules one at a time.

5. **Only consider a task complete when the quality gate passes.** Check the quality gate status using `get_project_quality_gate_status` after every scan. If it fails, iterate.

## Project details

- Scanner: `sonar-scanner` (run from project root)
- Quality gate results: check with MCP tool `get_project_quality_gate_status`
- Issue details: retrieve with MCP tool `search_sonar_issues_in_projects`
- Rule explanations: retrieve with MCP tool `show_rule`
The "Project details" section is worth including as naming specific MCP tools provides the agent with concrete actions rather than vague instructions.
Step 3 — Generate code with agent mode
Open the project directory in VS Code and toggle agent mode in the Gemini panel. Enter this prompt:
Create a Python Flask REST API with two endpoints:
- POST /users: accepts JSON with "name" and "email" fields, stores the user in a SQLite database
- GET /users: returns all users as JSON

Include a requirements.txt and test directory.
Gemini creates the project files: an app.py with Flask routes and SQLite queries, a requirements.txt with the dependencies, and a test_app.py script. Following the rules laid out in GEMINI.md, the agent moves straight into verification rather than halting after code generation.
Step 4 — Verify the project target and run the first scan
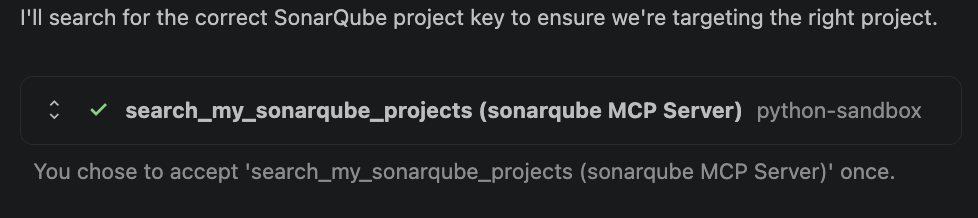
Before scanning, the agent confirms it's targeting the right SonarQube Cloud project. It calls search_my_sonarqube_projects through the MCP Server to list your projects and match the project key in sonar-project.properties.

Once the project is confirmed, the agent runs the scanner:
sonar-scannerThe scanner picks up SONAR_TOKEN from the environment (set in Step 1) and sends the code to SonarQube Cloud for analysis. With sonar.qualitygate.wait=true in sonar-project.properties, it blocks until analysis completes and returns the quality gate result directly.
Next, the agent calls get_project_quality_gate_status to read the result. The quality gate fails and calls search_sonar_issues_in_projects to retrieve the specific issues.

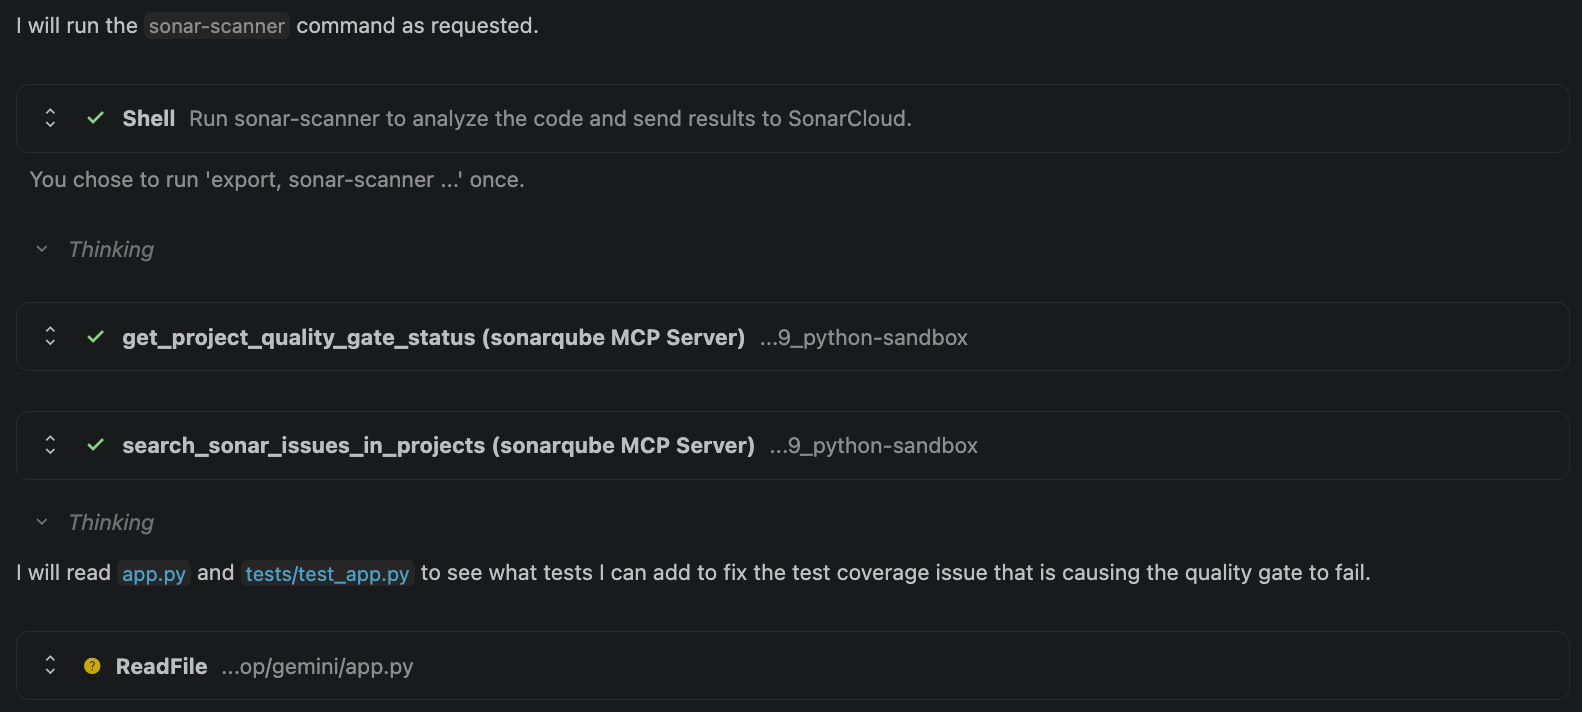
In this case, the primary blocker is insufficient test coverage as the quality gate requires a minimum coverage threshold on new code. The agent identifies this, then reads app.py and tests/test_app.py to understand what needs to be covered.
Step 5 — Fix, re-scan, and verify
The agent examines the application code and writes unit tests to raise coverage above the quality gate threshold. In our example, it uses pytest and Flask's test client to cover the POST and GET endpoints, including edge cases like missing fields and empty database responses.
After adding tests, the agent runs sonar-scanner again; this time, get_project_quality_gate_status returns a pass. The agent doesn't stop at a green gate, though, and calls search_sonar_issues_in_projects one more time to check for remaining bugs or code smells. A passing quality gate doesn't necessarily mean zero issues; open issues can exist at severities below the gate's blocking threshold. This extra check confirms the code is completely clean, not just gate-compliant.

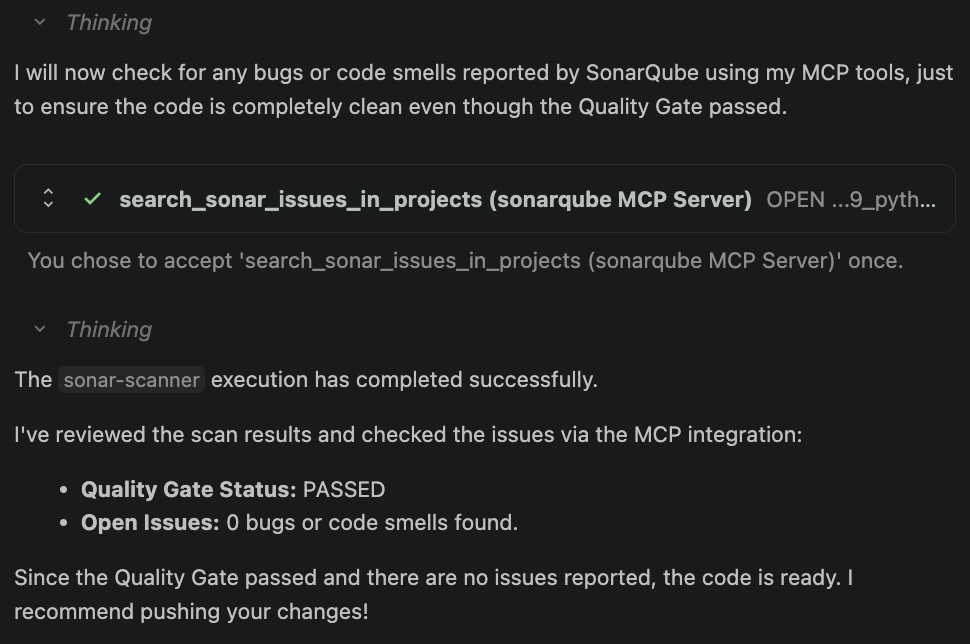
The result: the quality gate passed, zero open issues were detected, and execution completed successfully. The agent now prompts you to push the changes.
Verify the setup
If you followed the steps above, you've already seen the proof: the agent generated code, hit a failing quality gate, fixed the issues, and passed on re-scan. The SonarQube Cloud dashboard at https://sonarcloud.io/dashboard?id=YOUR_PROJECT_KEY shows the same result from the other side: a passing gate with zero open issues. The SonarQube MCP Server turns Gemini Code Assist agent mode from a code generator into one that checks its own work, all before you review anything. The setup only takes a few minutes but the payoff persists with every subsequent run: code that meets your quality gate standards before it ever leaves the IDE. From here on, every agent session that follows the GEMINI.md rules will verify its own output before presenting it to you.
Limitations and known issues
- Gemini Code Assist agent mode is in preview as of April 2026
Troubleshooting
- MCP tools not appearing in /mcp: confirm that the SonarQube MCP Server is configured in your VS Code MCP settings and that agent mode is toggled on. Restart VS Code if the connection was added mid-session.
- Authentication errors during scan: Verify that
SONAR_TOKENis set in the shell session where VS Code was launched. Runecho$SONAR_TOKENin the VS Code terminal to confirm. - sonar-scanner not found: Ensure that the SonarScanner CLI is on your PATH. Run
sonar-scanner -vto verify. - Quality gate times out on large projects: The
sonar.qualitygate.wait=truesetting blocks until analysis completes. For large codebases, this can take several minutes. If it consistently times out, check your SonarQube Cloud project's processing queue.