
Start your free trial
Verify all code. Find and fix issues faster with SonarQube.
CommencerTL;DR overview
- Integrating the SonarQube MCP server with Google Antigravity IDE connects Sonar's static analysis engine to Antigravity's autonomous coding agents.
- The integration uses Docker to run the SonarQube MCP server and requires a SonarQube Cloud user token and organization key for authentication.
- Antigravity agents can continuously verify AI-generated code against quality gates before it is committed to the repository.
- The setup addresses the engineering productivity paradox by embedding verification directly in the agentic development loop.
The rise of agentic AI and tools like Google Antigravity IDE is rapidly changing software development, enabling “vibe coding” with autonomous agents. This velocity risks technical debt and vulnerabilities, creating an “engineering productivity paradox.”
Sonar addresses this with the SonarQube Model Context Protocol (MCP) Server, a crucial trust and verification layer. It connects Google Antigravity’s agents to SonarQube (Sonar's analysis engine), ensuring AI-generated and human code meets quality and security standards.
When you integrate SonarQube’s deep static analysis directly into Antigravity via MCP, you allow Antigravity’s agents to write high-quality, secure, and reliable code that adheres to your organization’s quality gates. Most importantly, it empowers the agent to perform a continuous verification on its own work, so that you can effectively review AI code for vulnerabilities before it is even committed.
In this guide, you’ll learn how to bridge these two powerful tools.
Prerequisites and environmental preparation
Implementing the SonarQube MCP Server requires a specific set of components and permissions. This section details the necessary environment preparation to ensure a seamless installation.
- Google Antigravity IDE: The integration relies on Google Antigravity’s native support for the Model Context Protocol.
- Docker: The SonarQube MCP Server runs as a Docker container. Ensure Docker Desktop or the daemon is running.
- SonarQube access:
- SonarQube Cloud: You will need your Organization Key and a User Token.
- Authentication credentials: Security is paramount when connecting AI agents to your codebase infrastructure. The MCP server requires specific tokens to authenticate its requests. You must gather these credentials before starting the configuration.
| Credential type | Description | Required for |
| User token | A personal access token generated within SonarQube. This token identifies the agent actions as being performed on behalf of a specific user. | All configurations |
| Organization key | The unique identifier for your organization on SonarQube Cloud. | SonarQube Cloud users only |
| Server URL | The fully qualified domain name (FQDN) of your self-hosted instance (e.g., https://sonarqube.internal.corp). | SonarQube Server users only |
Step-by-step installation guide
This section provides a detailed walkthrough for configuring the SonarQube MCP Server within Google Antigravity. We will cover the configuration for both SonarQube Cloud and SonarQube Server.
Credential generation
Before configuring the IDE, you must generate a dedicated security token. Using a dedicated token for the MCP integration is a security best practice, as it allows you to revoke access specifically for the AI agent without affecting your other workflows.
Generating a token in SonarQube Cloud
- Log in to your SonarQube Cloud account.
- Navigate to your user settings by clicking your avatar in the top-right corner and selecting My Account.
- Select the Security tab.
- In the “Generate Token” section, enter a descriptive name, such as Antigravity-MCP-Agent-2026.
- Click Generate.
- Critical: Copy the token immediately and store it in a secure location (like a password manager). You will not be able to view this token again once you navigate away from the page.
- Locate your Organization Key. This is found in your organization overview page or within the URL of your project dashboard (e.g., in sonarcloud.io/project/overview?id=my-org_my-project, the organization key is my-org).
Installing the SonarQube MCP Server in Antigravity
Google Antigravity manages its connections to external tools via a JSON configuration file named mcp_config.json. The IDE also provides a UI for installing popular servers.
- Open Google Antigravity IDE.
- Locate the Agent Panel. This is typically docked on the right side of the interface.
- At the top of the Agent Panel, locate the More Options menu (represented by three dots ...).
- Click the menu and select MCP Servers.

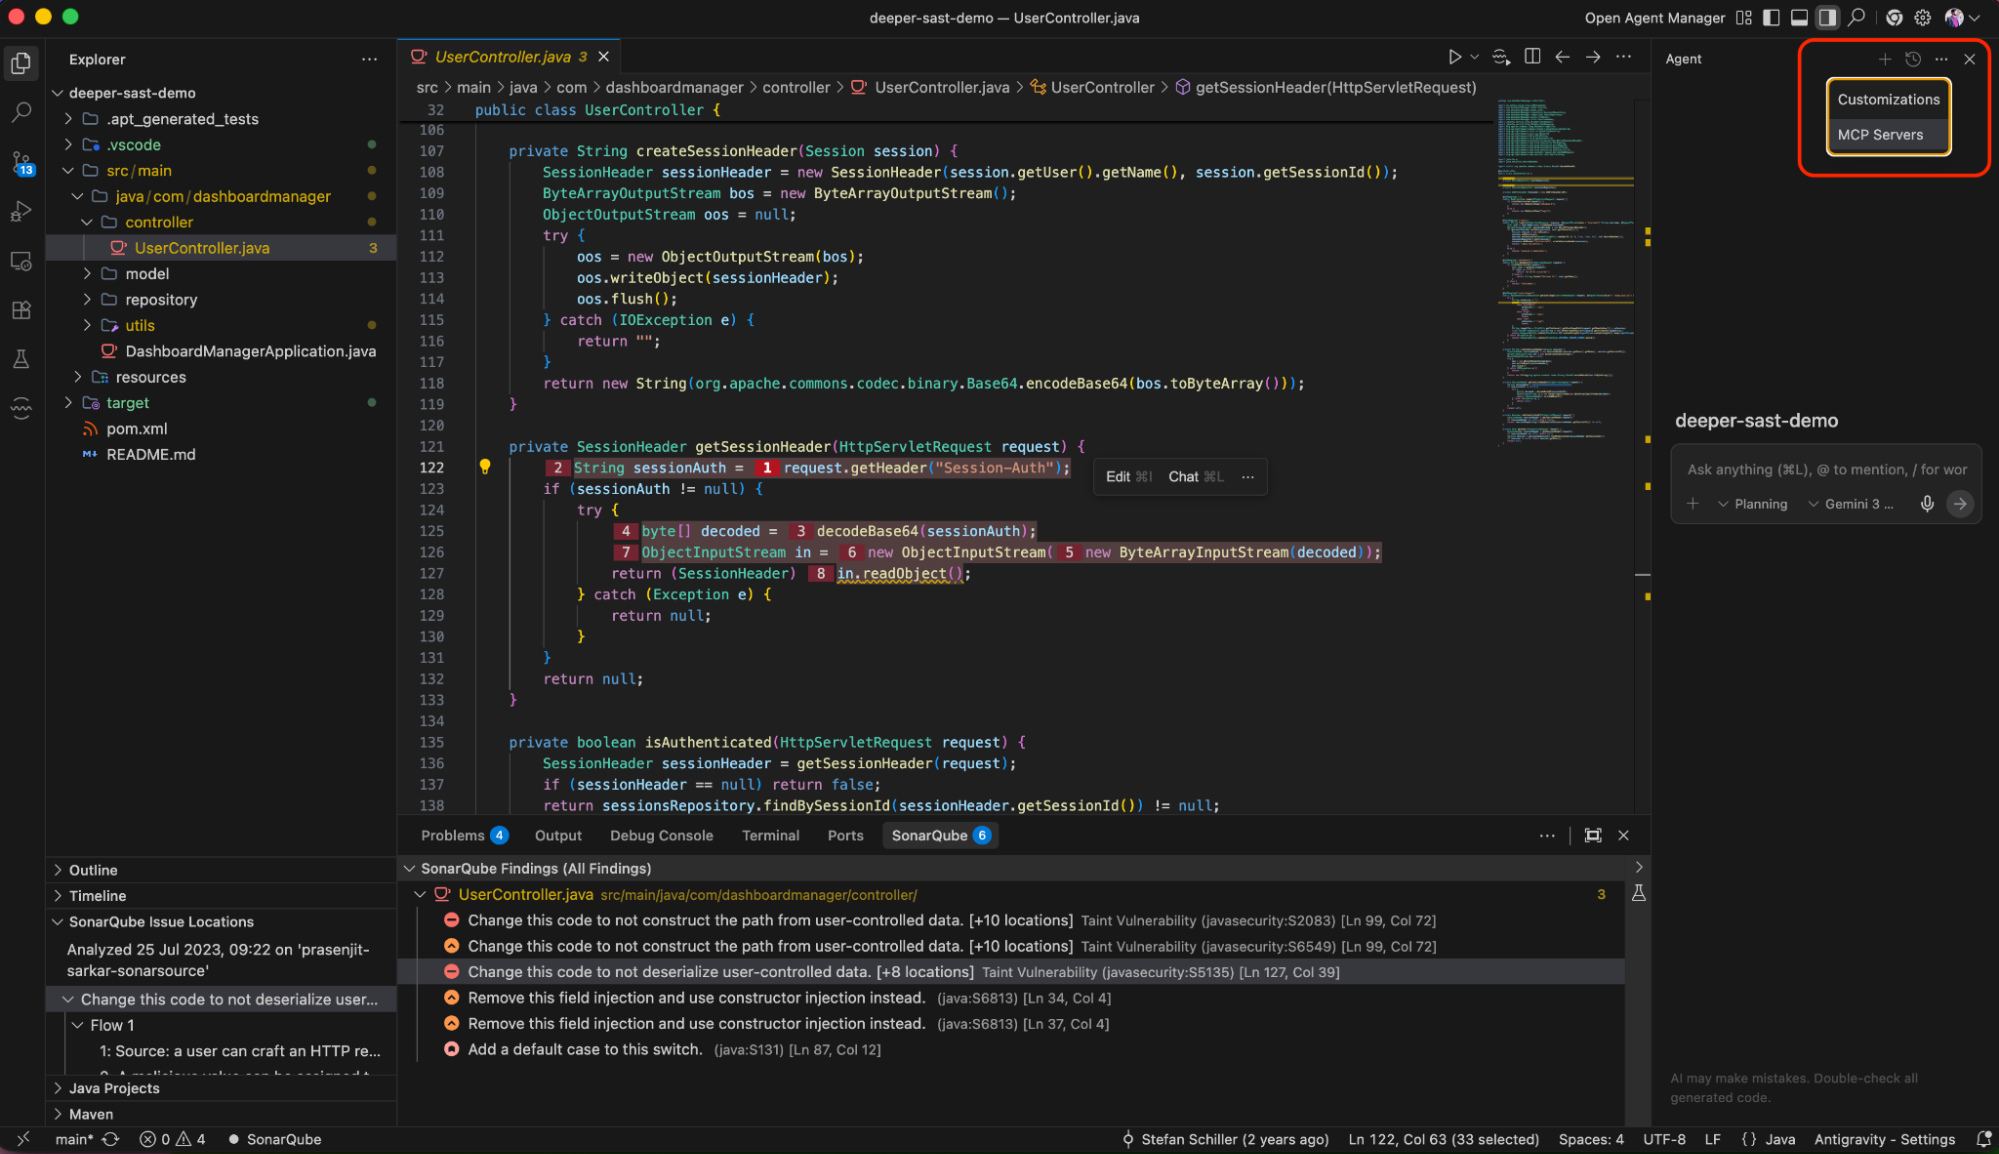
- This opens the MCP Store interface. Type Sonar in the search bar, select the SonarQube and click on Install.

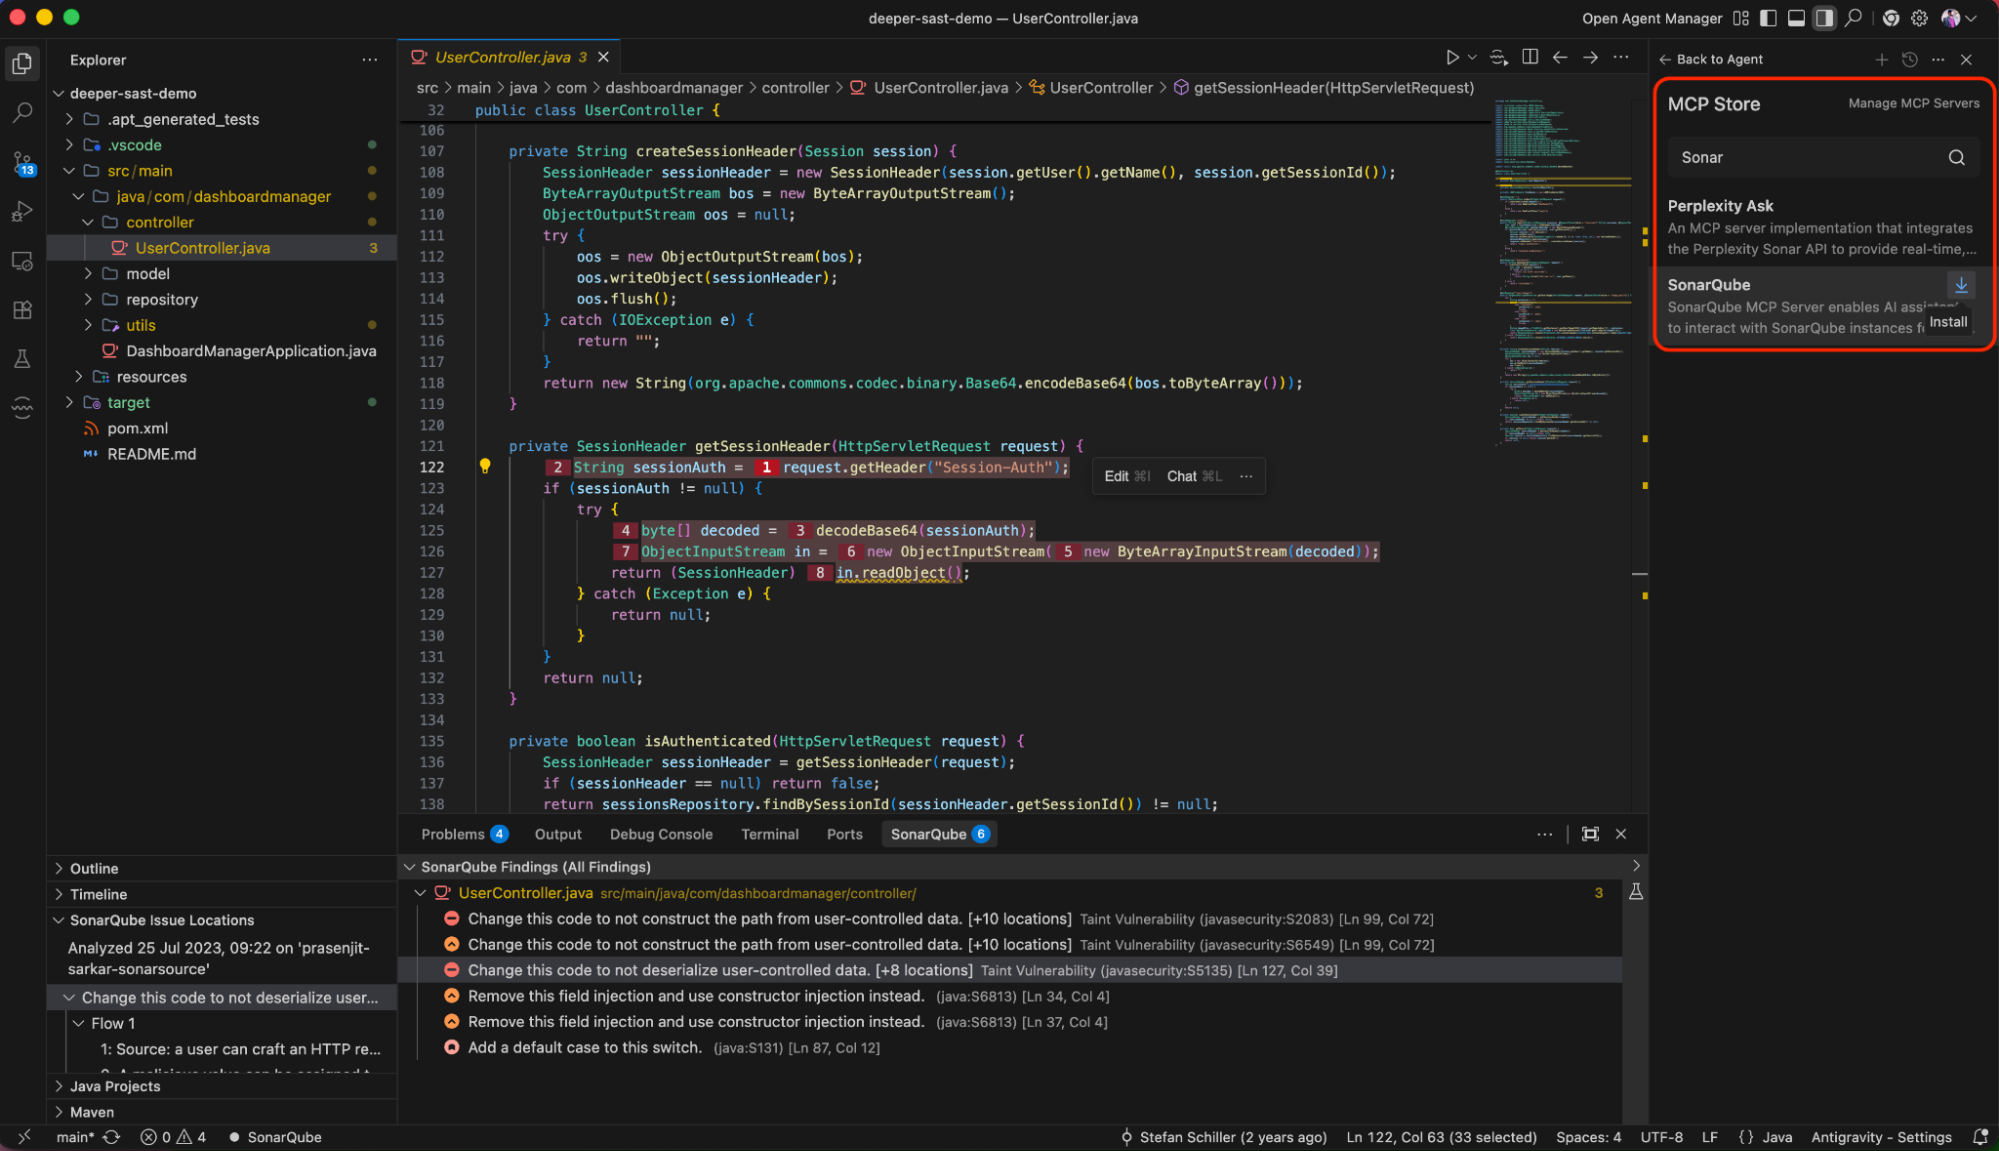
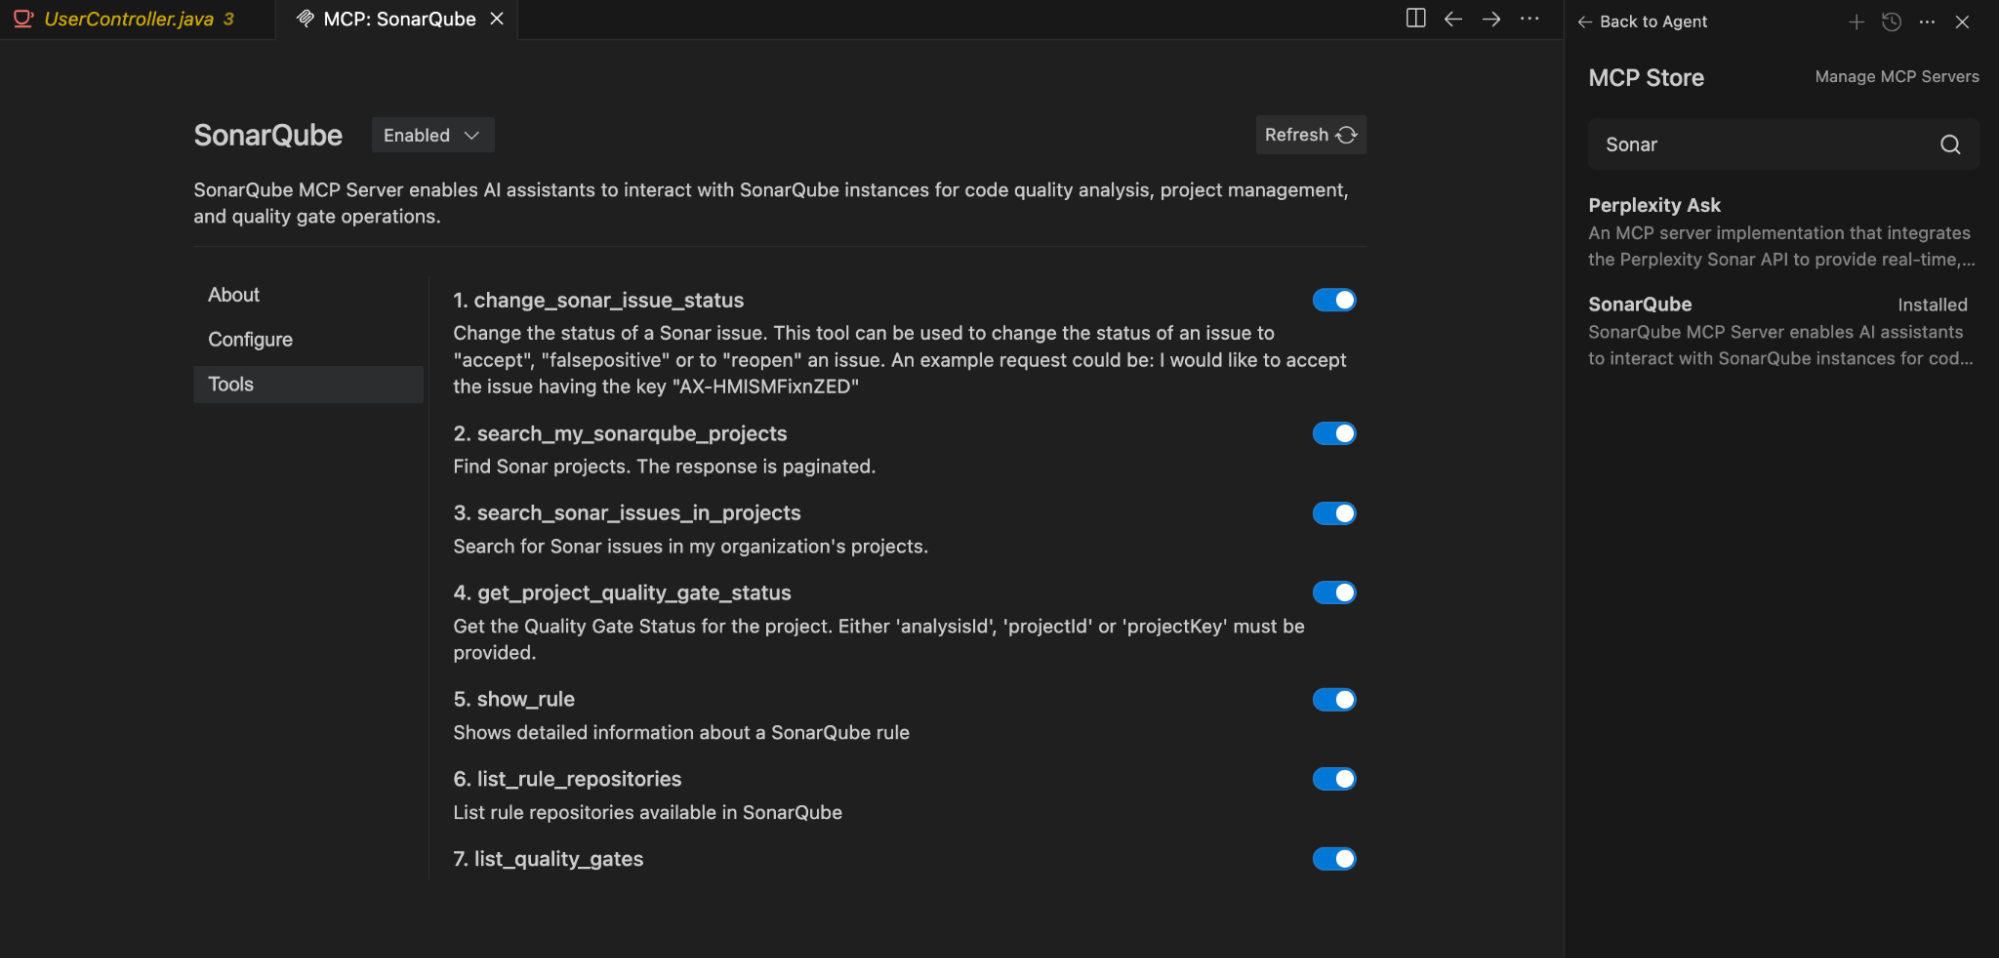
- Once it is installed, it will automatically show the configure screen.


- Provide the SonarQube Token and the Organization Key that you saved in the previous section. Click on Save. If the config is correct, you will see the list of the tools that are loaded.

Validating the connection
Once the configuration is added, you must verify that the connection is active and stable.
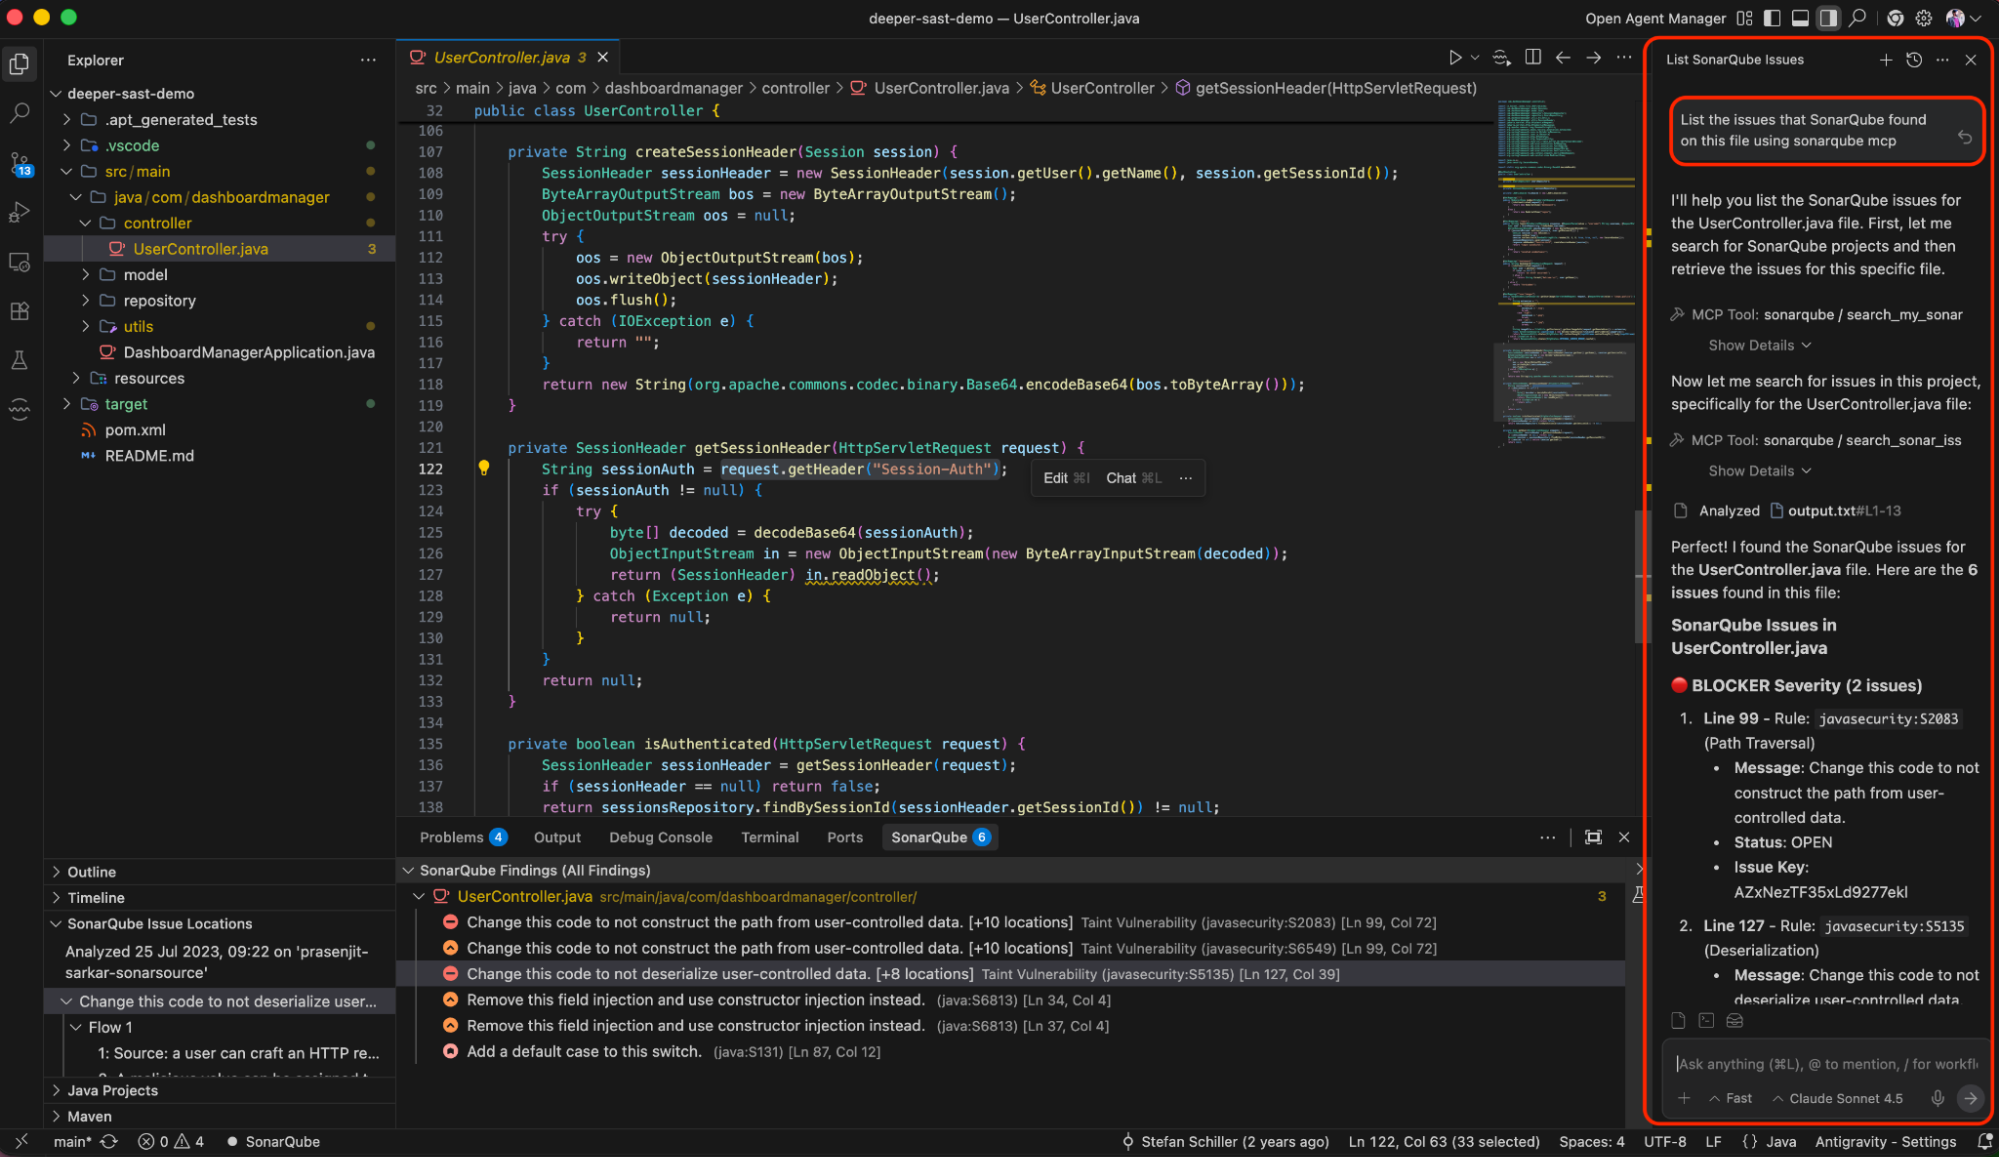
- In the Agent Panel, type in this example query “List the issues that SonarQube found on this file using sonarqube mcp”. You will see a similar output like the below one.

Conclusion
The integration of the SonarQube MCP Server with Google Antigravity IDE signifies a crucial step in the evolution of agentic development. This move underscores the principle that while the excitement of rapid creation is important, the essential “verification” of the AI Code phase is the foundation of sustainable, robust software.
You have not only just learned how to install a plugin; but also you have architected a workflow that goes together with speed with security. You have empowered your developers to leverage the full potential of AI without compromising the integrity of your codebase. In the era of AI-generated code, Sonar remains the essential verification layer, ensuring that the software of tomorrow is built on a foundation of trust.
Start your secure AI coding journey: Install the SonarQube MCP Server.