

Introduction: Developing with Windsurf and SonarQube for IDE
AI-native IDEs like Windsurf and Cursor are revolutionizing development, but too often, speed comes at the cost of quality. AI-generated code isn't immune to bugs or security vulnerabilities, creating a hidden risk of technical debt.
SonarQube for IDE acts as a real-time “spell checker” for your source code directly within Windsurf, catching issues the moment they’re written. This integration ensures all code, whether human or AI-authored, is secure and robust, as it provides the critical governance layer for modern development.
This guide will show you how to install the SonarQube for IDE plugin and connect it to SonarQube Cloud. Similar steps can be used for connecting to SonarQube Server. You'll learn how to leverage SonarQube’s powerful static code analysis and AI CodeFix to unite development speed with rock-solid quality.
Setting up the SonarQube IDE plugin for Windsurf
Following these steps will enable a fully integrated, real-time code quality and security analysis workflow using the SonarQube IDE plugin in Windsurf and connecting it to SonarQube Cloud.
Prerequisites
Before you start, ensure the following requirements are met:
- The Windsurf IDE is installed and operational.
- You have access to SonarQube Cloud . Sign up for a free trial account if needed.
- The project intended for analysis already exists on the SonarQube Cloud. See our getting started guide if you need to set up a project.
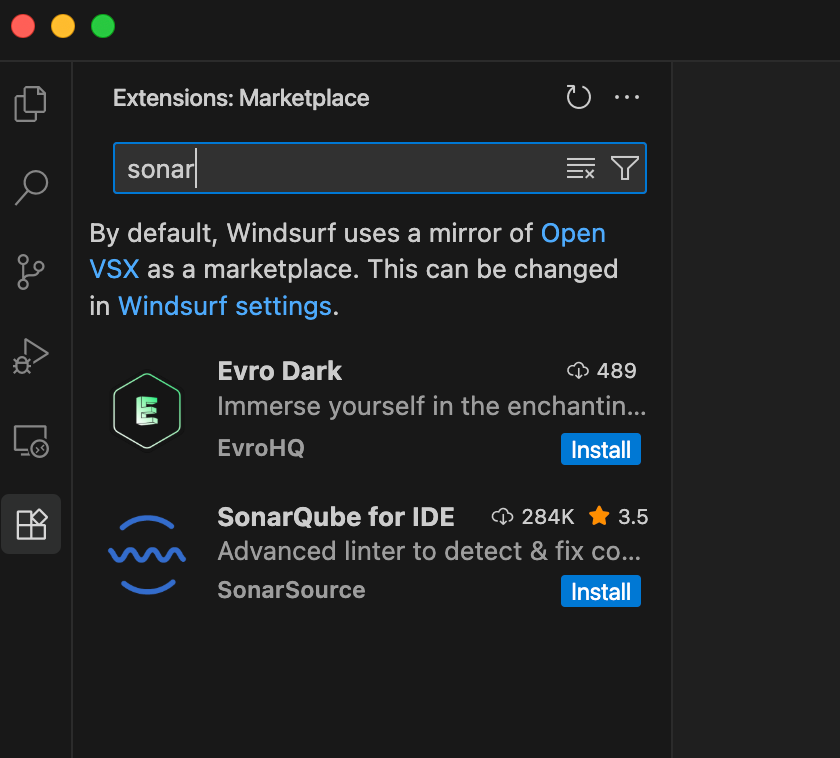
Step 1: Installing the SonarQube for IDE extension from the marketplace
The first step is to install the plugin from the official Windsurf extensions marketplace. The process is straightforward and similar to installing any other IDE extension.
- Open the Windsurf IDE.
- Navigate to the extension dialog. To do this, click on the Windsurf menu, then Settings and click on Extensions.
- On the Marketplace tab search bar, type “Sonar” and press Enter.


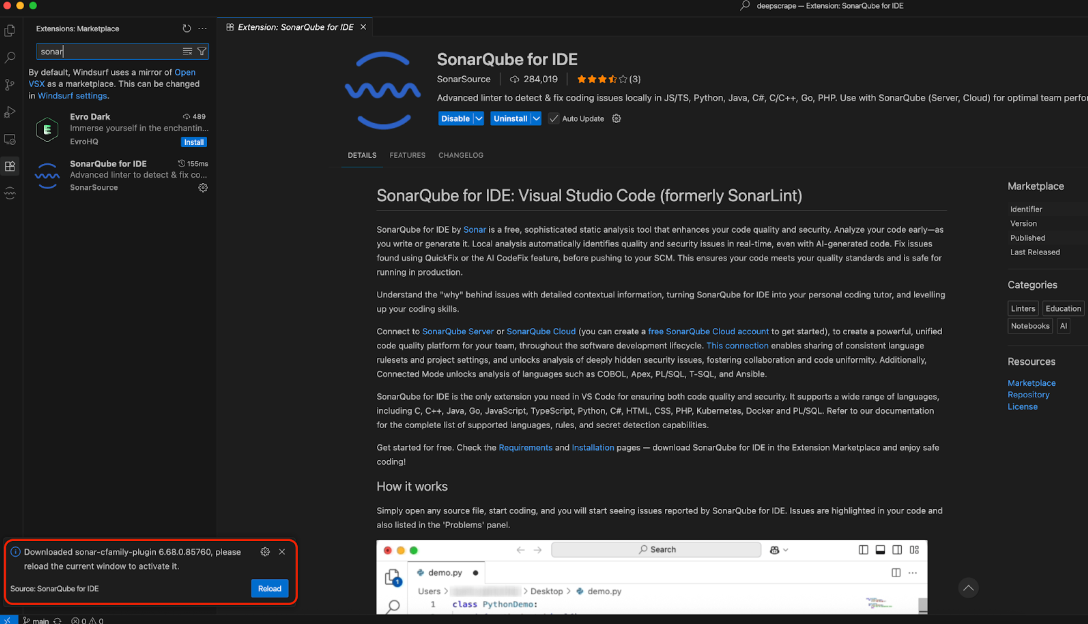
- The “SonarQube for IDE” extension by SonarSource should appear in the search results. Click the Install button next to it.

- In the “Do you trust the publisher “SonarSource?”” dialog box, click on Trust Publisher & Install.
- After the installation is complete, click on the Reload button to finalize the installation.

Step 2: Connecting Windsurf to your SonarQube Cloud
With the plugin installed, the next crucial step is to establish a secure connection to your SonarQube Cloud. This requires generating an authentication token from the cloud and configuring it within Windsurf.
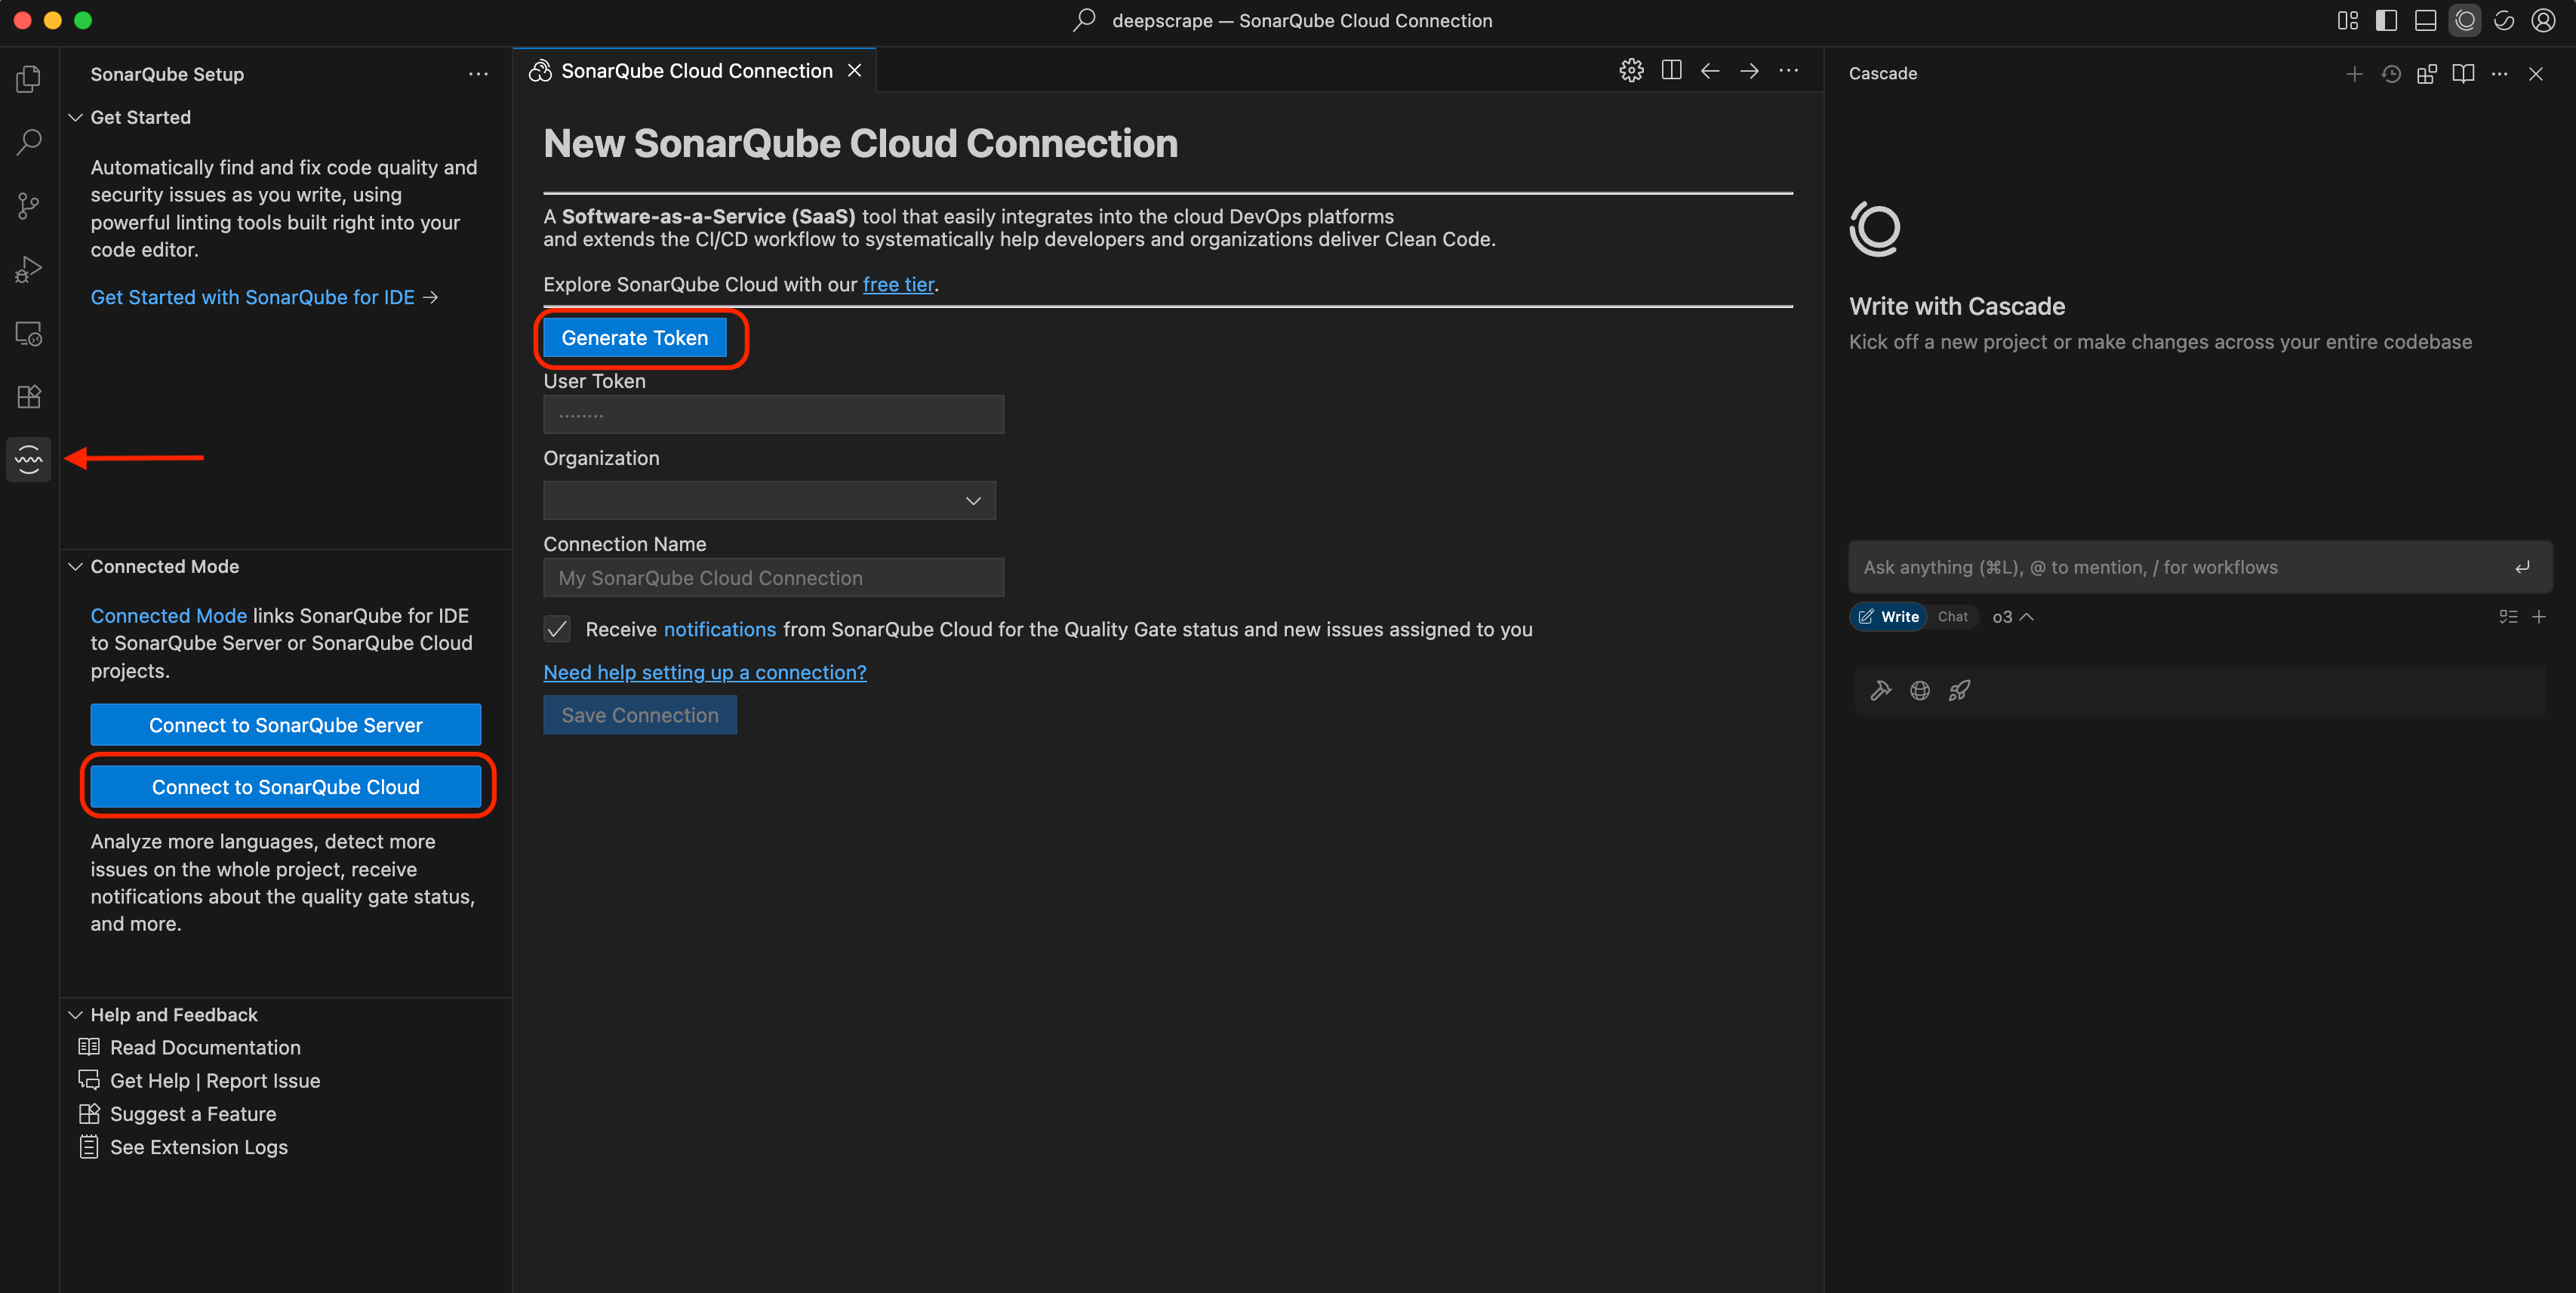
- Click on the SonarQube setup icon on the side panel.
- Click on the Connect to SonarQube Cloud.
- Click on Generate Token.

- Click on Open in the “Do you want Windsurf to open the external website?” menu?
- Click on Allow connection.
- A new token will be generated for you. At this time, close this browser window and head back to the Windsurf.
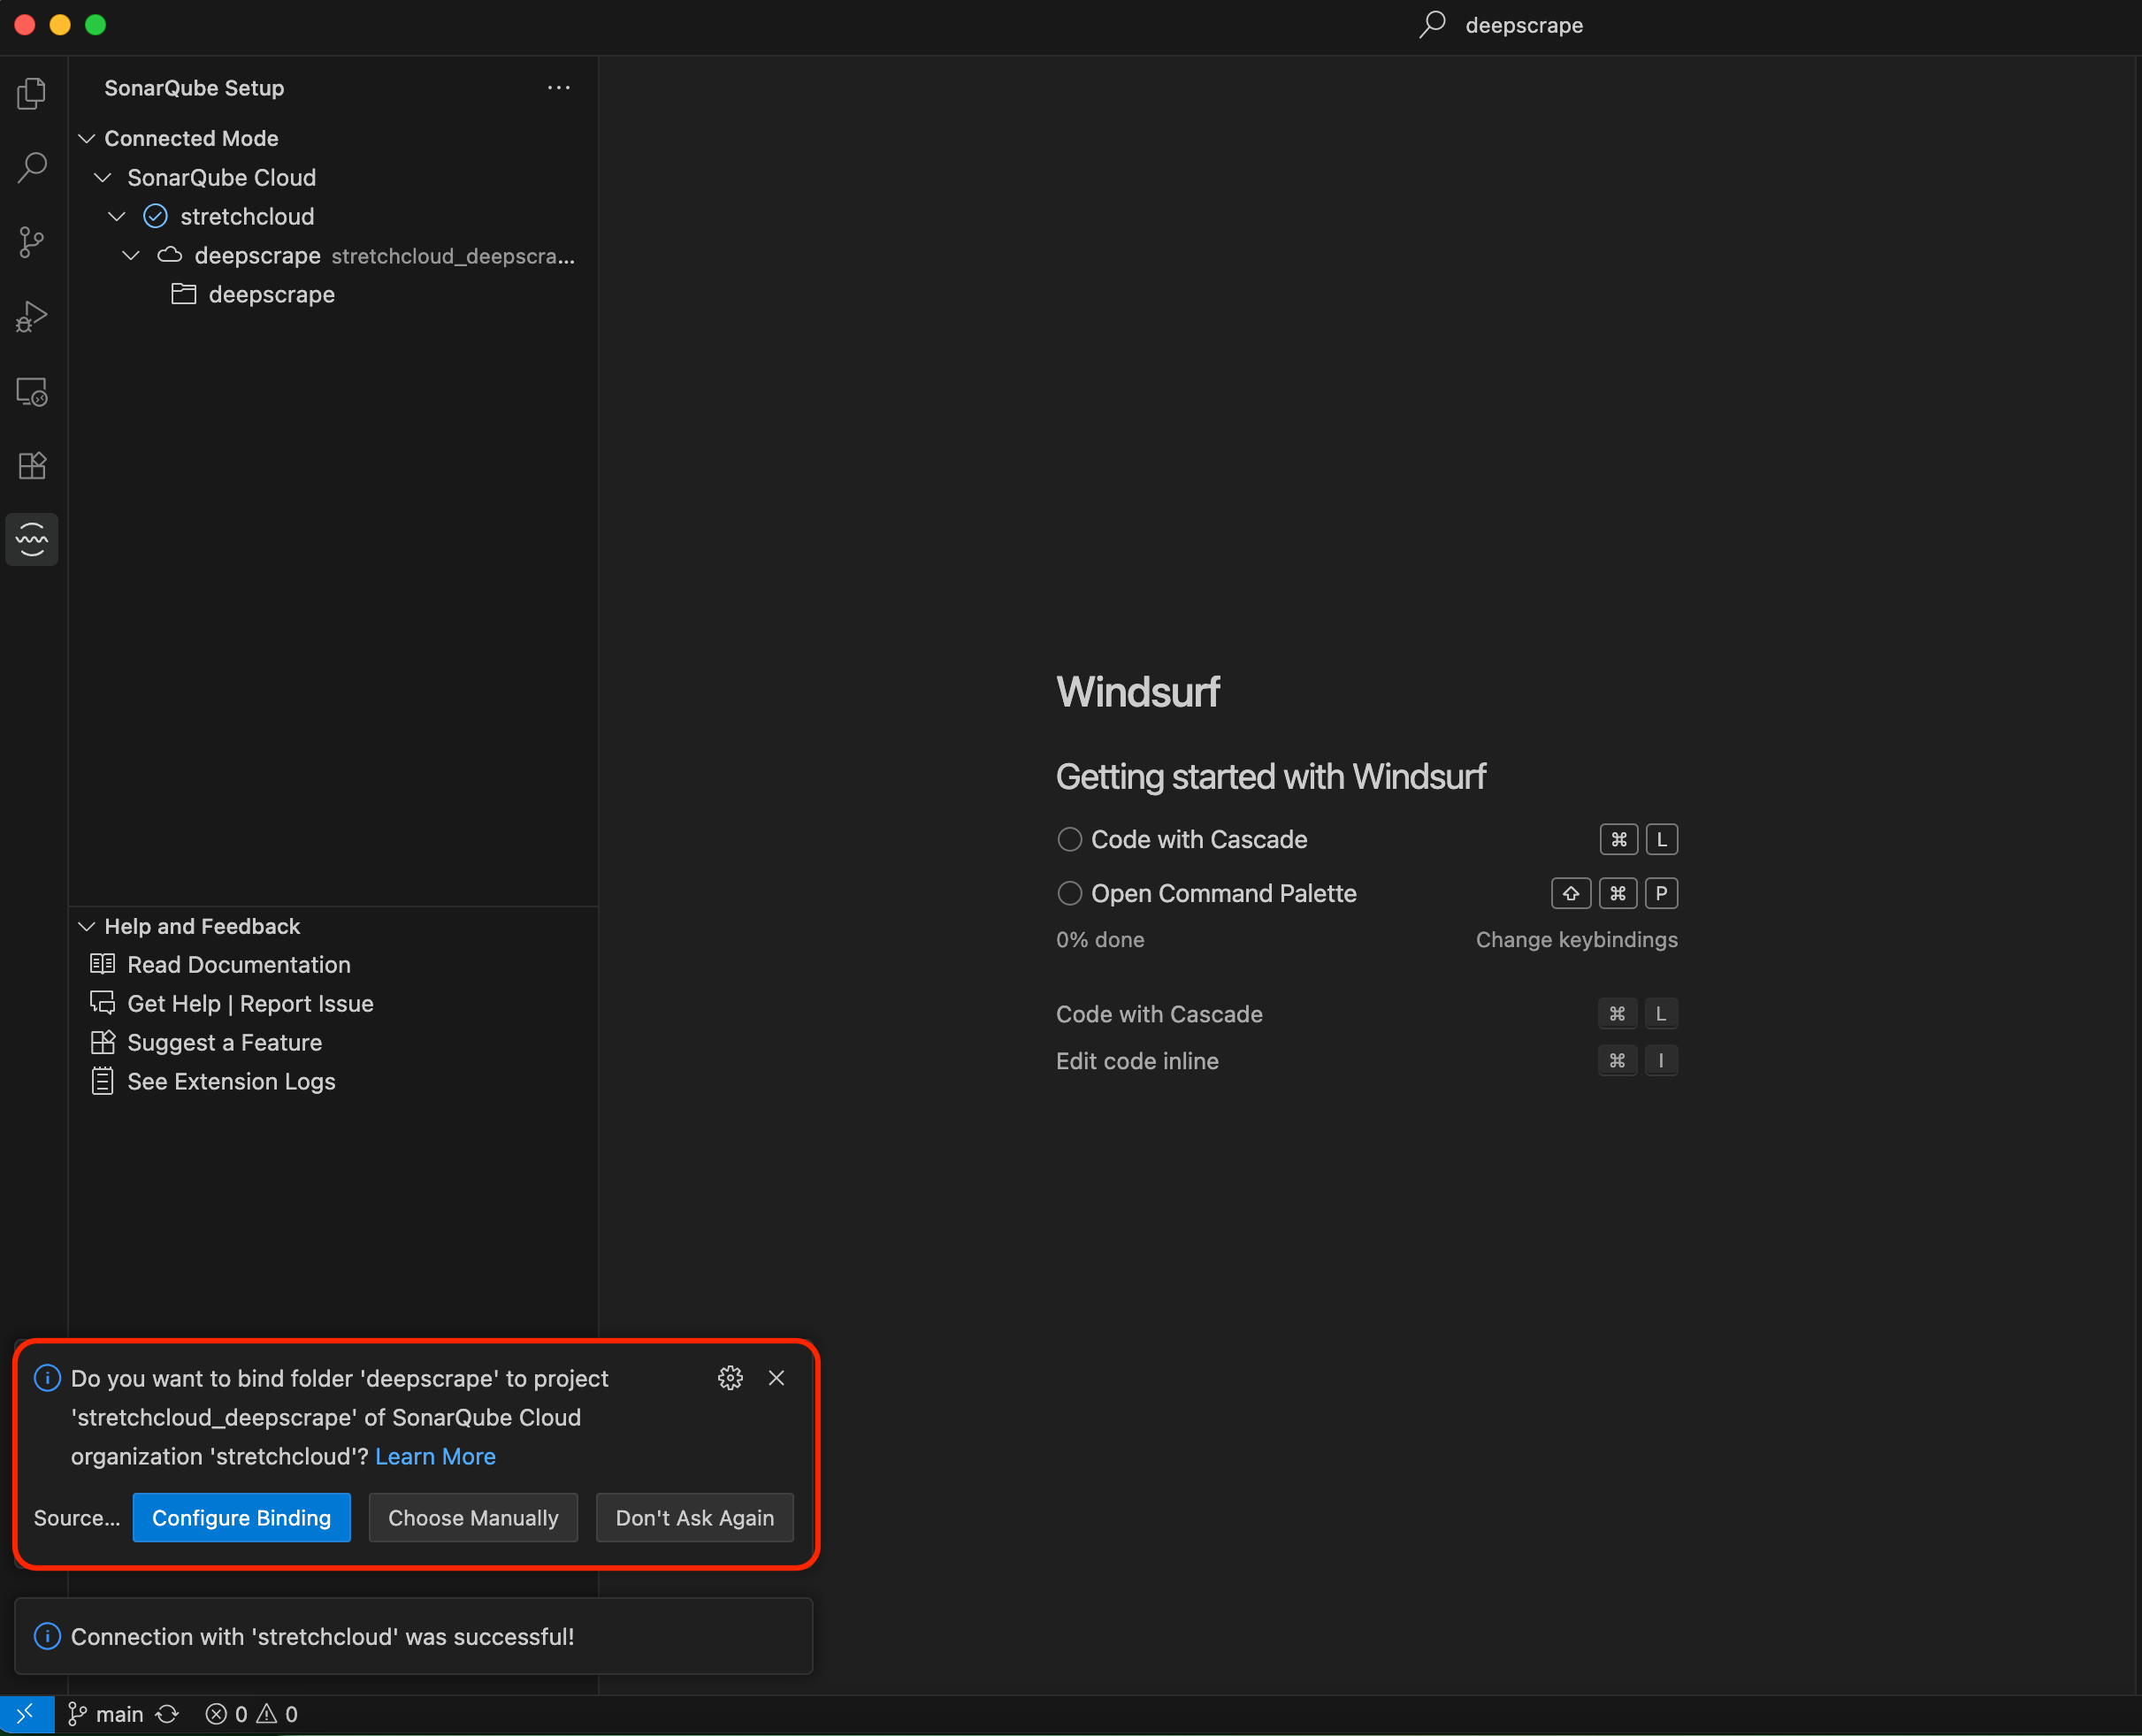
- Click on the Save Connection button.
- If you have a project open, Windsurf will ask you to configure binding to the project.
- Click on the Configure Binding button.

Step 3: Examining code quality in real time
With the setup complete, the benefits are immediate. SonarQube for IDE will now automatically analyze any supported source code file you open in the Windsurf editor.
- In-editor highlighting: Issues are flagged directly in your code with colored “squiggles,” much like a spell checker identifies a typo. This provides instant, non-intrusive visual feedback.
- Rich issue details: When you hover your mouse over a highlighted issue, a tooltip will appear with a concise description of the problem.

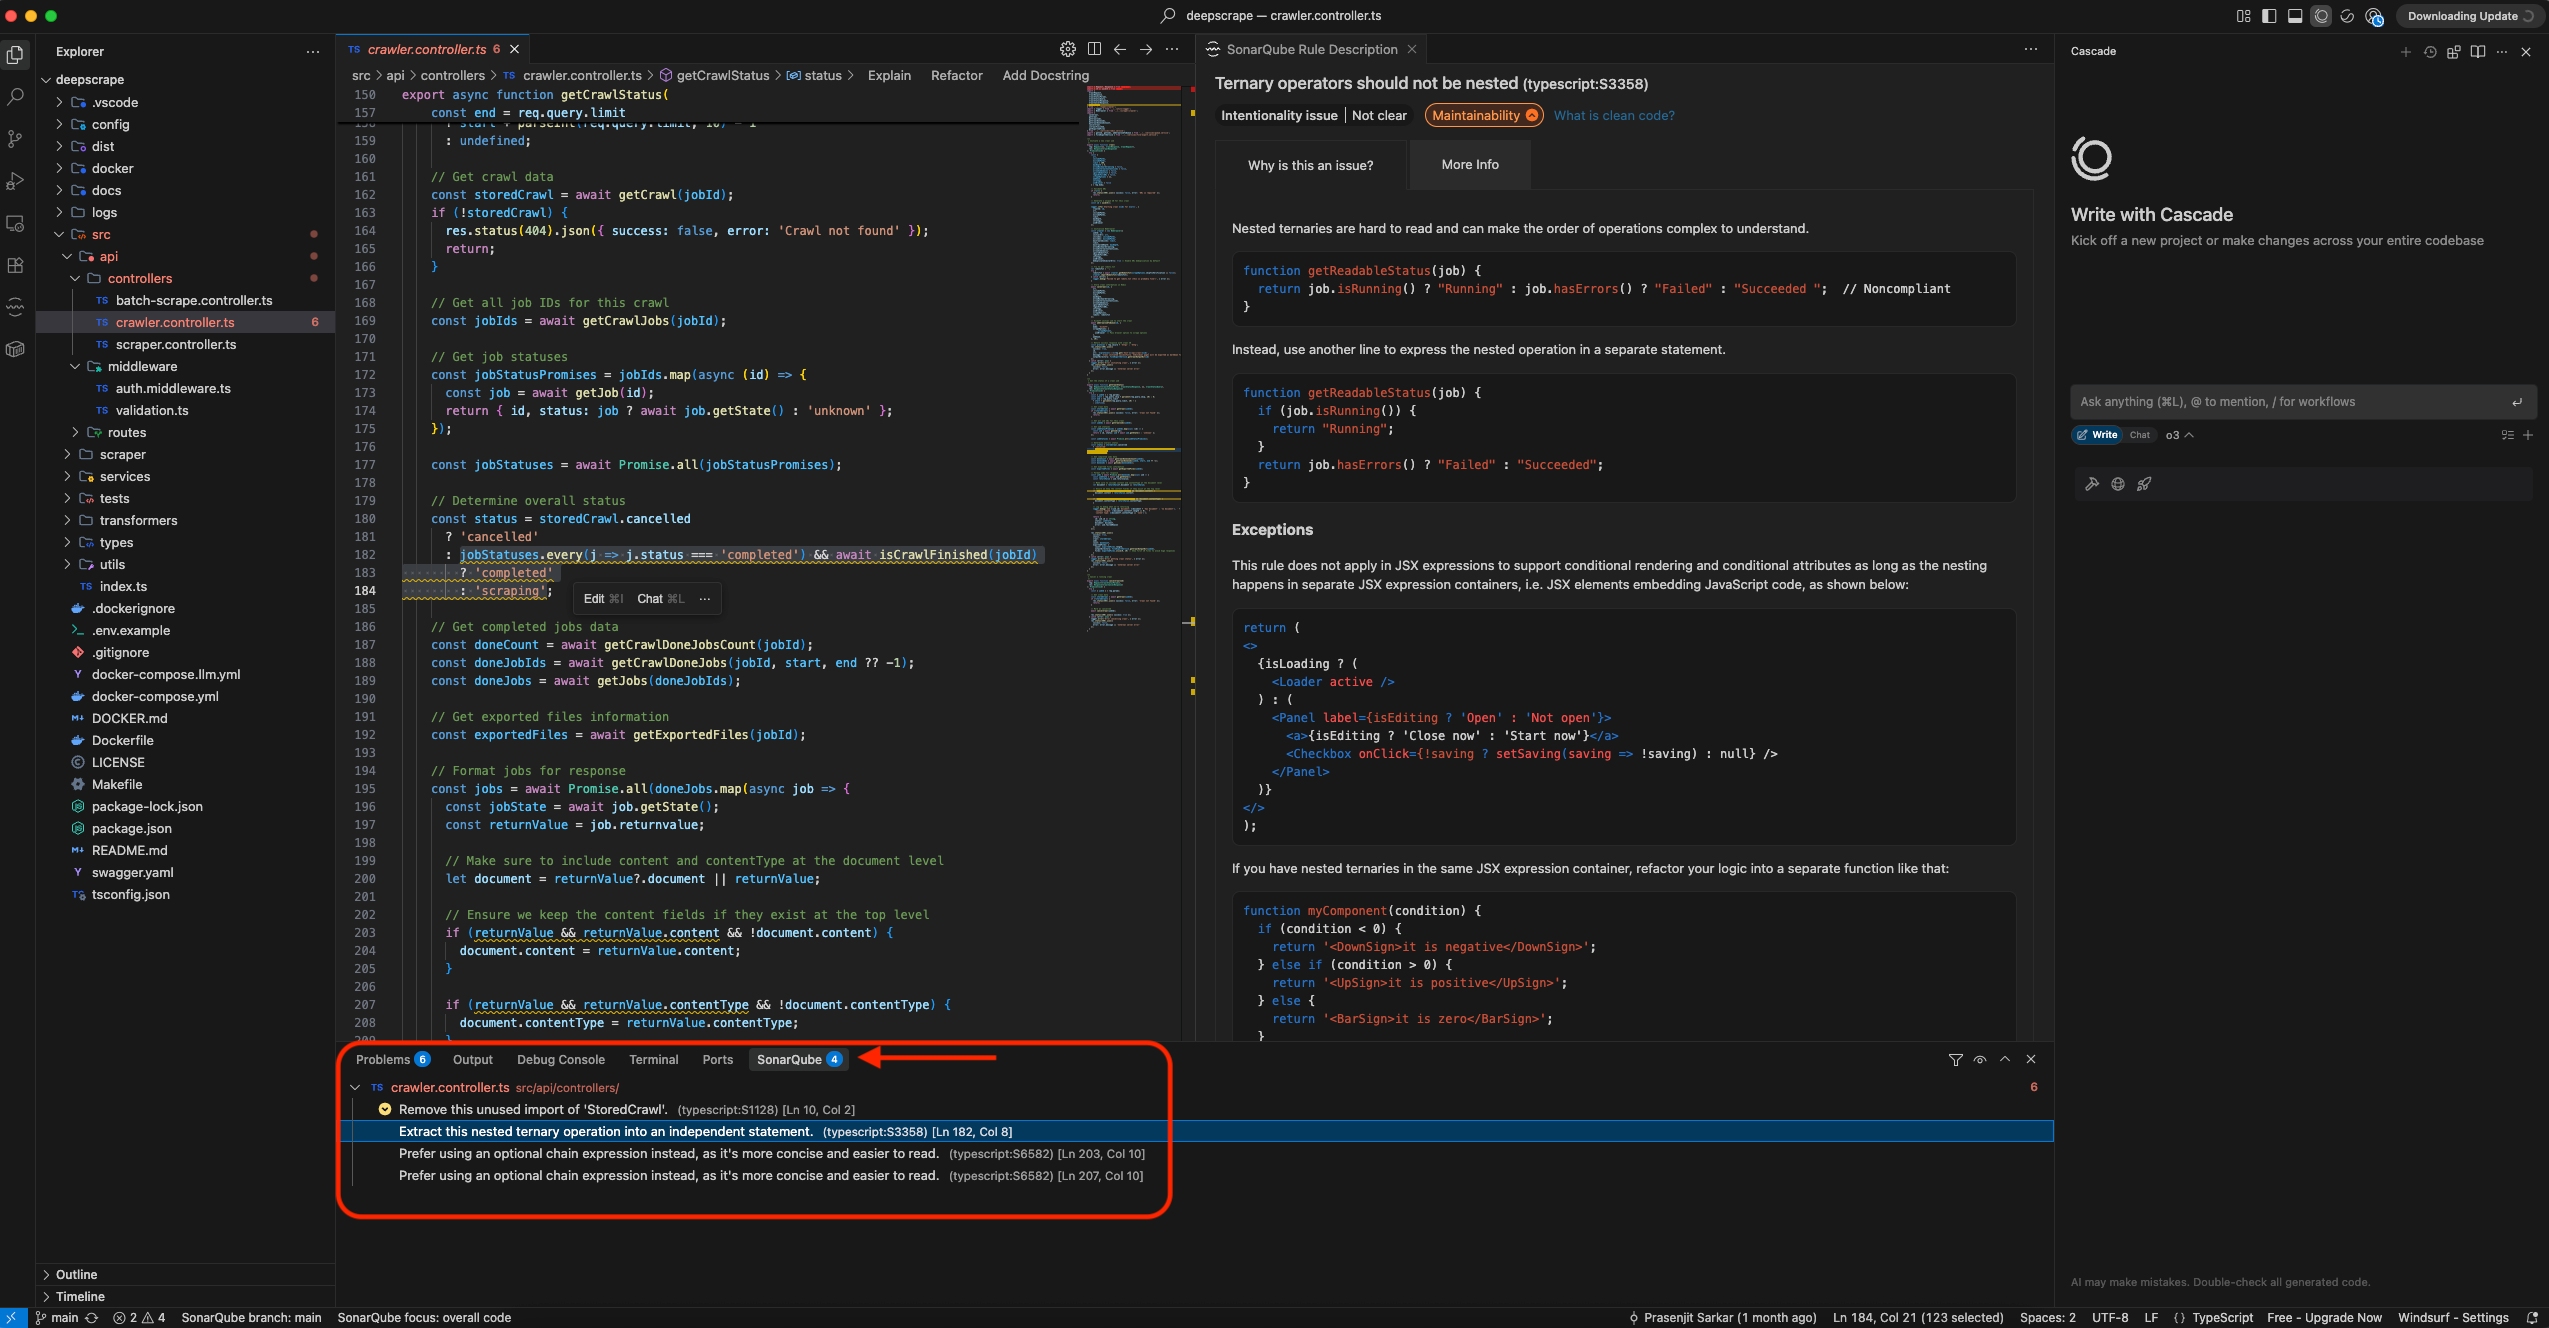
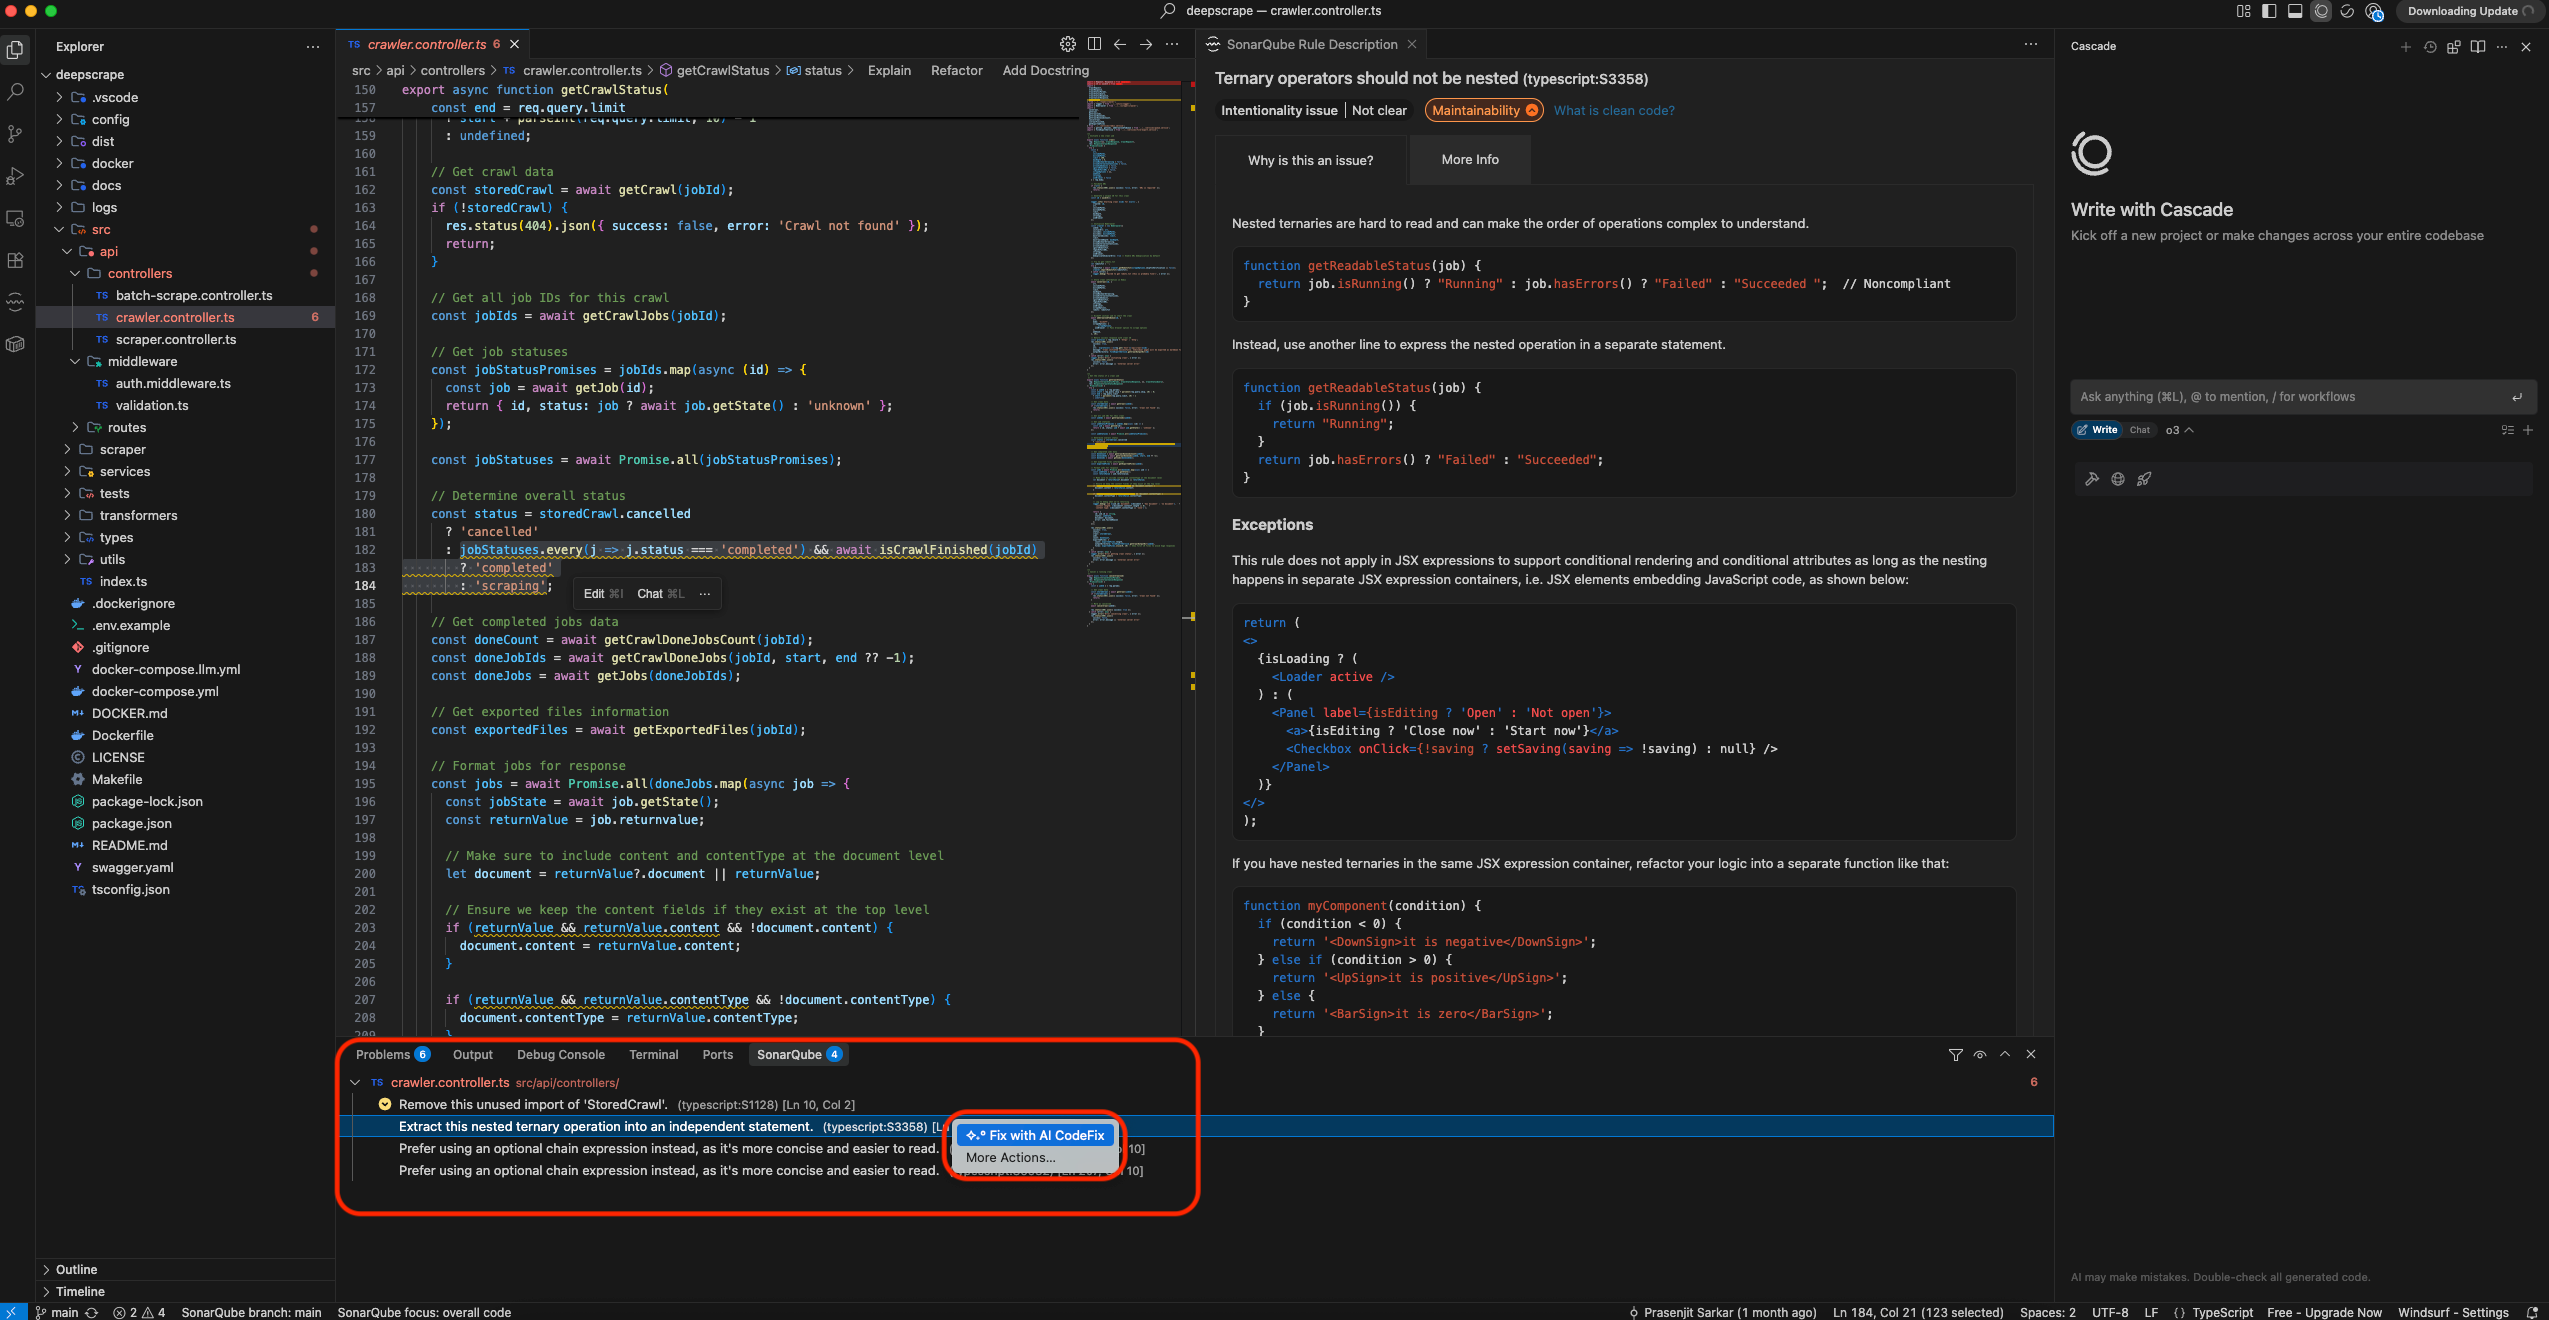
- AI CodeFix: You can also take further action on these issues. If the AI CodeFix is available for the issue, then you can apply that as well. Right click on the issue and select “Fix with AI CodeFix.”

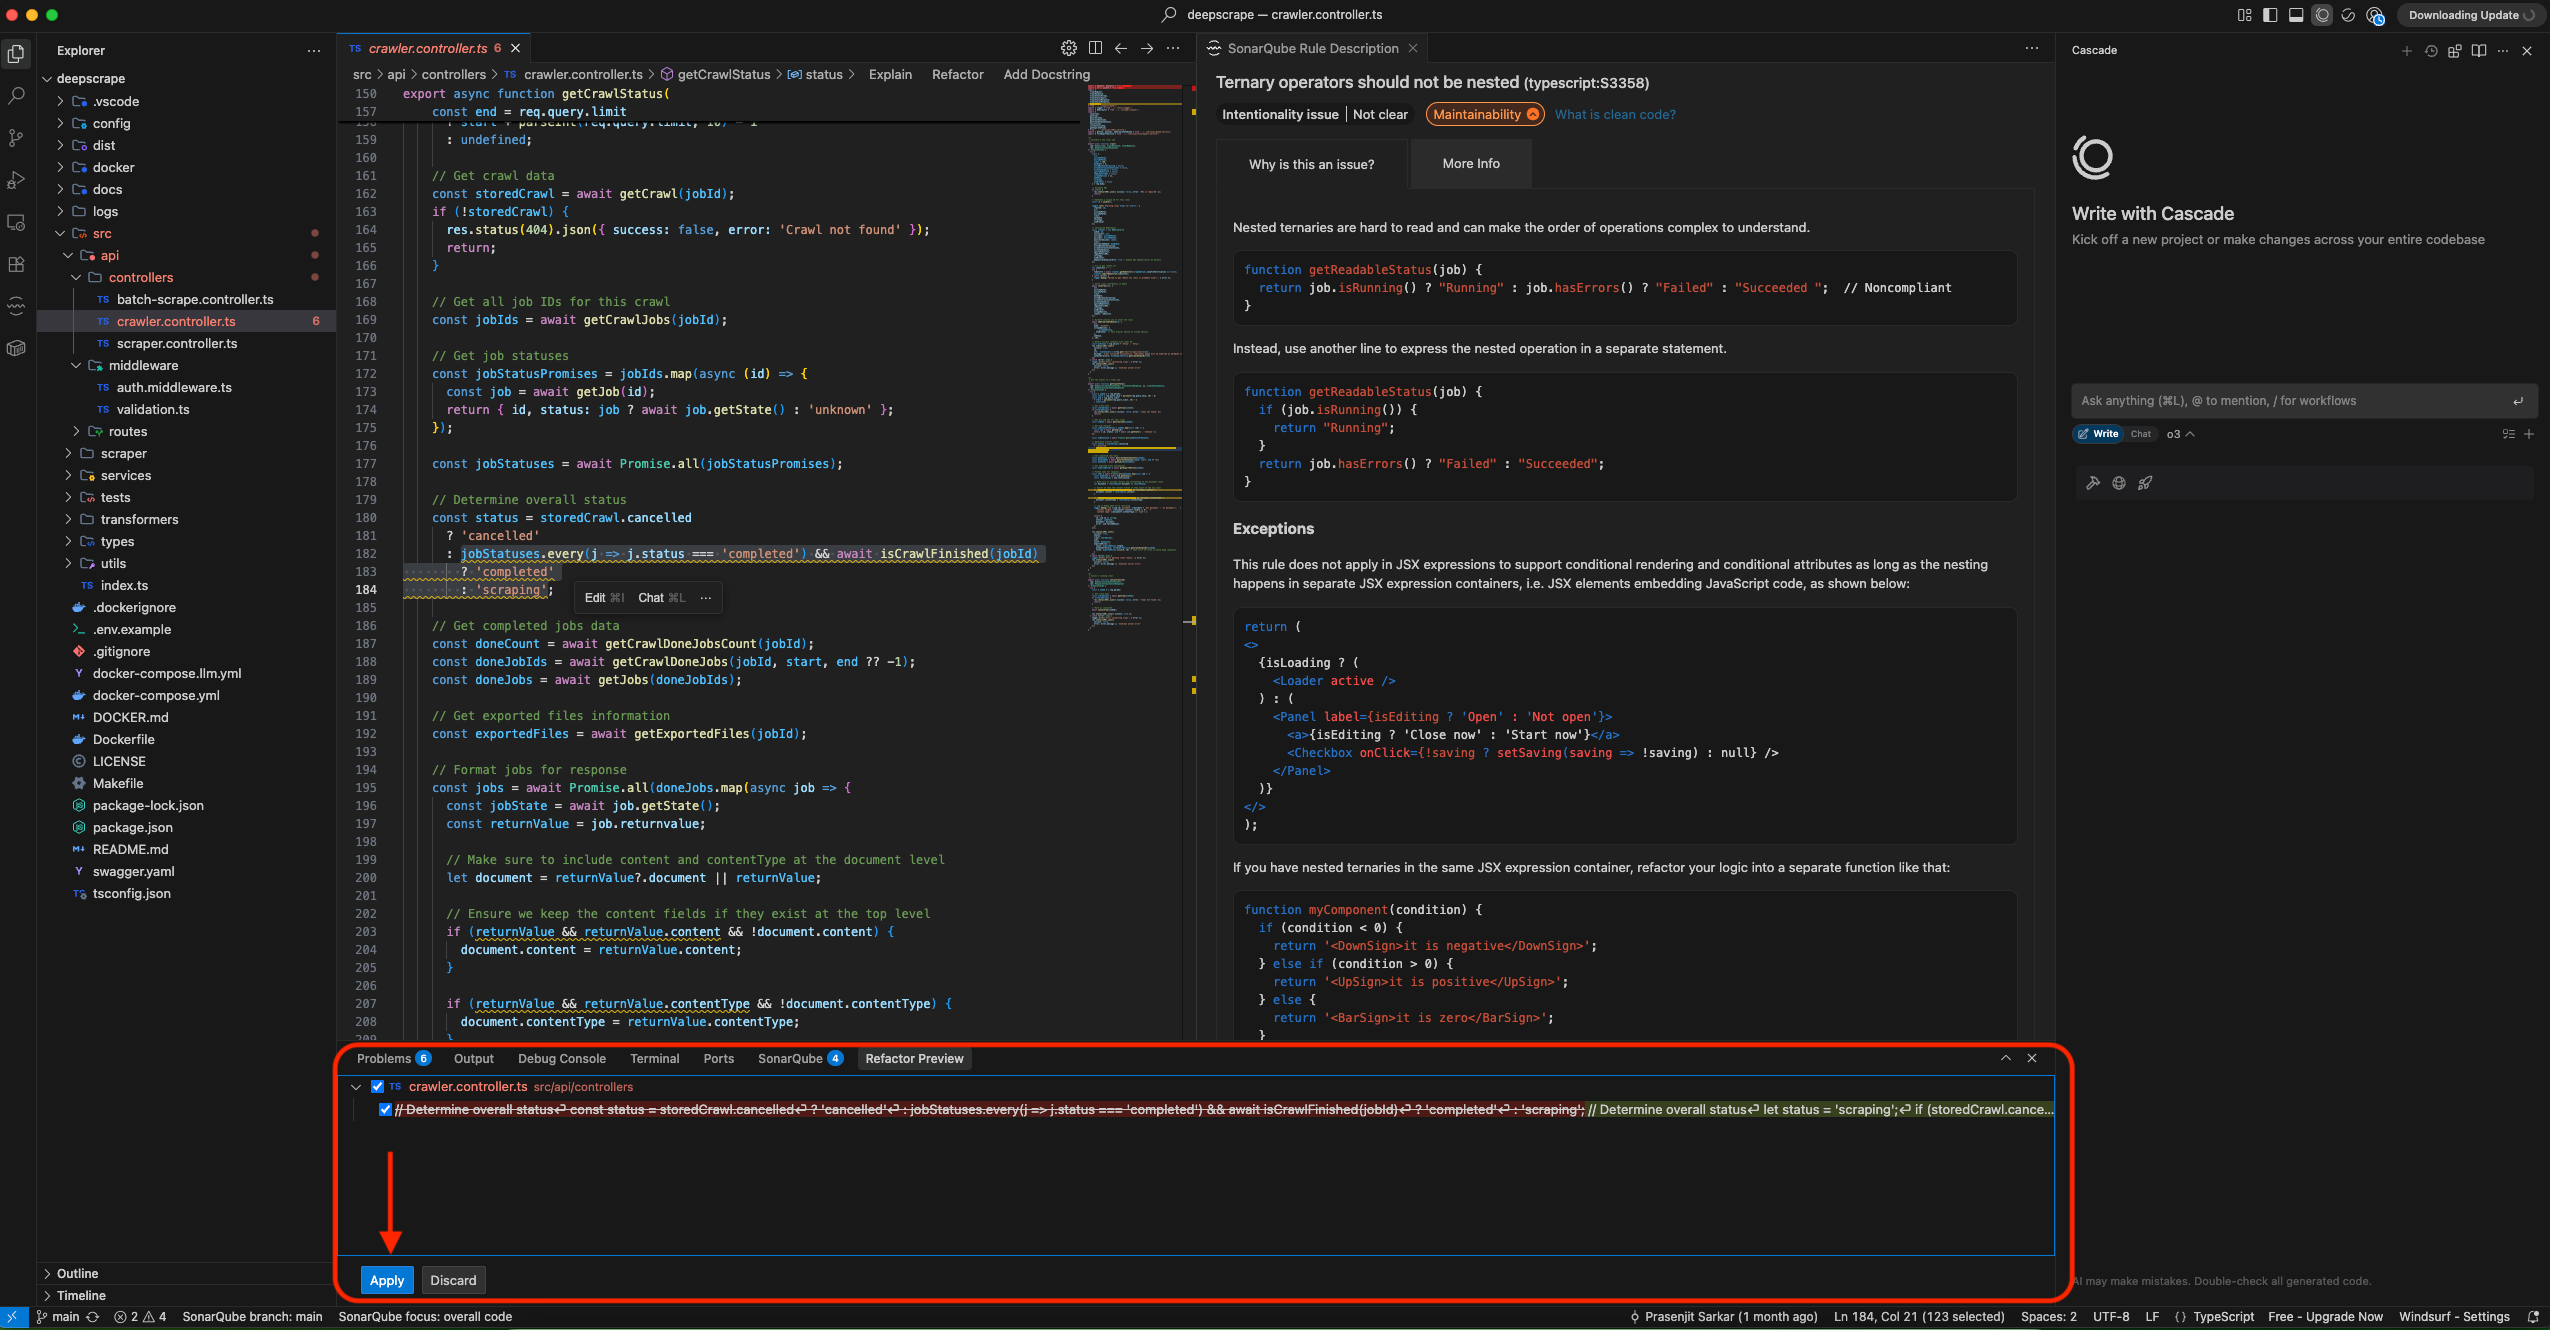
It will generate the fix and you can select and apply it right there in the IDE itself.

Unlocking a higher standard of quality with Connected Mode
Completing the setup guide above does more than just install an IDE extension; it activates Connected Mode, a paradigm that fundamentally elevates the SonarQube IDE's value. This section explores the powerful, tangible benefits unlocked by this connection, transforming your IDE from an isolated coding environment into an integrated hub for team-wide code quality.
Windsurf and SonarQube IDE are better together
The integration of SonarQube for IDE into the Windsurf environment represents a fundamental enhancement to the modern development workflow. By following the steps outlined in this guide, developers can transform code quality from a downstream, often-rushed checkpoint into an upstream, real-time, and collaborative practice. The journey from a simple installation to a fully-bound project in Connected Mode unlocks a suite of powerful capabilities designed to produce cleaner, safer, and more maintainable code.
The benefits are clear and compelling. Developers can write code with confidence, knowing they are adhering to team-wide standards and catching bugs and vulnerabilities at the moment of inception. They gain access to deep security insights and intelligent remediation tools like AI CodeFix, which not only accelerates their work but also provides continuous learning opportunities. This proactive approach significantly reduces technical debt, minimizes the stress of late-stage issue discovery, and ultimately fosters a culture of quality and excellence.
Ready to transform your development process in Windsurf? Install the SonarQube for IDE plugin, set up Connected Mode, and start writing better, safer code today.