
Start your free trial
Verify all code. Find and fix issues faster with SonarQube.
LoslegenTL;DR overview
- Integrating SonarQube for IDE with Google Antigravity IDE brings real-time static code analysis into Google's agentic development environment.
- Installation follows the same VS Code-compatible extension flow, with Connected Mode linking the plugin to SonarQube Cloud or SonarQube Server.
- The integration validates both human-written and AI-generated code against team quality profiles as it is produced inside the IDE.
- Catching issues at the agentic coding stage prevents quality and security debt from accumulating before code reaches review.
In the age of agentic AI, the speed at which code is generated has outpaced the human capacity to review it. Tools like Google Antigravity allow agents to architect and implement entire features in minutes. However, this velocity creates a new risk: the “silent accumulation” of technical debt. An AI agent, left unchecked, can generate code that functions correctly but introduces security vulnerabilities, maintainability issues, or deprecated patterns.
While the SonarQube MCP server gives agents the ability to ask for analysis, the SonarQube for IDE extension provides the immediate, visual feedback loop necessary for real-time code quality assurance. It analyzes the agent’s output character-by-character and flagging issues directly in the editor’s “Problems” pane.
This guide details how to install and configure SonarQube for IDE within Google Antigravity. By integrating this tool, you enable a workflow where the agent not only writes code but can immediately “see” and correct its own errors based on your organization’s code quality standards.
Prerequisites
Before beginning the installation, ensure your environment meets the following requirements:
- Google Antigravity IDE: The integration relies on Google Antigravity’s native support for the Model Context Protocol.
- SonarQube Cloud or SonarQube Server account: To leverage “Connected Mode”, which syncs your organization’s specific rules and quality profiles—you will need an active account and a generated user token.
Step 1: Installing the extension
Google Antigravity is built on the same open-source foundation as VS Code, but it utilizes the OpenVSX registry instead of the Microsoft Marketplace. SonarQube for IDE is fully published and supported on OpenVSX.
- Open the extensions view: Launch Google Antigravity. In the left-hand activity bar, click the Extensions icon (the square block icon), or press Ctrl+Shift+X (Windows/Linux) or Cmd+Shift+X (macOS).
- Search for the extension: In the search bar, type SonarQube for IDE.

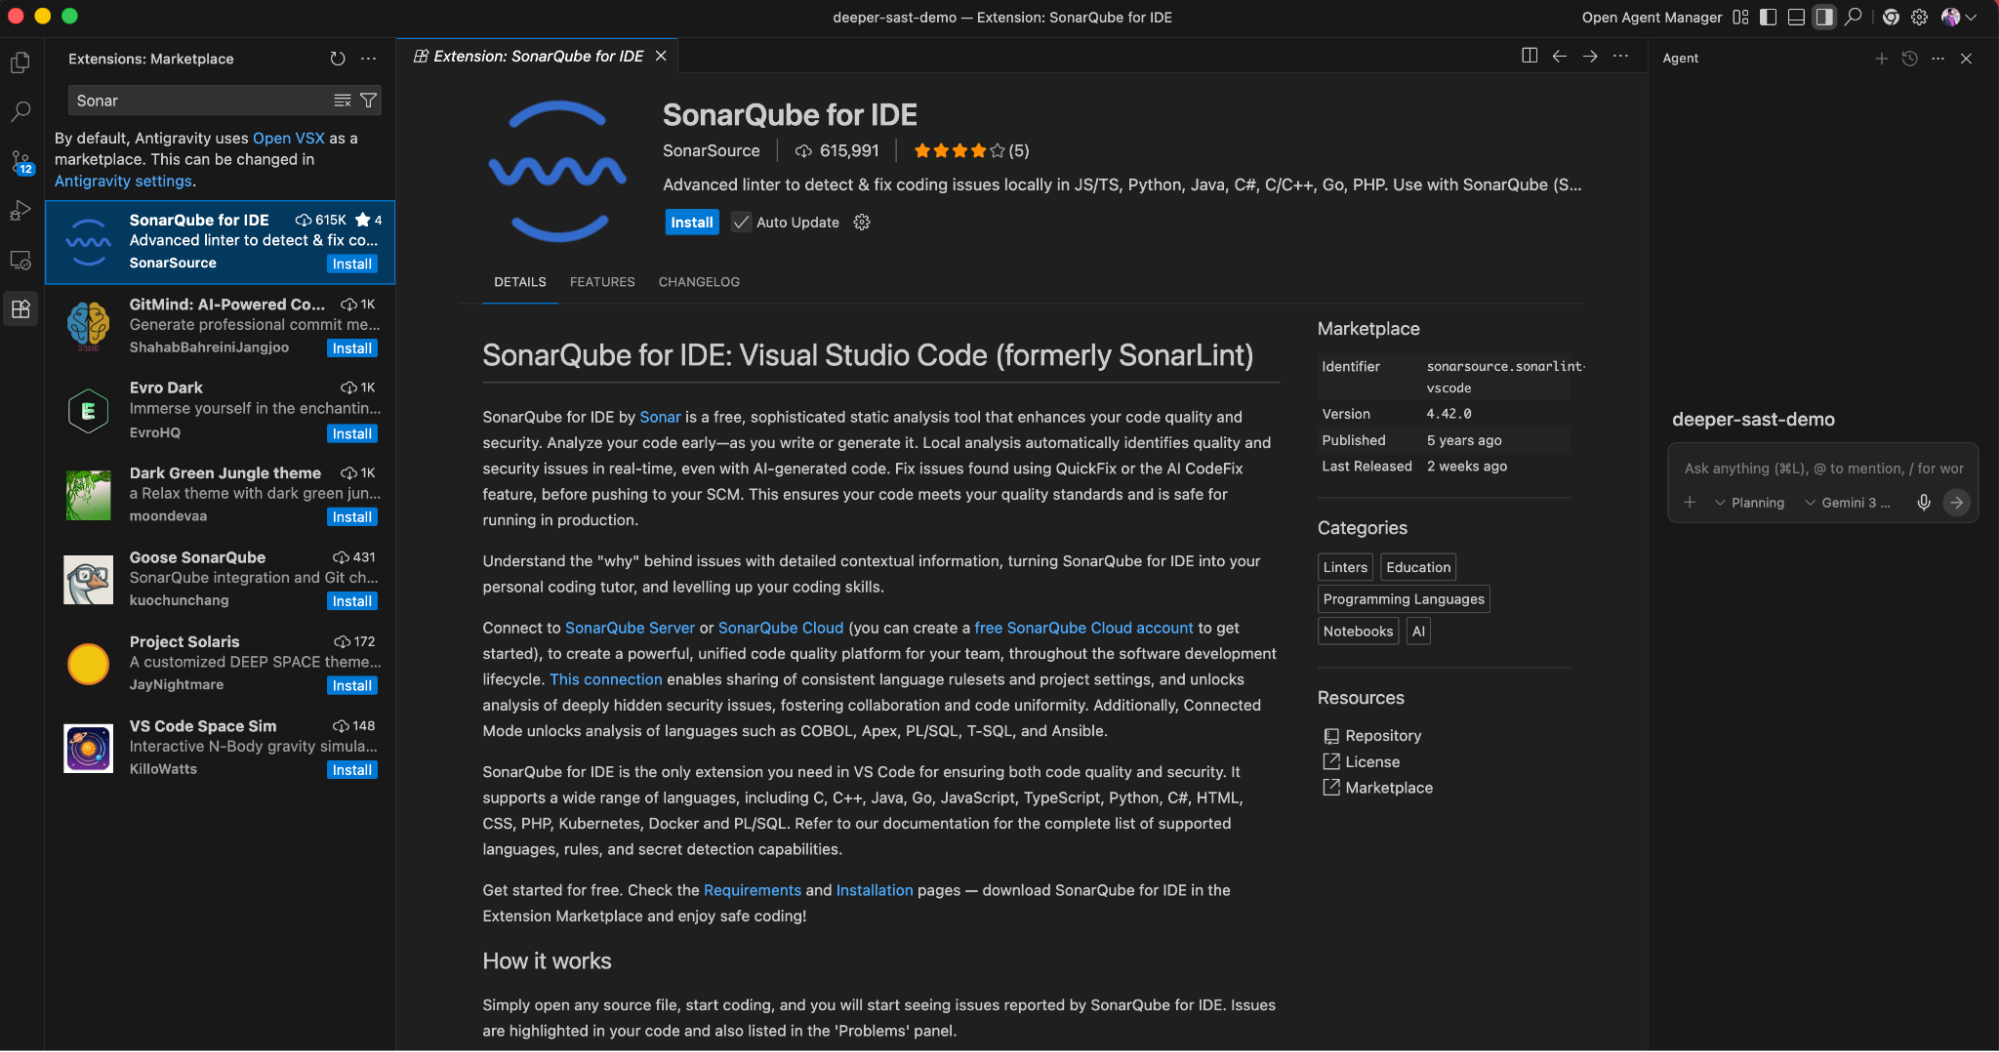
- Install: Click the Install button.
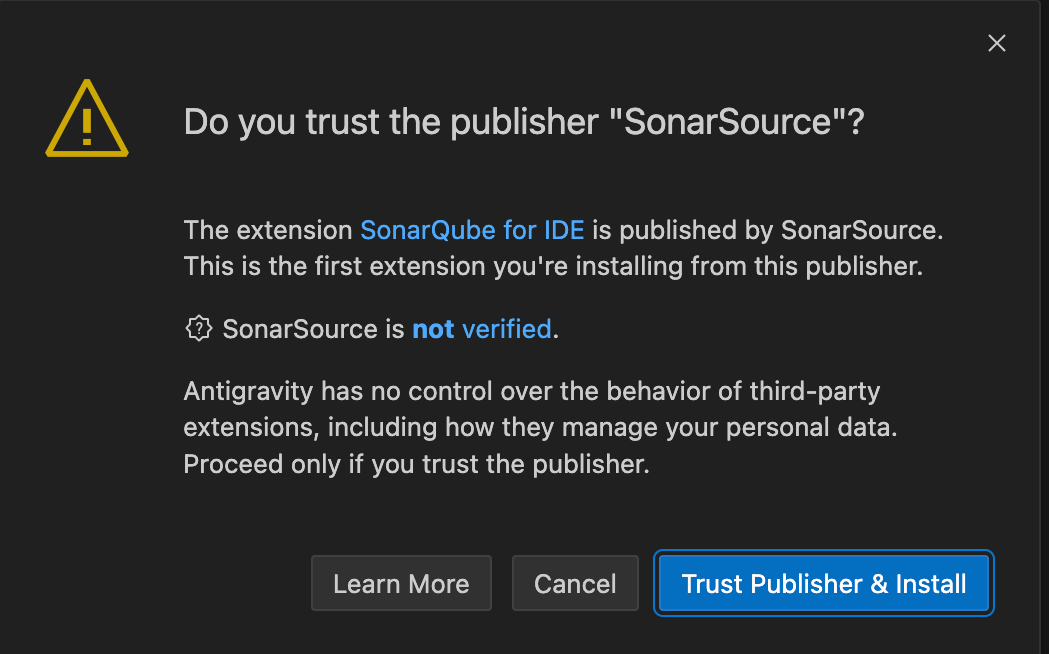
- It will ask you to trust the publisher and install. Click on Trust Publisher & Install.

- Reload: Once the installation is complete, you will be prompted to reload the window to activate the extension.


Step 2: Configuring connected mode
While the extension works out-of-the-box with a default set of rules (“Standalone Mode”), the real power for enterprise teams lies in Connected Mode. This connects your local editor to your SonarQube Server or SonarQube Cloud instance, ensuring that the AI agent follows the exact same rules defined in your CI/CD pipeline.
Generating your token
If you have not already generated a token (e.g., for the MCP server), do so now:
- SonarQube Cloud: Go to My Account > Security > Generate Token. Select "User Token".
- SonarQube Server: Go to My Account > Security > Generate Token.
Note: For this article, we will be using SonarQube Cloud.
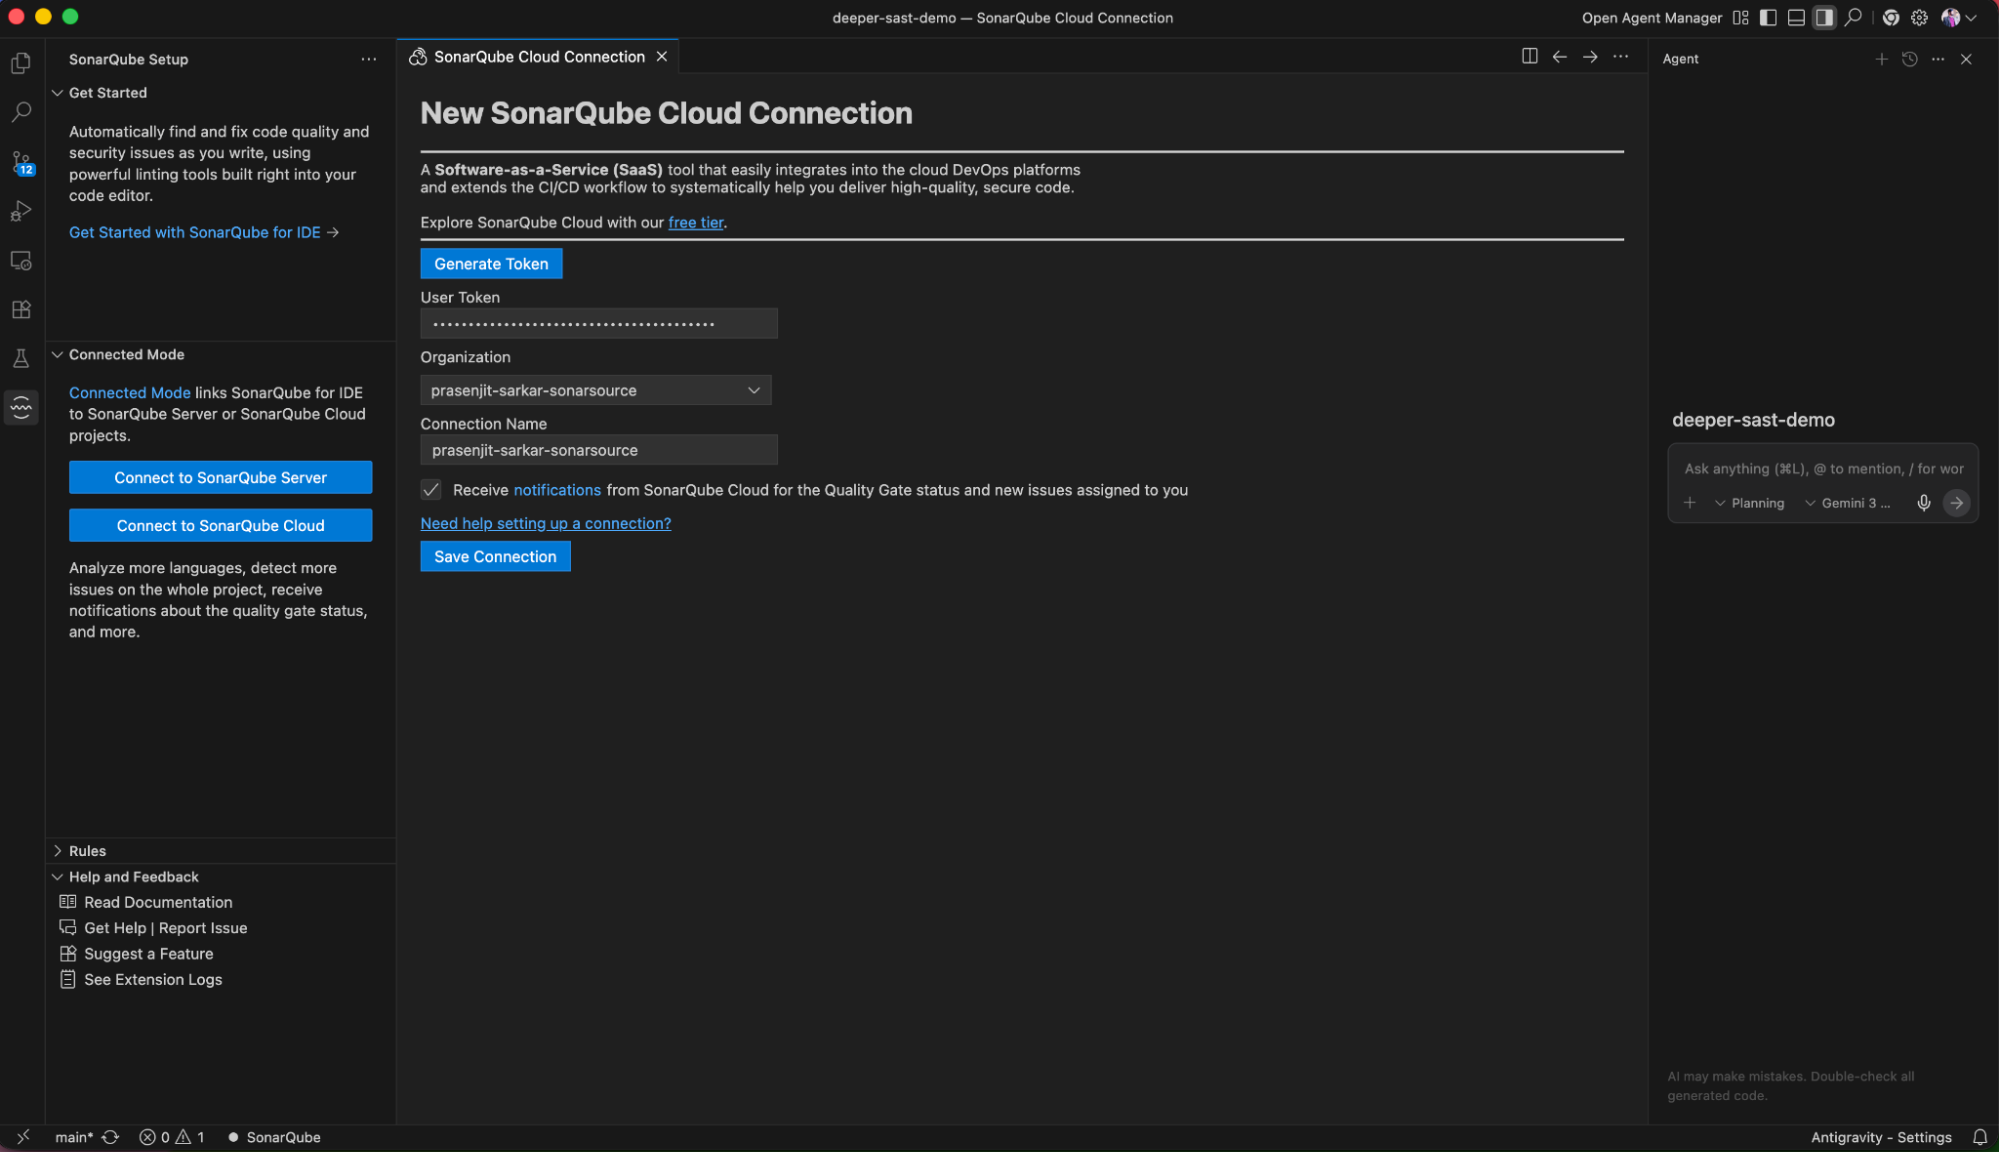
Establishing the connection
- Open the command palette: Press Ctrl+Shift+P (Windows/Linux) or Cmd+Shift+P (macOS).
- Trigger the connection wizard: Type SonarQube for IDE: Connect to Server or SonarQube for IDE: Connect to SonarQube Cloud depending on your platform. Select the appropriate command.
- Enter credentials:
- Token: Paste the user token you generated.
- Organization: Select the organization that you want to connect to.
- Name the connection: Give it a memorable name, such as Corporate-SonarQube.
- Click on Save Connection.

Step 3: Binding your project
After connecting, you must explicitly bind your current workspace folder to a specific project on the server. This tells the extension which Quality Profile to apply.
- Open the command palette: Press Cmd+Shift+P / Ctrl+Shift+P.
- Bind the project: Search for and select SonarQube for IDE: Configure Project Binding.
- Select the connection: Choose the connection you created in Step 2.
- Select the project: The extension will fetch the list of projects you have access to. Select the remote project that matches your current code.

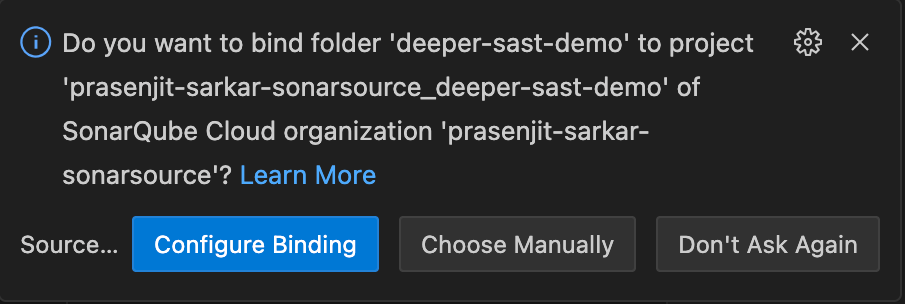
Once bound, you will see a confirmation message. The extension will now download the specific quality profile and analysis settings for your project.
Step 4: The agentic workflow
Integrating SonarQube for IDE changes how you interact with Antigravity’s AI agents. Instead of passively accepting code, you can now use the “Problems” pane as a quality gate for the agent.
Real-time remediation
When the Antigravity agent generates code (whether via “vibe coding” or a chat prompt), SonarQube for IDE immediately scans the new files.
- Scenario: You ask the agent to “create a Python script to parse the CSV logs.”
- Detection: As the agent writes the file, SonarQube for IDE detects a security hotspot (e.g., using a weak hashing algorithm).
- Visual Feedback: A yellow or red squiggle appears under the code in the editor.
- Agent Correction: You can now prompt the agent: "Check the problems in this file. You used a weak hash. Fix it according to the linter."

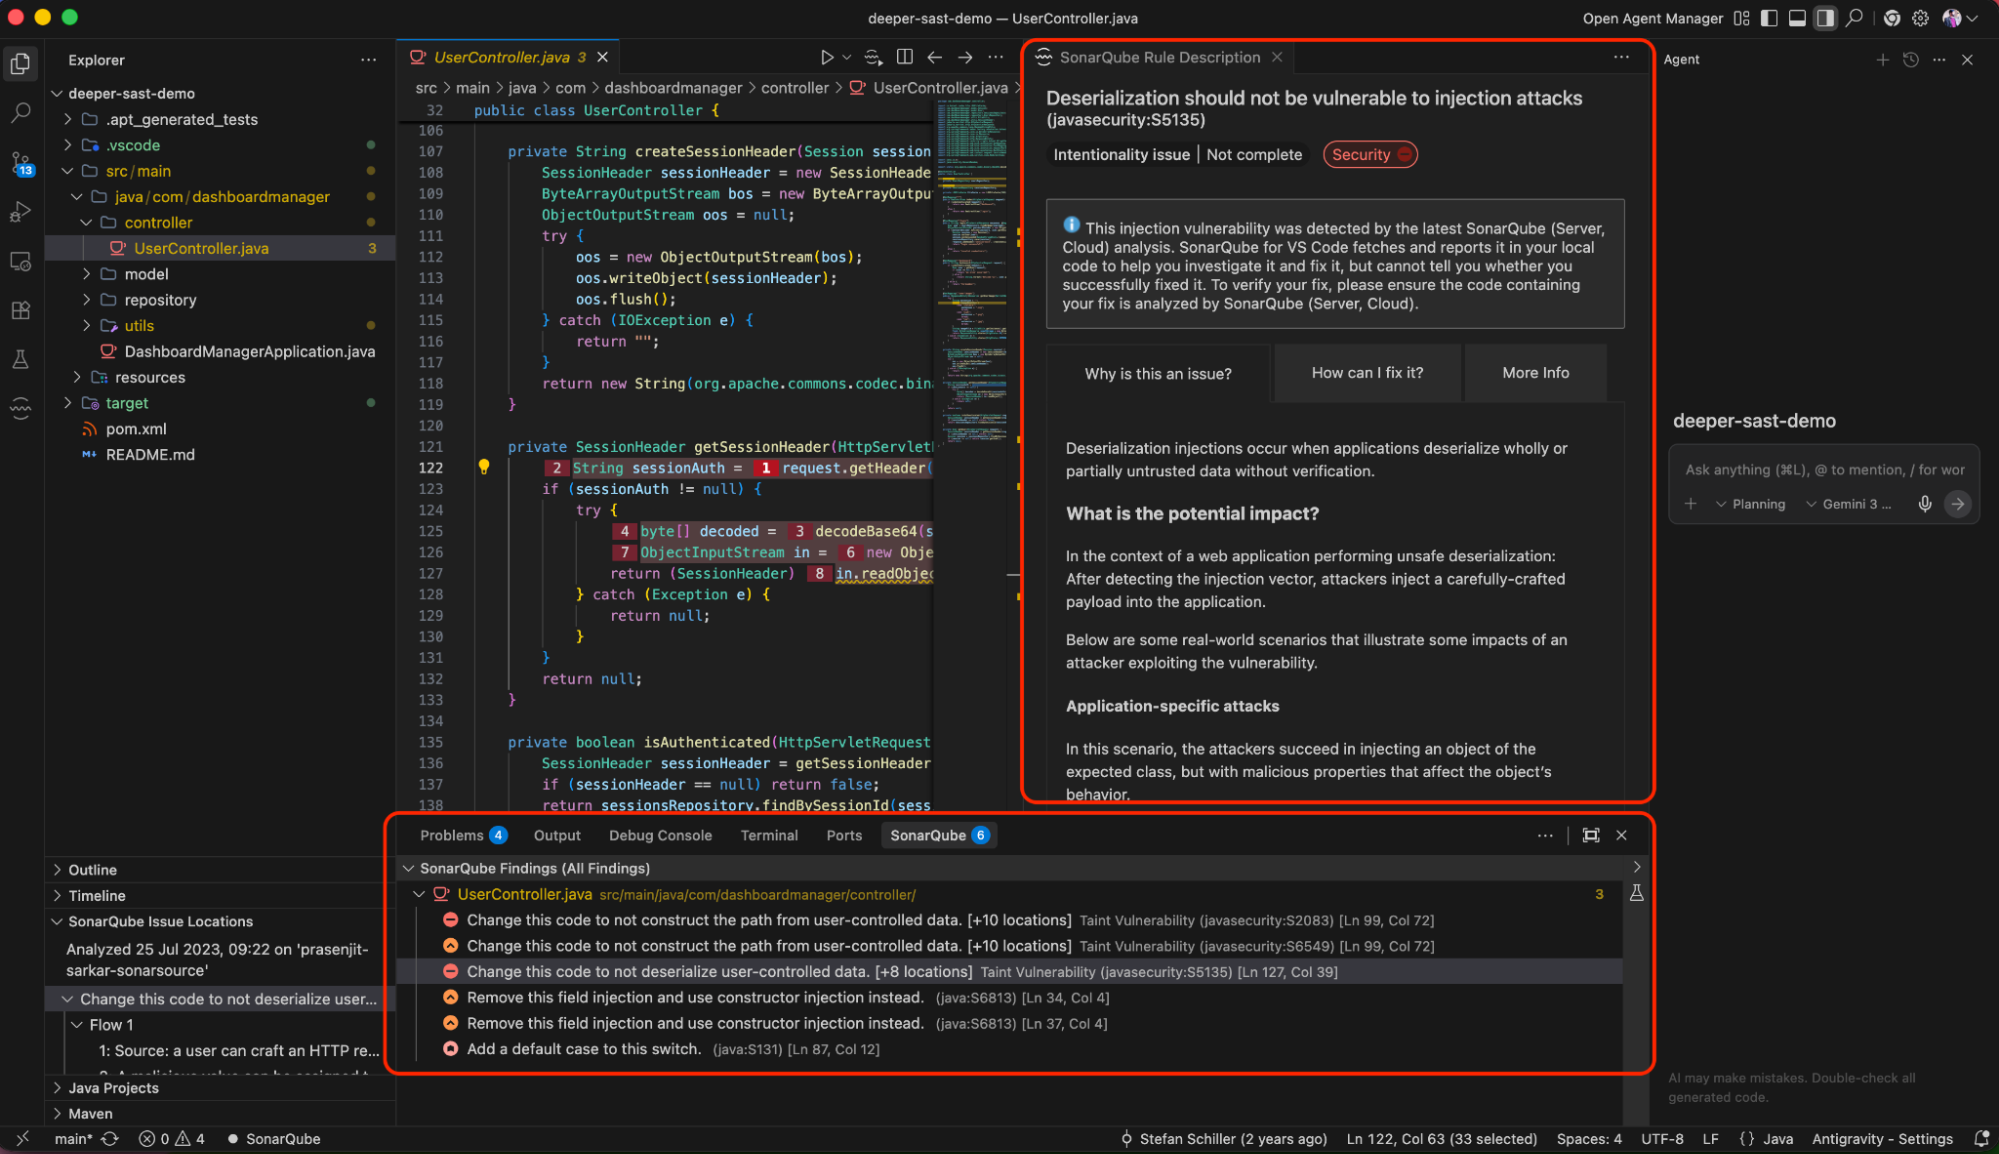
Because the agent has access to the editor’s context, it can read the diagnostic messages provided by SonarQube for IDE and apply the fix immediately.
Conclusion
By installing SonarQube for IDE in Google Antigravity, you effectively deputize the editor to act as a rigorous code reviewer. This setup ensures that the speed of AI generation does not compromise the code security or maintainability of your software. You can now trust the agent to build fast, while verifying—in real-time—that it builds right.
Start your secure AI coding journey: Install the SonarQube for IDE extension.