

Engineering teams want to produce the highest quality code possible, making SonarQube a leading platform for code quality and code security by performing automated code reviews. When deployed in a Kubernetes environment, such as AWS EKS (Elastic Kubernetes Service), SonarQube Server can be highly scalable, resilient, and well-integrated with CI/CD pipelines. Additionally, Platform Engineering and DevSecOps teams want to unify the way they deploy to save time and reduce effort. Manually managing a SonarQube Server deployment in Kubernetes can be complex, especially when configuring enterprise-grade features within the server like high availability and autoscaling.
This is where Helm comes into play. Helm is a powerful package manager for Kubernetes that simplifies deployment, version management, and dependency resolution. By using a Helm Chart to deploy SonarQube Server, teams can quickly provision a production-ready SonarQube Server instance with minimal configuration while adopting best practices for scalability, security, and maintainability.
There are many reasons why teams use Helm for deploying SonarQube Server, including:
- Simplified deployment: Helm automates the setup of SonarQube Server in Kubernetes, reducing the operational overhead of manual configuration.
- Version and upgrade management: Helm makes it easy to update SonarQube Server while maintaining configurations and rollback capabilities.
- Dependency management: Helm Charts can handle the deployment of required components, such as a database and other external services.
SonarQube Server Enterprise and Data Center
For organizations requiring advanced security, compliance, and scalability, SonarQube Server offers two premium editions:
- Enterprise: This edition includes branch and pull request analysis, security hotspot detection, executive reports, integration with enterprise authentication (such as LDAP and SAML), and parallel processing of analysis results for improved performance, so developers aren’t waiting for results when large teams of developers are simultaneously working.
- Data Center: Includes everything in Enterprise, and adds high availability and scalability, such as multi-node clustering, horizontal autoscaling, and load balancing in large-scale enterprise environments. These are especially important to handle extremely large codebases while remaining highly available.
Installing SonarQube Server with Helm
These steps can be followed for installing either SonarQube Server Enterprise or Data Center. This example specifically shows how to install the Enterprise edition in AWS EKS. Only some minor adjustments to the installation are needed to switch between installing one or the other. At specific steps, it will be noted how to install the Data Center edition instead.
Prerequisites
- Set your AWS Access Keys (either via ~/.aws/credentials or pasting the environment variables in your terminal)
- aws CLI
- eksctl
- kubectl
- Helm
AWS EKS setup procedure
- Create a file named eks-cluster.yaml with the following. Modify as needed, such as
metadata.name(EKS cluster name),metadata.version,metadata.tags.Owner, etc. The critical part is the add-ons for the AWS EBS CSI driver for storage.
apiVersion: eksctl.io/v1alpha5

kind: ClusterConfig

metadata:

  name: example-sonarqube-cluster

  region: eu-central-1

  version: "1.33"

  tags:

    Owner: "<YOUR NAME>"

iam:

  withOIDC: true

managedNodeGroups:

  - name: ng-1

    instanceType: m5.xlarge

    desiredCapacity: 2

    minSize: 2

    maxSize: 2

    volumeSize: 50

    iam:

      withAddonPolicies:

        ebs: true

    tags:

      Owner: "<YOUR NAME>"

addons:

  - name: aws-ebs-csi-driver

    version: latest

    wellKnownPolicies:

      ebsCSIController: true

    configurationValues: |

      controller:

        extraVolumeTags:

Owner: "<YOUR NAME>"- Create another file called storage-class.yaml with the following (adjust as needed):
apiVersion: storage.k8s.io/v1

kind: StorageClass

metadata:

  name: gp3

  annotations:

    storageclass.kubernetes.io/is-default-class: "true"

provisioner: ebs.csi.aws.com

parameters:

  type: gp3

  fsType: ext4

reclaimPolicy: Delete

volumeBindingMode: WaitForFirstConsumer- Create the cluster (takes ~15 mins to complete):
eksctl create cluster -f eks-cluster.yaml- Once EKS cluster creation is complete, apply the StorageClass manifest:
kubectl apply -f storage-class.yaml- Set the correct k8s context:
aws eks update-kubeconfig --region <REGION> --name <CLUSTER NAME>Install SonarQube Server with the standard Helm Chart
- Get the Helm Chart for SonarQube Server:
helm repo add sonarqube https://SonarSource.github.io/helm-chart-sonarqube
helm repo update- Make a namespace in your cluster for SonarQube:
kubectl create namespace sonarqube- Set configuration options
Create a file named values.yml and include the following configuration options:
monitoringPasscode: "ChangeMe1234!"	# Password for Prometheus monitoring

edition: "enterprise" # can be set to "developer" with this Helm Chart- Install the Helm Chart (using the upgrade command to install is more flexible):
helm upgrade --install sonarqube sonarqube/sonarqube \

    -n sonarqube \

-f values.yamlNOTE: To deploy SonarQube Server Data Center, use the Helm Chart for the Data Center edition (differences in the above commands are detailed in the ArtifactHub).
The command will complete within a few seconds and return some diagnostic information. The actual installation will take several minutes. You can view the progress of the installation with the following helpful Kubernetes commands.
- See the current status of each pod within the SonarQube Server cluster:
kubectl get pods --namespace sonarqube- Get the name of the pod the SonarQube Server will run on:
kubectl get pods \

    --namespace sonarqube \

    -l "app=sonarqube,release=sonarqube" \

-o jsonpath="{.items[0].metadata.name}"- View the logs of a pod within the SonarQube Server cluster:
kubectl logs <NAME OF POD> --namespace sonarqube- See the information on all the resources of the SonarQube Server cluster:
kubectl get po,svc,pv --namespace sonarqube- See all the events within the SonarQube Server cluster:
kubectl get events --namespace sonarqube- Check that the installation has finished:
kubectl get pods -n sonarqubeThis returns results that look like:
NAME                     READY   STATUS    RESTARTS   AGE
sonarqube-postgresql-0   1/1     Running   0          8m8s
sonarqube-sonarqube-0    1/1     Running   0          8m8s
If both pods are ready (STATUS will show Running), then SonarQube Server is up and running.
Set up port forwarding to access SonarQube Server at port 9000:
kubectl port-forward <NAME OF POD> 9000:9000 --namespace sonarqubeOpen a browser and navigate to http://localhost:9000. You will see the SonarQube Server login:
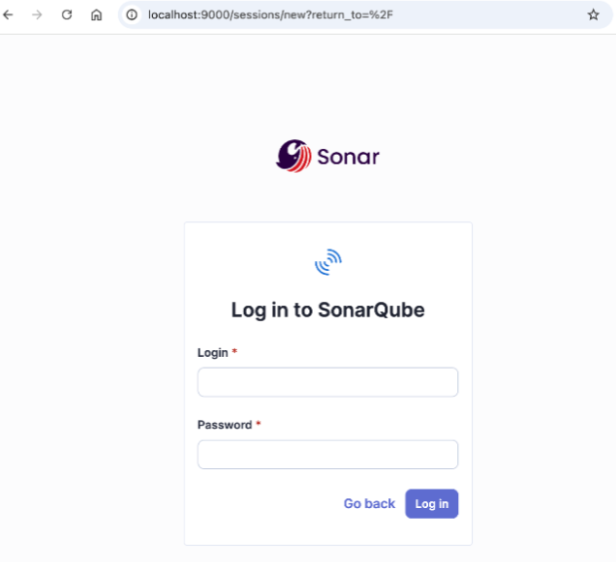
The default Administrator username is admin, and the password is admin. Upon first login, you will be asked to change this password.
Allow external access
For your initial install of SonarQube Server, it’s good practice to lock down traffic to and from the internet until after you have changed the default password for the Administrator user. After successfully changing the password, you can expose SonarQube Server externally via a Kubernetes Ingress Controller.
Create a file called ingress.yaml file with the following contents:
apiVersion: networking.k8s.io/v1
kind: Ingress
metadata:
  name: sonar-ingress
  namespace: sonarqube
  annotations:
    kubernetes.io/ingress.class: "nginx"
    cert-manager.io/cluster-issuer: "letsencrypt-prod"
spec:
  rules:
    - host: <YOUR-SQ-HOST> # For example: sonar.myhost.com
      http:
        paths:
          - path: /
            pathType: Prefix
            backend:
              service:
                name: <SONARQUBE-SERVICE-NAME> # Replace with name of your service
                port:
                  number: 9000
  tls:
    - hosts:
        - <YOUR-SQ-HOST> # must be same as above
      secretName: sonar-tls
Make sure the Ingress Helm Chart is installed locally:
helm repo add ingress-nginx https://kubernetes.github.io/ingress-nginx

helm repo update
Install the Ingress-Nginx Helm Chart in your Kubernetes cluster:
helm install ingress-nginx ingress-nginx/ingress-nginx \

    --namespace ingress-nginx \

    --create-namespace
Install the Ingress controller configured in the ingress.yaml file:
kubectl apply -f ingress.yamlAfter installation is complete, find the IP or DNS name of the controller that was created with:
kubectl get ing --namespace sonarqubeThe results will look something like this:
NAME          HOSTS            ADDRESS                                 PORTS    AGE
sonar-ingress sonar.myhost.com example123.us-west-1.elb.amazonaws.com  80, 443  28m
Next, you will need to modify DNS settings for your domain in order to point to your deployment. For example, assume the value for host in your ingress.yaml file was set to sonar.myhost.com, a subdomain of your myhost.com domain. Add the CNAME record for your domain, pointing the sonar subdomain to the controller address displayed in the command output above (such as example123.us-west-1.elb.amazonaws.com).
The SonarQube Server Helm Chart does include some limited functionality for configuring ingress that may meet your specific use case. See the Chart documentation for more information.
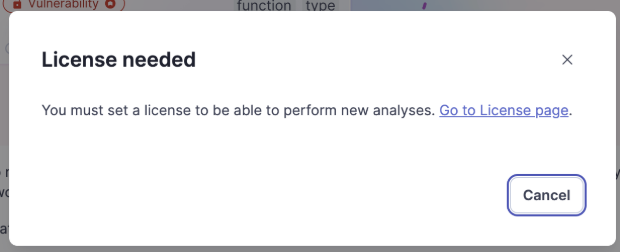
Add a license to SonarQube Server
After you log in for the first time as Administrator and change the default password, you will be asked to add your license key.
Or go to the Administration > Configuration > License Manager page in SonarQube Server and click the “Set a new license” button.
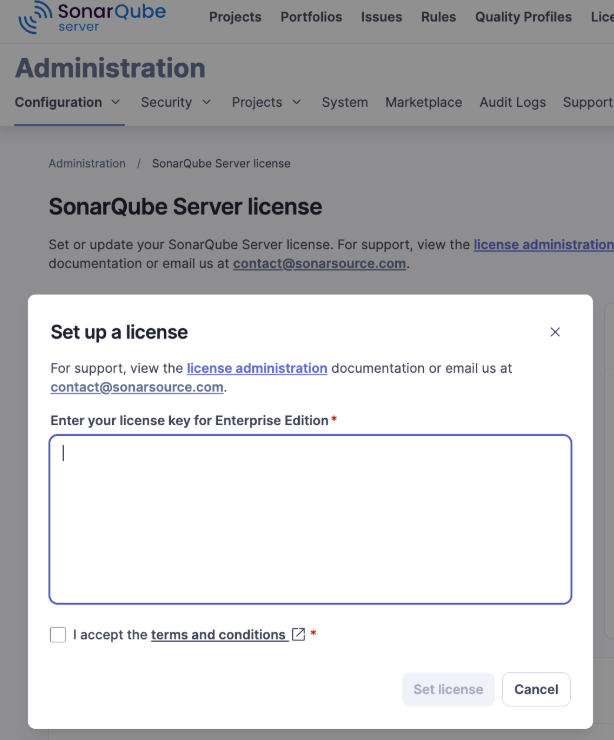
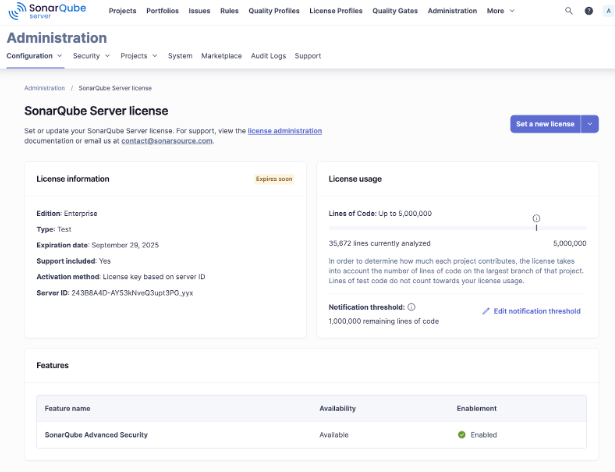
Once you enter the license key, ensure the current settings are as you’d expect for the edition you have and any related parameters before continuing the configuration process.
Now that your license has been set you’ll want to configure the server, such as setting up user authentication. Also you will need to set up integration into your DevOps platform to start setting up projects and running scans.
Troubleshooting and maintenance
Deploying SonarQube Server in a Kubernetes environment requires ongoing maintenance to ensure optimal performance and stability.
Common issues and solutions
Reference the following common issues that you may encounter when deploying SonarQube Server on Kubernetes:
Issue #1: SonarQube Server fails to start
- Cause: Insufficient memory, database connection failures, or misconfigured environment variables.
- Solution:
- Check the pod logs using kubectl logs <pod-name> -n <namespace> for error messages.
- Ensure the PostgreSQL database is running and accessible. Use kubectl exec -it <db-pod> -- psql -U <user> -d <database> to verify connectivity.
- Increase the allocated memory for SonarQube Server by modifying the values.yaml file under resources.requests.memory.
Issue #2: Slow performance or crashes during scans
- Cause: Insufficient CPU and memory allocation or database performance bottlenecks.
- Solution:
- Scale the SonarQube Server deployment by adjusting replicaCount and increasing resource limits.
- Optimize the database by using a managed PostgreSQL instance with SSD storage.
- Enable Kubernetes HPA if required.
Issue #3: Permission issues with persistent volumes
- Cause: Kubernetes storage classes and security contexts may not align with SonarQube Server's requirements.
- Solution:
- Check and update security context settings in values.yaml.
- Ensure the correct storage class is specified in the Helm configuration.
Validate PVC status using kubectl get pvc -n <namespace>.
Update SonarQube Server to the latest version with Helm
Regularly updating SonarQube Server ensures access to new features, security patches, and performance improvements. Follow these steps for a seamless update:
- Check for new versions
Visit the SonarQube Server Release Notes to review changes and breaking updates or verify the Helm Chart has updates:
helm repo update
helm search repo sonarqube- Back up before updating
- Take a snapshot of the PostgreSQL database.
- Back up SonarQube Server’s persistent volume data
- Perform the upgrade
Update the Helm release:
helm upgrade \

    --install sonarqube oci://helm.sonarsource.com/sonarqube \
    --namespace <namespace> \
    --set image.tag=<new-version> \
    -f values.yaml
Monitor the deployment:
kubectl get pods -n <namespace>

kubectl logs <pod-name> -n <namespace>
Perform post-update checks
- Verify that SonarQube Server is running by checking pod status and logs.
- Ensure database migrations are completed successfully by reviewing the logs.
Clean up
When you are done with running the server and want to destroy everything, delete the cluster and it will delete its resources (takes ~11 min):
eksctl delete cluster --region=<REGION> --name=<CLUSTER NAME>